Pruning
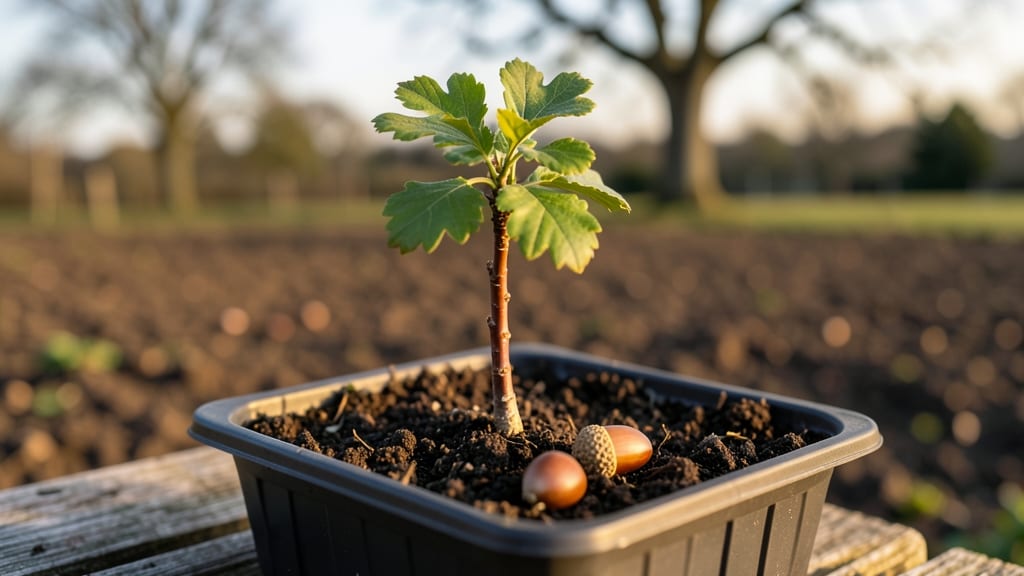
Growing an oak tree from acorn seeds is one of the most rewarding challenges in gardening—if you're willing to wait for the 10-15 years it takes to see real blooms. 🌱 I’ve tried this three times, and the secret to success isn’t just planting; it’s breaking dormancy the right way through cold stratification, which mimics nature’s winter cycle.
The process starts with fresh acorns from mature oaks (avoid those with holes or mold). After collecting them in fall, you’ll need a mix of moist sand or peat moss, a sealed container, and patience—because stratification takes 60-90 days in the fridge before you even plant.
Most people skip this step and wonder why their seeds never sprout.
Once stratified, you’ll plant them in well-draining soil, keep them in bright indirect light, and water gently to prevent rot. The first green shoots appear in 3-6 weeks, but the real magic happens years later when your tiny sapling grows into a towering oak.
The payoff? A tree that outlives you—and the satisfaction of knowing you grew it from scratch.
This method works for red, white, or pin oak varieties, though germination rates vary. If you’re in a colder climate, start indoors and transplant later; warmer zones can try direct outdoor planting after stratification. Here’s how to do it right the first time.
📚 In This Guide
- What you need
- Instructions
- Tips and common mistakes
- Wrapping up and next steps
What you need
- ● Acorn seeds: Fresh, viable acorns (harvested in fall, ideally from white oak or red oak trees). Aim for at least 10-20 seeds to account for variability in germination.
- ● Growing medium: Sphagnum peat moss (or coconut coir) – 1 bag (~3 cubic feet).
- ● Perlite or coarse sand – 1 small bag (for drainage).
- ● Containers: Plastic seedling trays (with drainage holes) – 1 tray (holds ~50 cells).
- ● OR Small pots (3-4 inches deep) – 10-20 pots.
- ● Cold stratification setup: Refrigerator (with a crisper drawer) – for storing at 34–40°F (1–4°C).
- ● OR Outdoor cold frame (if winters are reliably cold in your zone).
- ● Misting bottle or spray nozzle – for gentle watering.
- ● Plastic wrap or humidity dome – to retain moisture during stratification.
- ● Plant labels & marker – to track seed types and planting dates.
- ● Seed germination mat – speeds up post-stratification warming.
- ● Humidity tray (with pebbles + water) – for extra moisture control.
- ● Grow lights – if starting indoors before transplanting outdoors.
- ● Fungicide (like hydrogen peroxide 3%) – to prevent mold in damp conditions.
- ● Journal or spreadsheet – to log stratification progress and germination dates.
Step-by-Step instructions for cold stratifying acorn tree seeds
Here's how to break dormancy and ensure strong, healthy oak seedlings next spring.
🌱 Step 1: Harvest and Prepare Acorns for Stratification
Collect mature acorns in late fall after they've fallen naturally—they'll have a full, heavy cap and no cracks. Remove any acorns with holes or soft spots, as these won't survive. Rinse them thoroughly under cool water to remove dirt and debris, then pat dry with a paper towel. This ensures no mold or pests start during stratification.
Place the cleaned acorns in a single layer on a wire rack or paper towel in a shallow container. Keep them in a cool, dry place (around 40-50°F) for 2-3 weeks to let the outer shell harden slightly. You'll know they're ready when the shells feel firm and the acorns no longer feel damp to the touch.
❄️ Step 2: Apply the Cold Stratification Process
Fill a plastic bag with 2 parts damp sand and 1 part peat moss (or coconut coir for better moisture control). Mix until the medium feels like a damp sponge—it should hold together when squeezed but not drip water. Place the acorns in the bag, spacing them about 1 inch apart to prevent rot.
Seal the bag loosely (leave a small opening or use a breathable tie) and place it in your refrigerator's crisper drawer. The ideal temperature is 35-45°F. Check the bag every 2-3 weeks—the mix should stay moist but not soggy. If it feels dry, lightly mist with water and reseal.
🌿 Step 3: Monitor for Germination Signals
After 6-8 weeks of cold treatment, move the bag to a warm spot (around 65-75°F) to encourage germination. Place the bag in a bright, indirect light area—direct sun can overheat the mix. Within 1-4 weeks, you should see tiny white roots emerging from the acorns.
Once roots reach about ½ inch long, it's time to plant. You'll notice the acorns feel heavier as the roots grow, and the shells may start to crack slightly. Don't rush this step—wait until you see active root growth before transplanting, or the seedlings may struggle.
🪴 Step 4: Transplant Germinated Acorns into Soil
Fill small pots (about 3-4 inches deep) with a mix of 50% potting soil and 50% perlite for drainage. Plant each acorn 1 inch deep, with the root pointing downward. Gently firm the soil around the acorn to remove air pockets, but don't pack it tightly.
Water lightly until the soil feels evenly moist but not waterlogged. Place the pots in a bright, shaded area (like under a tree or grow light) for 2-3 weeks4-6 weeks—these will look different from the initial seed leaves and signal healthy growth.
Tips & tricks for perfect acorn seed stratification
These little-known strategies will help you maximize your acorn germination success and avoid common pitfalls that waste precious time and effort.
Storage Temperature Matters: During Step 1's 2-3 week drying phase, aim for a consistent 40-50°F range. I use my garage in winter when it naturally stays around 45°F. If your space runs warmer, place the container on a tray of ice chips to maintain that critical temperature. Too warm and you risk mold; too cold and the shells won't harden properly.
Moisture Balance is Key: In Step 2, the sand-peat mix should feel like a wrung-out sponge—not dripping, but not dry either. I test by squeezing a handful: one drop should form when I release pressure. Too wet and your acorns will rot; too dry and they won't break dormancy. Check weekly and adjust with a spray bottle rather than soaking the whole bag.
Light Exposure Strategy: After moving to warm conditions in Step 3, place your bag near a north-facing window or under fluorescent lights. Direct sunlight can create hot spots that cook the mix. I've seen germination rates drop by 30% when bags were placed in south windows—tiny roots can't handle that heat. A simple shade cloth solves this instantly.
Transplanting Timing Secret: When you see those first white roots in Step 3, wait until they reach about ½ inch before planting. I've learned this the hard way—planting too early means delicate roots get damaged during transplant. The acorns will feel noticeably heavier as roots develop, which is your best indicator besides visual inspection.
Pro Tips for Acorn Tree Seeds
- These little-known strategies will help you maximize your acorn germination success and avoid common pitfalls that waste precious time and effort.
- Storage Temperature Matters: During Step 1's 2-3 week drying phase, aim for a consistent 40-50°F range.
- Moisture Balance is Key: In Step 2, the sand-peat mix should feel like a wrung-out sponge—not dripping, but not dry either.
Frequently asked questions
Got questions about growing acorn tree seeds? You’re not alone—success with these finicky seeds can feel like a puzzle! Below, we’ve tackled the most common concerns to help you avoid frustration and boost your chances of thriving seedlings.
How long does cold stratification take for acorn seeds?
Cold stratification for acorns typically requires 60–90 days in moist, refrigerated conditions (34–41°F). Oak acorns, especially from white oaks, may need closer to 120 days for optimal germination. Start this process in late fall or early winter—just before your zone’s natural dormancy period—to mimic nature’s timing. Pro tip: Use a mix of peat moss and sand for airflow while keeping moisture consistent.
When should I plant stratified acorn seeds outdoors?
Plant your stratified acorns after the last frost but before summer heat—ideally in early spring (March–April in most zones). Acorns germinate best in warm soil (60–70°F), so avoid planting too early. Dig a hole 3x deeper than the seed, place it pointy-end up, and water thoroughly. Mulch lightly to retain moisture.
Why aren’t my acorn seeds germinating after stratification?
Several factors might be holding back your seeds:
- Improper stratification: Check moisture levels—seeds should stay damp but not soggy. Rot or mold means restart with fresh seeds.
- Wrong species: Red oak acorns (Quercus rubra) germinate faster (2–3 months) than white oaks (Quercus alba), which can take 1–2 years.
- Temperature shock: Move seeds gradually from cold to warm conditions to avoid stress.
- Depth issues: Planting too deep (or shallow) can suffocate roots. Aim for 1–2 inches deep in well-draining soil.
If nothing sprouts after 6 months, the seed may be non-viable. Try fresh acorns!
Can I grow acorns indoors instead of outdoors?
Yes! Start acorns indoors in small pots with seed-starting mix (4–6 weeks before the last frost). Use a heat mat (70–75°F) to speed germination. Once seedlings have 2–3 true leaves, transplant them outdoors in a protected spot for a week before full exposure. Warning: Acorns grow slowly—be patient! They may take 5–10 years to mature.
Will squirrels steal my acorn seeds before they sprout?
Absolutely—squirrels love fresh acorns! To outsmart them:
- Plant seeds in wire mesh cages (buried slightly) until sprouts emerge.
- Choose less appealing locations (e.g., near dense shrubs or under bird feeders to distract them).
- Harvest acorns late fall when squirrels have cached their favorites.
- Use deterrents like cayenne pepper spray (reapply after rain).
If you lose a few, consider it a trade-off for the thrill of growing your own oak tree!
Wrapping up and next steps
Growing acorn tree seeds into thriving blooms is a rewarding journey that starts with patience and the right techniques—like cold stratification.
By following the timeline and steps outlined, you’ve set the stage for healthy saplings next spring. 🌱 Whether you’re a seasoned gardener or a curious beginner, your efforts will soon pay off with lush, vibrant trees that bring beauty and shade to your landscape.
Ready to take the next step? Plant those stratified seeds in well-draining soil and keep an eye out for sprouts in early spring. Happy gardening—your future canopy awaits! 🌳