How To
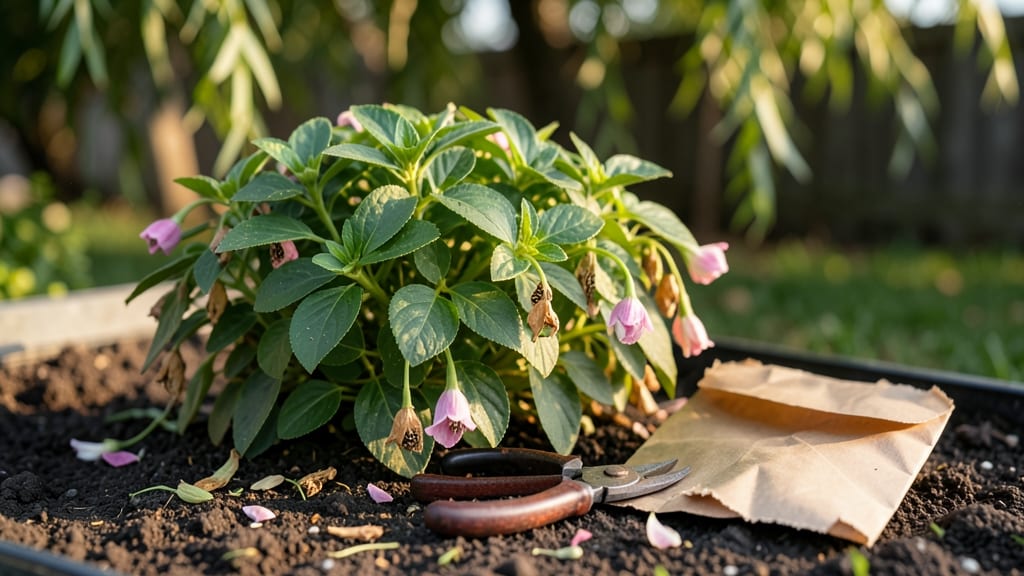
Harvesting impatiens seeds 🌸 is the secret to growing these showstopping annuals year after year without buying new plants.
Impatiens are a gardener’s dream—vibrant blooms that seem to thrive effortlessly—but saving their seeds for next season is an art few master. Many skip it, assuming it’s too tricky, but with the right timing and a little patience, you can turn last year’s flowers into next year’s garden stars.
Here’s the key: you’ll need to spot those dry, brown seed pods before they split open, then carefully extract the seeds while keeping them from molding. I’ll walk you through every step—from when to start watching for pods to how to store them so they’re ready for planting come spring.
By the end, you’ll have a stash of seeds that could save you $20 or more on next year’s plants, plus the satisfaction of knowing you grew them yourself. Let’s get started.
When and how to identify mature impatiens seed pods for harvesting
Harvesting impatiens seeds at the right time ensures high germination rates and healthy new plants. The key is watching for visual maturity cues—like pod color changes and texture shifts—that signal seeds are ready.
Miss this window, and you risk collecting immature or sterile seeds that won’t sprout. Timing also prevents over-maturation, where pods split open and scatter seeds before you can collect them.
Start monitoring your impatiens plants in late summer (around August-September in Zone 6), when blooms begin transitioning into seed pods. Look for green pods that form after flowers fade. These pods will gradually dry out and darken as seeds mature—a process that takes 4-6 weeks depending on climate.
Patience is critical; harvesting too early means soft, undeveloped seeds, while waiting too long risks pods bursting open.
Here’s how to spot mature impatiens seed pods with confidence:
1. Pod Color: Mature pods turn from bright green to tan or brown. A dull, papery texture replaces the initial firmness. Avoid pods that stay green or yellowish—these seeds won’t germinate.
2. Seed Movement: Gently shake a dry pod near your ear. If seeds rattle inside, they’re ready. Immature pods feel hollow or make no sound.
3. Pod Position: Mature pods often hang lower on the stem or curl slightly. They may also split open naturally at the seams, releasing seeds. Harvest these immediately to avoid waste.
4. Plant Health: By late fall, impatiens plants naturally decline. This is your final cue—harvest all remaining pods before the first frost (October 15 in Zone 6). Dead plants won’t produce viable seeds.
Distinguishing viable seeds from sterile blooms is easier with practice. Sterile flowers (often double-petaled hybrids) won’t form pods at all. Focus on single-petaled blooms or those with long, thin petals, as these are more likely to produce seeds.
Even then, not all pods will contain seeds—some may be empty due to pollination failures.
One common mistake is confusing seed pods with unopened buds. Buds remain tightly closed and green, while pods elongate and dry out. To test, gently squeeze a pod: if it resists pressure and feels leathery, it’s immature.
If it crushes easily with a papery sound, it’s ready for harvest.
Use this summary-table to compare ready vs. unready impatiens seed pods at a glance:
Once you’ve identified mature pods, harvest them on a dry, sunny day to minimize moisture exposure. Use clean pruning shears or your fingers to snip pods from the stem, leaving a small stem attachment (about 1/4 inch) to prevent seed loss.
Place pods in a paper bag or brown envelope to dry further. Avoid plastic bags—condensation causes mold.
Pro tip: Label each batch with the harvest date and impatiens variety (e.g., "New Guinea Impatiens – Sept 2024"). This helps track seed viability over time.
Store dried pods in a cool, dark place (like a seed catalog drawer) until ready to extract seeds—typically 2-4 weeks of drying is sufficient.
If you’re unsure whether a pod is mature, err on the side of waiting. Overripe pods may scatter seeds unpredictably, but underripe pods can be re-harvested later if left on the plant. Just monitor them weekly to avoid missing the window entirely.
🌸
Step-by-step process to extract and store impatiens seeds properly
Once you’ve identified your mature impatiens seed pods, the next step is careful extraction and storage to preserve seed viability. Impatiens seeds are delicate, so gentle handling is key—rushing this process can lead to mold growth or poor germination rates.
I’ll walk you through the tools you’ll need, the safest drying methods, and how to store your seeds for up to three years without losing potency.
Gather these essential tools before starting: a pair of clean scissors or pruners, a paper towel or mesh drying bag, a small envelope or airtight container, and a silica gel packet (optional, for humidity control).
Work in a well-ventilated, dry area to prevent moisture buildup, which is the enemy of seed storage.
How to Harvest Impatiens Seeds
- Step 1: Gently snip the dry, brown seed pods from the stem using clean scissors. Avoid crushing or tearing the pods—this releases immature seeds that won’t germinate.
- Step 2: Place the pods in a paper towel-lined tray or mesh drying bag. Spread them out in a single layer to allow air circulation. Avoid stacking pods to prevent mold growth.
- Step 3: Let the pods dry for 7–10 days in a cool, dry place (60–70°F). Check daily for signs of moisture or mold. If humidity is high, place a silica gel packet nearby.
- Step 4: Once the pods are completely brittle and dry, gently crush them with your fingers or a small rolling pin to release the seeds. Avoid over-crushing, as this can damage the seed coats.
- Step 5: Sift the seeds through a fine mesh sieve to separate them from debris. Discard any discolored or shriveled seeds, as these won’t germinate.
- Step 6: Store the seeds in a small envelope or airtight container with a desiccant packet. Label it with the harvest date and variety (if known). Keep the container in a cool, dark place, like a seed vault or refrigerator.
For long-term storage, I recommend using paper envelopes over plastic containers, as they allow for better moisture control. If you’re storing seeds for more than a year, test a few each spring to ensure germination viability.
Impatiens seeds can retain viability for up to three years if stored properly, but germination rates may drop after the first year.
One common mistake is storing seeds in humid environments, like a damp basement or garage. Excess moisture accelerates fungal growth and reduces germination rates. If you notice white fuzz or musty smells on your seeds, discard them immediately and start fresh with a new batch.
Pro tip: If you’re unsure about the seed maturity, plant a few pods directly in soil to test germination. This way, you’ll know exactly which seeds are viable before committing to large-scale storage. Happy seed saving!