Vegetables
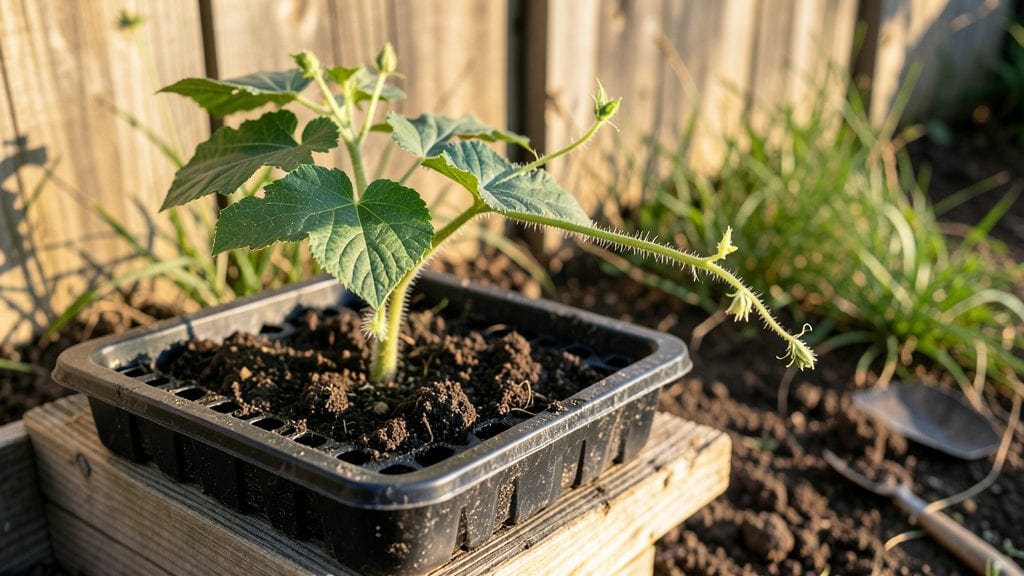
Bitter gourd seedlings need fast germination—just 5 to 10 days if you nail the conditions. 🌱 I’ve watched trays of these finicky little plants go from damp paper towels to sturdy seedlings in under a week, and the secret isn’t just patience but the right balance of warmth, moisture, and light.
Too cold or dry, and they’ll sulk; too wet, and damping-off will strike like a thief in the night.
The trick starts with pre-soaking seeds overnight in lukewarm water, then planting them in a light, airy mix of coco coir and perlite—nothing heavy or compact. Keep the soil consistently moist (not soggy) and the tray wrapped in plastic until sprouts appear.
Once they break through, move them to a bright spot with 12+ hours of indirect sunlight daily—no peeking at weak seedlings in dim corners.
Within three weeks, you’ll have bushy, deep-green seedlings ready to transplant, their vines already flexing with potential. The key is consistency: no skipping water, no sudden temperature swings, and no crowding.
When they’re 4-6 inches tall, harden them off for a week before setting them out—this toughens their skin for the real world.
Here’s where it gets interesting: bitter gourds hate being disturbed, so handle seedlings like they’re made of glass. A gentle touch now means stronger vines later, and those are the ones that’ll climb, spread, and produce fruit like crazy. Let’s get those seeds sprouting right.
📚 In This Guide
- What you need
- Instructions
- Tips and common mistakes
- Wrapping up and next steps
What you need
- ● Bitter gourd seeds: 10–20 seeds (fresh, untreated, and ideally from a reputable supplier for best germination rates).
- ● Seed trays or small pots: 2–4 trays (3–4 inches deep) or 4–6 small pots (3–4 inches in diameter) with drainage holes.
- ● Seed-starting mix: 2–3 quarts of lightweight, sterile potting soil (avoid garden soil—it’s too dense!).
- ● Watering can or spray bottle: With a fine mist nozzle to keep seeds moist without overwatering.
- ● Plastic wrap or clear lid: To create a mini greenhouse effect and retain humidity.
- ● Grow lights or sunny windowsill: A full-spectrum LED grow light (12–16 hours/day) or a south-facing window (6+ hours of direct sunlight).
- ○ Humidity dome (optional but helpful): If your seed trays don’t come with a lid.
- ● Fertilizer (after germination): A balanced, water-soluble fertilizer (5-5-5 or 10-10-10) diluted to half-strength.
- ● Heating mat: Keeps soil warm (75–85°F) for faster germination.
- ● pH test kit: Ensures your soil is slightly acidic (6.0–6.8) for optimal growth.
- ● Label markers: To track seedling progress and transplant dates.
- ● Organic mulch: Like coconut coir or peat moss to retain moisture.
- ● Transplanting tools: Small trowel or spoon for careful seedling transfer.
Step-by-step instructions for germinating bitter gourd seedlings
Here's how to coax strong, bushy bitter gourd seedlings in just 3-4 weeks—no guesswork, no waiting months.
🌱 Step 1: Soak Seeds Overnight for Faster Germination
Bitter gourd seeds have tough outer shells that slow germination. Place the 10 seeds in a small bowl and cover them with lukewarm water for 12 hours. This softens the seed coat so roots emerge quicker—you'll see them sprout 24-48 hours earlier than dry seeds. Drain and pat them dry with a paper towel before planting.
I know it seems counterintuitive, but soaking actually prevents rot if you use fresh, viable seeds. If any seeds float, discard them—they won't germinate. The good ones will sink and plump up noticeably.
💧 Step 2: Plant in Warm, Moist Soil with Proper Spacing
Fill 4-inch pots with the 3 gallons of seed-starting mix, moistening it until it's damp like a wrung-out sponge. Press the soil down lightly to remove air pockets, then plant each soaked seed ½ inch deep. Space them 1 inch apart in each pot—this gives roots room to spread without competing.
Cover the pots with clear plastic wrap to trap warmth and humidity. Place them in a spot where the soil stays at 80-85°F—a seedling heat mat works wonders if your home runs cooler. Germination should begin in 3-5 days, but don't remove the plastic until you see green sprouts breaking through.
☀️ Step 3: Provide Bright, Indirect Light Immediately
The moment seedlings emerge, move them to bright, indirect light for 12 hours daily. South-facing windows work, but supplement with a grow light if natural light is weak. Keep the light 4 inches above seedlings—too close scorches tender leaves, too far makes them stretch leggy.
Watch for first true leaves (the second set after the initial seed leaves). These should appear in 7-10 days. If leaves look pale or stems stretch toward the light, raise the light higher or add a few hours of exposure. Strong seedlings have dark green, thick stems and compact spacing between leaves.
🌿 Step 4: Thin to One Seedling Per Pot and Fertilize Lightly
When seedlings reach 2 inches tall, thin to the strongest seedling per pot. Snip the weaker ones at the base with clean scissors—don't pull, or you'll disturb the roots of the remaining plant. After thinning, add 1 teaspoon of balanced fertilizer (10-10-10) to the soil and water lightly to dissolve it.
Bitter gourd seedlings need 1 inch of water weekly, but check soil moisture daily—it dries faster in warm conditions. You'll know they're thirsty when the top ½ inch of soil feels dry to touch. Avoid wetting leaves to prevent fungal diseases like powdery mildew.
⏰ Step 5: Harden Off and Transplant After 4 Weeks
Two weeks before transplanting, start hardening off seedlings by placing them outside in partial shade for 1 hour daily. Gradually increase time and sun exposure over 10 days. By week 4, they should tolerate 4-6 hours of direct sun without wilting.
Transplant on an overcast day or in the evening to reduce shock. Bury seedlings 1 inch deeper than their current pot level—this encourages stronger root growth. Water deeply after planting, and mulch with 1 inch of organic mulch to retain moisture and regulate soil temperature.
Tips & tricks for germinating bitter gourd seedlings
Fast germination and healthy seedlings hinge on precise timing and environmental control—here's how to optimize every step.
Soaking Secret: The 12-hour soak in lukewarm water isn't just about speed—it's about seed viability. After soaking, inspect the seeds: viable ones will plump up noticeably and sink to the bottom. Discard any that float or remain hard, as they won't germinate. Pro tip: Use a clear bowl so you can easily spot the good seeds without disturbing them. This simple visual check saves you from planting non-starters that waste your time and resources.
Heat Control: Maintaining that 80-85°F soil temperature range is critical for the 3-5 day germination window. If your home runs cooler, invest in a seedling heat mat—it's the difference between rapid sprouting and waiting weeks. I've seen germination times stretch to 10 days in cool conditions (65°F or below), so don't skip this step. Place your thermometer in the soil, not just the air, for accurate readings.
Light Management: Those first 12 hours of bright, indirect light after emergence are non-negotiable. The moment you see green sprouts, move them immediately—delaying even by a few hours can cause leggy growth. For indoor setups, position grow lights 4 inches above seedlings and adjust height as they grow. Watch for stems stretching toward light (a sign of etiolation) and adjust within 24 hours. Strong seedlings develop compact spacing between leaves—this is your visual cue for proper light exposure.
Thinning Technique: When you reach the 2-inch height for thinning, use clean scissors to snip at the base rather than pulling. This prevents disturbing the roots of your remaining seedling. After thinning, give the soil a light watering to dissolve that 1 teaspoon of fertilizer. I've found that adding a small handful of compost to each pot at this stage provides extra nutrients without overwhelming the young plants. The key is gentle handling—bitter gourd seedlings are delicate at this stage.
Pro Tips for Bitter Gourd Seedling
- Fast germination and healthy seedlings hinge on precise timing and environmental control—here's how to optimize every step.
- Soaking Secret: The 12-hour soak in lukewarm water isn't just about speed—it's about seed viability.
- Heat Control: Maintaining that 80-85°F soil temperature range is critical for the 3-5 day germination window.
Frequently asked questions
Got questions about growing bitter gourd seedlings? You’re not alone! Here are answers to the most common concerns—from germination to troubleshooting—so you can get a head start on your harvest.
How long does it take for bitter gourd seedlings to sprout?
Bitter gourd seeds typically sprout within 7 to 14 days after planting, depending on soil warmth (ideal: 70–85°F) and moisture. Pre-soaking seeds for 6–8 hours can speed this up by 2–3 days. If no sprouts appear in 2 weeks, check moisture levels or seed viability—sometimes seeds need a little extra coaxing!
What’s the best temperature for bitter gourd seedling growth?
Bitter gourd seedlings thrive in warm soil (70–85°F) and air temperatures. If nights dip below 60°F, growth slows, and seedlings may wilt. Use a heat mat for indoor starts or wait until soil warms naturally in spring. Harden off seedlings gradually before transplanting to avoid shock.
Can I grow bitter gourd from store-bought seeds or do I need special ones?
Yes! You can use seeds from store-bought bitter gourds (save 2–3 seeds per fruit), but opt for heirloom or hybrid varieties labeled for seedlings if possible. Store-bought seeds may vary in vigor—test a few to ensure germination. For faster, more reliable results, buy seeds from a nursery specializing in tropical veggies.
Why are my bitter gourd seedlings turning yellow or wilting?
Yellow leaves often signal overwatering, poor drainage, or nutrient deficiency. Check soil moisture—seedlings need consistent dampness, not soggy soil. Wilting can also mean underwatering or heat stress. Ensure pots have drainage holes and place seedlings in bright, indirect light (direct sun can scorch tender leaves). A diluted fish emulsion fertilizer can help if growth stalls.
How do I transplant bitter gourd seedlings without shocking them?
Wait until seedlings have 3–4 true leaves and soil is warm (above 65°F). Hardening off is key: place seedlings outdoors for 1–2 hours daily over 5–7 days, gradually increasing time. Transplant in the late afternoon to reduce stress, and water deeply before and after. Mulch with straw to retain moisture and protect roots.
Wrapping up and next steps
Growing bitter gourd seedlings is a rewarding journey that yields fast, healthy plants with just the right care! By following the proper germination timeline—soaking seeds, maintaining warmth, and ensuring consistent moisture—you’ll enjoy a thriving bushy harvest in weeks.
The key? Patience and precision—but the payoff is delicious, nutrient-packed bitter gourds!
Ready to take the next step? Start your seedlings today and watch them flourish! Once your plants are strong, explore transplanting tips or pest management strategies to keep your garden thriving. Happy growing! 🌱💚