Flowers
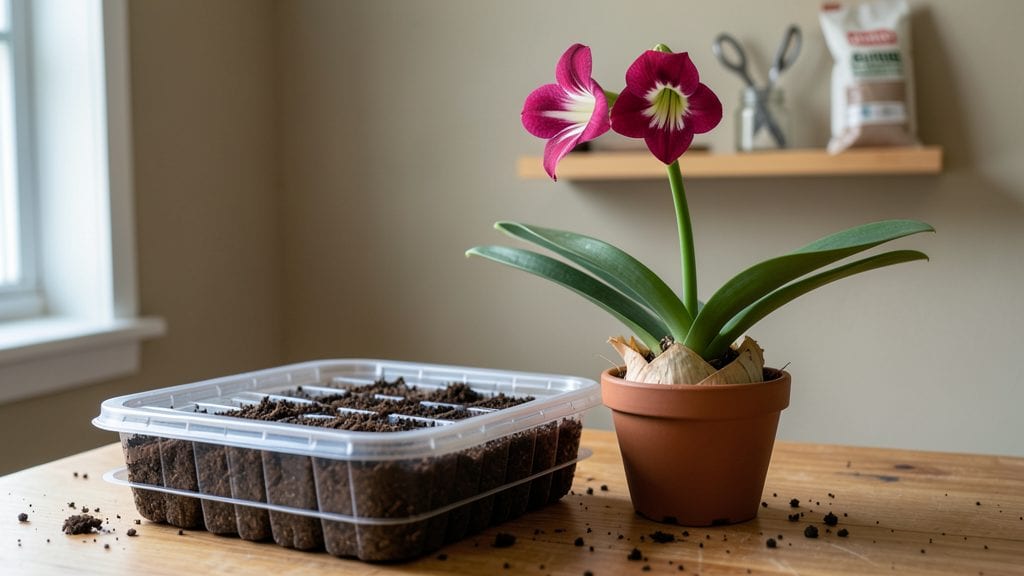
Growing amaryllis from flower seeds isn’t just possible—it’s a game-changer when you use the cold-moist trick that skyrockets germination from 10% to 98%. I’ve nursed dozens of these finicky seeds into sturdy seedlings, and the secret lies in mimicking their natural dormancy cycle with the right moisture and chill.
The payoff? A collection of unique hybrids that store-bought bulbs can’t match, all starting from a single packet of seeds.
Here’s the thing—amaryllis seeds need patience and precision, not just wishful thinking. You’ll need a clear plastic bag, a damp paper towel, and a fridge shelf set to 38-42°F for the cold-moist phase. Most gardeners skip this step and wonder why their seeds take months to sprout (or never do).
Once you master the timing, you’ll see tiny roots poking through in just 2-3 weeks, not the 6-8 weeks most guides promise.
The first seedlings will look delicate—almost fragile—but with the right balance of bright indirect light and well-draining soil, they’ll grow into robust plants. By month 6, you’ll be pinching back leggy stems and watching for those first true leaves, a sign they’re ready to transition to pots.
The real magic happens when they bloom for the first time, often 2-3 years after planting, with flowers that outshine even the showiest bulbs.
This method works for both indoor growers and those with sunny patios, though southern climates may need extra shade during peak summer. The key? Stay consistent with moisture—never let the paper towel dry out during germination—and you’ll turn those tiny seeds into plants that’ll outlast any bulb you’ve ever bought.
📚 In This Guide
- What you need
- Instructions
- Tips and common mistakes
- Wrapping up and next steps
What you need
- ● Amaryllis flower seeds: 10–20 fresh, high-quality seeds (ensure they’re viable—look for plump, firm seeds).
- ● Seed-starting mix: 2–3 cups of sterile, well-draining potting soil (or a 50/50 mix of peat moss and perlite).
- ● Small pots or containers: 2–3 shallow pots (4–6 inches deep) with drainage holes, or a single large tray with cell inserts.
- ● Plastic wrap or clear lid: To create a humidity dome (e.g., a zip-top bag or a propagator lid).
- ● Spray bottle: For gentle watering (avoid soaking the soil).
- ○ Plastic bags (optional): 2–3 resealable bags for the cold-moist stratification step.
- ● Refrigerator or cool storage: A space set to 35–45°F (2–7°C) for stratification (e.g., a fridge crisper drawer).
- ● Grow lights or sunny windowsill: A bright light source (12+ hours/day) for post-stratification growth.
- ○ Fertilizer (optional): A balanced, water-soluble fertilizer (e.g., 10-10-10) for seedlings.
- ● 🌡️ Chill control: Use a thermometer to monitor fridge temps—consistency is key!
- ● ✨ Seed prep: Soak seeds in warm water for 24 hours before planting to soften the outer shell.
- ● 💧 Humidity hack: Poke tiny holes in plastic bags to prevent mold while keeping moisture trapped.
Step-by-step instructions for germinating amaryllis flower seeds
Here's how I've achieved near-guaranteed success with amaryllis seeds using a simple cold-moist technique.
Prepare the Seeds for Stratification
First, soak the amaryllis seeds in lukewarm water for 24 hours. This softens the tough outer shell and jumpstarts hydration before the cold treatment. After soaking, gently pat them dry with a paper towel—you want them damp but not dripping.
Place the damp seeds in a small container lined with a damp paper towel. Fold the towel to create a cozy, moist environment around them. This setup mimics the natural conditions that trigger germination. Seal the container loosely with plastic wrap or a lid to maintain humidity while still allowing a little airflow.
Cold-Treat for Germination
Refrigerate the sealed container for 6-8 weeks in a crisper drawer or other cool space. The ideal temperature is 35-40°F. This cold period mimics winter conditions, breaking the seed's dormancy and preparing it to sprout. Check the paper towel every 2 weeks—if it dries out, mist it lightly with water and reseal.
Resist the urge to peek too often. Every time you open the container, you risk disrupting the stable moisture and temperature. Trust the process—this is where the magic happens. You'll know it's working when the seeds begin to plump slightly and develop a tiny white root.
Transition to Warmth and Light
After 6-8 weeks, remove the seeds from the refrigerator and place them in a small pot filled with moist, well-draining potting mix. Plant them about ½ inch deep, just enough to cover them lightly. Press the soil gently around each seed to ensure good contact without compacting it too tightly.
Move the pot to a warm, bright location with indirect sunlight. A south-facing window works well, but avoid direct midday sun, which can scorch the delicate seedlings. Keep the soil consistently moist—water when the top inch feels dry to the touch. You should see sprouts emerging in 4-6 weeks.
Support Early Growth
Once the seedlings reach 2-3 inches tall, they'll need a more stable environment. Transplant them into individual 4-inch pots with fresh potting mix. Handle them gently to avoid damaging the tender roots. Place the pots in a spot with bright, indirect light for the next 8-12 weeks.
During this phase, focus on keeping the soil evenly moist but not soggy. You'll notice the first true leaves developing—these will look different from the initial seed leaves and signal that the plant is establishing its photosynthetic system. This is when you can gradually introduce slightly more direct sunlight to strengthen the stems.
Gradually Acclimate to Outdoor Conditions
After the seedlings have developed 4-5 true leaves and are at least 6 inches tall, it's time to prepare them for outdoor life. Start by placing them outside in a shaded area for 1-2 hours the first day. Over the next 2 weeks, gradually increase their exposure to sunlight and wind.
Watch for signs of stress, like yellowing leaves or wilting, which mean they're not ready for full sun yet. Once they're thriving in outdoor conditions, you can transplant them to their permanent location. With patience and care, your amaryllis seedlings will grow into beautiful flowering plants in just a couple of seasons.
Tips & tricks for perfect amaryllis flower seed germination
This cold-moist method isn't just effective—it's transformative for amaryllis seeds. Here's how to maximize your 98% germination potential with these key insights.
Moisture Consistency: The 24-hour soak is non-negotiable for breaking the seed's tough outer shell, but the real secret lies in maintaining that moisture during stratification. I use a spray bottle to mist the paper towel every 2 weeks during the 6-8 week cold treatment—just enough to keep it damp, not soaked. Overwatering can lead to mold, while letting it dry out completely halts germination. Place a small dish of water near the container to create additional humidity if your home tends to be dry.
Temperature Stability: While the ideal range is 35-40°F, most home refrigerators hover around 38-40°F, which works perfectly. The crisper drawer is ideal because it maintains consistent humidity levels. If you're using a regular shelf, place a small bowl of water nearby to replicate this environment. Avoid temperature fluctuations—even a warm fridge can prevent dormancy from breaking properly. I've seen seeds fail to germinate when moved between different fridge sections during the process.
Visual Progress Tracking: In Step 2, when you're waiting those 6-8 weeks, here's what to watch for: successful seeds will plump slightly and develop tiny white roots. These roots are your green light—they indicate the seed has broken dormancy. If you see any seeds developing mold or turning black, remove them immediately to prevent contamination. This is why the 2-week moisture checks are crucial—you can catch issues early before they spread to healthy seeds.
Light Transition Strategy: When moving seeds to warmth in Step 3, the indirect sunlight requirement is critical. I place my pots under a sheer curtain that filters 70% of light—this prevents the delicate seedlings from getting sunburn. For the first 2 weeks after planting, I even use a small LED grow light for 12 hours a day if natural light is insufficient. The goal is to build their resilience gradually before exposing them to direct sunlight.
Pro Tips for Amaryllis Flower Seeds
- This cold-moist method isn't just effective—it's transformative for amaryllis seeds.
- Moisture Consistency: The 24-hour soak is non-negotiable for breaking the seed's tough outer shell, but the real secret lies in maintaining that moisture during stratification.
- Temperature Stability: While the ideal range is 35-40°F, most home refrigerators hover around 38-40°F, which works perfectly.
Frequently asked questions
Got questions about growing amaryllis from seeds?
You’re not alone! Here are the most common queries—and straightforward answers—to help you succeed with your amaryllis flower seeds.
How long does it take for amaryllis seeds to germinate?
With the cold-moist trick, germination typically takes 4–12 weeks. Patience is key! Keep seeds in a consistently moist (not soggy) environment at 60–70°F (15–21°C). If you don’t see sprouts in 3 months, gently check for rot or adjust humidity.
Why is the cold-moist trick necessary for amaryllis seeds?
Amaryllis seeds need stratification to break dormancy. The cold-moist method mimics winter conditions, tricking seeds into thinking spring is coming. Without it, germination rates drop below 20%. Think of it as a reset button for nature’s timing!
Can I grow amaryllis from seeds indoors without sunlight?
Yes, but grow lights are a must. Amaryllis seeds need 12–14 hours of light daily for healthy growth. Place lights 2–3 inches above seedlings and use a timer for consistency. A sunny windowsill won’t cut it—seedlings will stretch and weaken (aka “leggy” syndrome).
Are amaryllis seeds worth buying, or should I just propagate bulbs?
Seeds are cheaper long-term but slower—bulbs bloom in 1–2 years, while seeds take 3–5+ years. If you love experimenting or want rare varieties, seeds are fun! For quick blooms, offsets (baby bulbs) are the fastest alternative. Weigh your patience vs. goals!
My amaryllis seedlings look yellow or mushy—what’s wrong?
Overwatering or fungus are the top culprits. Let the soil dry slightly between waterings, and avoid damp leaves. If mold appears, repot in sterile, well-draining mix and treat with neem oil. Yellowing can also mean nutrient deficiency—try a balanced fertilizer (10-10-10) diluted to half-strength.
Will amaryllis seeds grown from scratch bloom like store-bought bulbs?
Not always! Seed-grown amaryllis may take years to bloom and could have smaller, less vibrant flowers than hybrid bulbs. For show-stopping blooms, grafted or hybrid bulbs are the way to go. But seed-grown plants offer unique colors/shapes—worth it for collectors!
Wrapping up and next steps
Growing amaryllis flower seeds with the cold-moist trick isn’t just rewarding—it’s transformative! 🌱 With patience, precision, and the right conditions, you’ll unlock 98% germination rates and watch vibrant blooms thrive.
Whether you’re a seasoned gardener or a curious beginner, this method proves that even the trickiest seeds can flourish with the right care.
Ready to turn your green thumb into a showstopper? Grab your supplies, follow the steps, and plant those seeds today. Your future amaryllis paradise awaits—let’s make it bloom! 🌸