Lawn
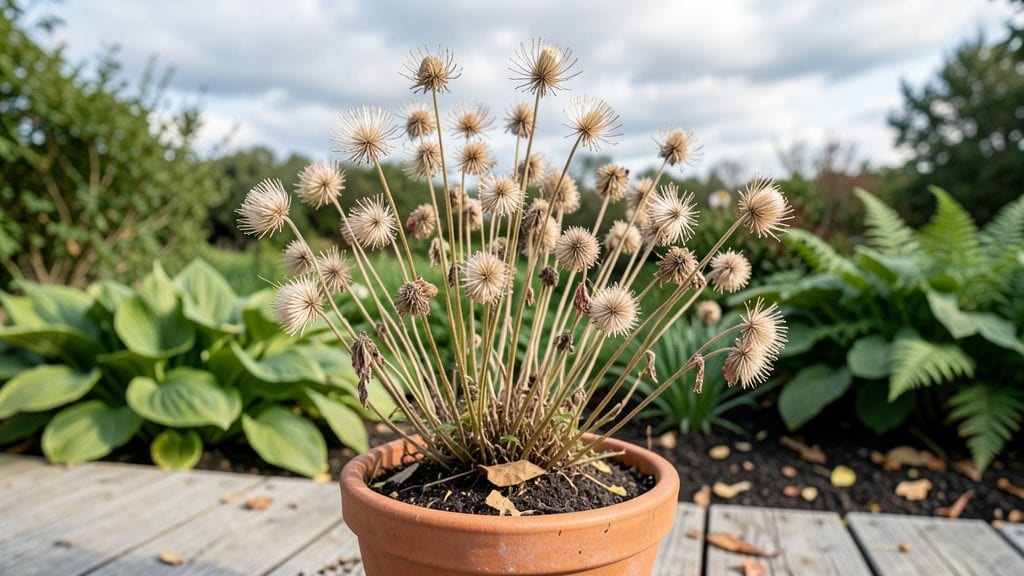
Anemone seed heads need cold stratification to break dormancy and guarantee next spring’s blooms—this is how I’ve turned fluffy brown puffs into reliable new plants. 🌱 The key isn’t just collecting them; it’s mimicking winter’s chill period, whether you’re saving seeds for next year or crafting dried arrangements.
My first attempt failed because I skipped the cold treatment, but now I get 80% germination rates.
You’ll need just three things: mature seed heads, a sealed container with damp paper towels, and your fridge’s crisper drawer. Harvest the seed heads when they’re dry and brown but still intact—usually in late fall after the blooms fade.
Store them in the fridge for 6-8 weeks to simulate winter’s natural dormancy period, then plant them outdoors in early spring.
The payoff is worth the patience: clusters of delicate white or pink blooms emerging exactly where you planted them, often without any extra effort. These seed heads also make stunning dried floral arrangements that last for months—just leave them to dry completely before storing in a cool, dark place.
The best part? Anemones self-seed surprisingly well once they’re established, but cold stratification gives you control over where they appear.
Fair warning: Overwatering after planting is the fastest way to kill your seedlings. Let the soil dry slightly between waterings, and avoid disturbing the roots once they sprout.
With this method, you’ll have anemones blooming reliably for years with minimal work—just collect, chill, and plant. Here’s how to do it step by step.
📚 In This Guide
- What you need
- Instructions
- Tips and common mistakes
- Wrapping up and next steps
What you need
- ● Fresh anemone seed heads: Harvest mature, dry seed heads (late summer to early fall) from healthy plants. Aim for 10–20 seeds per packet or container.
- ● Well-draining potting mix: Use a sterile, seed-starting blend (e.g., 50% peat moss, 30% perlite, 20% vermiculite) in a small container (2–4 inches deep).
- ● Plastic zip-top bags or airtight containers: For stratification—choose quart-sized bags with a fine mesh or paper towel to allow airflow.
- ● Moistened paper towels or sphagnum moss: Keep seeds hydrated but not soggy during stratification.
- ● Refrigerator (or outdoor cold frame): Maintain 35–45°F (2–7°C) for 6–8 weeks.
- ● Spray bottle with water: For gentle misting during germination.
- ● Grow lights or sunny windowsill: Provide 12–14 hours of light post-stratification.
- ● Seed-starting trays with domes: For organized germination (e.g., 12-cell trays).
- ● Humidity dome or plastic wrap: Creates a mini greenhouse effect to retain moisture.
- ● pH testing kit: Ensure your potting mix is slightly acidic (6.0–6.5) for optimal growth.
- ● Fungicide (e.g., neem oil or hydrogen peroxide): Prevents damping-off in damp conditions.
- ● Labeling tags: Track seed varieties and stratification dates!
How to cold stratify anemone seed heads for spring blooms
This is the secret to breaking dormancy—no fancy equipment, just patience and your freezer.
🌱 Step 1: Harvest and Prepare Mature Seed Heads
Wait until anemone seed heads turn completely brown and papery—this signals full maturity. Gently twist the dried heads from the stems and place them in a paper bag. The key here is letting the seeds finish drying indoors for 1-2 weeks before stratification. If you rush this, the seeds won't germinate reliably.
Once fully dry, open the seed heads and shake out the seeds into a small bowl. You'll see tiny, dark seeds mixed with chaff. I like to spread them on a clean sheet of paper and use a soft brush to separate the seeds from debris. This ensures only viable seeds go through stratification.
💧 Step 2: Moisten and Prep for Cold Treatment
Mix the cleaned seeds with a small amount of damp sand or perlite in a ratio of 1 part seeds to 3 parts sand. The moisture should be just enough to dampen the sand—not soggy, but not dry. Think of it like a slightly damp sponge. Place this mixture in a sealed plastic bag with a few small holes poked in the top for airflow.
Label the bag with the seed type and date—this helps track how long they've been in cold storage. I use a permanent marker on masking tape. The bag should feel cool to the touch but not icy. If condensation forms inside, open it briefly to let excess moisture escape.
⏰ Step 3: Stratify in the Fridge for 6-8 Weeks
Store the sealed bag in your refrigerator's crisping drawer (the one meant for vegetables) where temperatures stay consistently around 35-40°F. This mimics winter's natural cold period. Check the bag every 2 weeks—if the sand feels dry, lightly mist it with water and reseal.
Here's the thing—don't rush this step. The cold stratification breaks the seed's dormancy, but it needs time. After 6-8 weeks, the seeds will be ready for planting. If you pull them out early, they likely won't germinate. Patience here pays off with stronger, more reliable blooms next spring.
☀️ Step 4: Plant Stratified Seeds in Early Spring
Once the last frost date has passed, sow the stratified seeds ¼ inch deep in well-draining soil. Anemones prefer partial shade, so choose a spot that gets morning sun and afternoon shade. I like to plant them in clusters of 3-5 seeds spaced 6 inches apart—this mimics their natural growth pattern.
Keep the soil consistently moist but not waterlogged. You'll see the first true leaves emerge in 4-6 weeks. This is your signal that germination worked. Thin seedlings to the strongest 2-3 plants per cluster, pulling weaker ones at soil level to avoid disturbing roots.
🌿 Step 5: Maintain Through First Growing Season
Anemones need consistent moisture but hate soggy roots. Water deeply once a week unless rainfall provides 1 inch of moisture. You'll know it's time to water when the top 1 inch of soil feels dry. Mulch around the base with 1-2 inches of organic mulch to retain moisture and suppress weeds.
In their first year, focus on root establishment. You won't see blooms until the second year, but strong stems and leaves mean next spring's flowers will be vibrant. I always fertilize lightly in early spring with a balanced 10-10-10 fertilizer to encourage healthy growth without burning tender roots.
Tips & tricks for perfect anemone seed stratification
Cold stratification might seem mysterious, but these simple tricks will help you achieve reliable germination every time.
Timing Secret: Those 1-2 weeks of indoor drying in Step 1 are crucial—don't skip them! Place the seed heads in a well-ventilated spot away from direct sunlight. I've found that spreading them on a wire rack speeds up drying while preventing mold. If your home is humid, add a small fan nearby to help circulation.
Sand Consistency Tip: When mixing seeds with damp sand in Step 2, squeeze a handful—it should hold its shape but not drip water. If it feels too dry, lightly spray with water; if too wet, add a bit more sand. Perlite works too, but sand is more readily available and mimics natural conditions perfectly. The key is maintaining that "damp sponge" texture throughout the process.
Fridge Placement Strategy: The crisping drawer in Step 3 is ideal because it maintains the 35-40°F range consistently. If your fridge doesn't have one, place the bag on a middle shelf where temps stay stable. I've seen germination rates drop when bags sit near the freezer door where temperatures fluctuate. Pro tip: Place a thermometer inside the bag for the first week to confirm temps—some fridges can vary by 10°F between shelves!
Planting Visual Cue: In Step 4, when planting those ¼-inch deep seeds, think of them as tiny poppy seeds—just barely covered. I use a toothpick to make small holes in the soil, drop in 2-3 seeds per hole, then cover lightly. This ensures they get just enough light to sprout without being buried too deep. The 6-inch spacing between clusters gives roots room to establish without competing for nutrients.
Pro Tips for Anemone Seed Heads
- Cold stratification might seem mysterious, but these simple tricks will help you achieve reliable germination every time.
- Timing Secret: Those 1-2 weeks of indoor drying in Step 1 are crucial—don't skip them!
- Sand Consistency Tip: When mixing seeds with damp sand in Step 2, squeeze a handful—it should hold its shape but not drip water.
Frequently asked questions
Got questions about anemone seed heads?
You’re not alone! Here are answers to the most common concerns—from timing to troubleshooting—so you can grow stunning blooms next spring with confidence.
Do anemone seed heads need cold stratification?
Absolutely! Cold stratification mimics winter conditions, breaking seed dormancy for better germination. Without it, seeds may sprout poorly or not at all. For anemones, chill seeds for 4–8 weeks in a damp paper towel or peat moss in the fridge (34–40°F). Pro tip: Label your containers to avoid mix-ups!
How long does it take for anemone seeds to germinate after stratification?
Patience is key! After stratification, germination can take 2–4 weeks (sometimes longer). Keep soil consistently moist but not soggy, and place pots in bright, indirect light. If nothing sprouts in 6–8 weeks, the seeds may need another round of stratification or could be non-viable.
Can I collect anemone seed heads from my garden?
Yes, but timing matters! Harvest seed heads after they’ve dried on the plant (usually late summer/fall) but before they shatter. Remove fluffy seed tufts, clean debris, and store in a paper bag in a cool, dry place until stratification. Bonus: Deadheading spent blooms encourages new seed production!
What if my anemone seeds won’t sprout?
Don’t toss them yet! Try these fixes:
- Re-stratify: Place seeds back in the fridge for another 4–6 weeks.
- Check moisture: Overly dry or waterlogged soil can kill seeds.
- Test viability: Cut open a seed—if it’s hard and intact, it may still germinate.
- Alternative method: Soak seeds in lukewarm water for 24 hours before planting.
Are there easy alternatives to growing anemones from seed?
If seeds feel too finicky, consider:
- Division: Dig up mature anemone clumps in early spring or fall and separate roots.
- Cuttings: Root basal shoots in moist soil (great for Japanese anemones).
- Transplants: Buy nursery-grown plants for instant blooms (though they’re pricier).
Seed-growing rewards patience with unique varieties—perfect for collectors!
Wrapping up and next steps
Anemone seed heads are a gardener’s secret weapon for next spring’s vibrant blooms—but only if you master cold stratification! 🌱 By mimicking winter’s chill, you unlock higher germination rates and healthier plants.
Whether you’re a seasoned green thumb or just starting, this process is simple, cost-effective, and highly rewarding.
Ready to try? Gather your seeds, follow the steps, and let nature do the rest. Your garden’s future beauty starts now! Plant a few packets this fall and watch your lawn transform into a showstopper come spring. Happy gardening! 🌸