Pruning
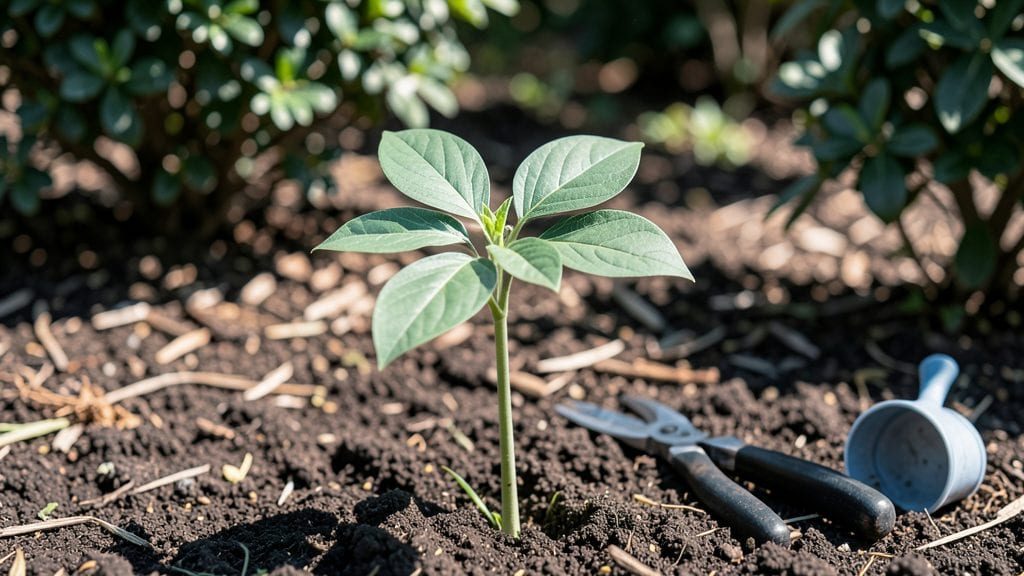
Fast-germination bush bean seedlings mean fresh harvests in just 4-6 weeks—and I’ve cracked the code after years of impatient waiting. The secret isn’t fancy equipment but a few simple tweaks: warm soil, perfect moisture, and the right timing.
Most gardeners overlook how quickly beans sprout when conditions are just right, and that’s where the magic happens.
Start with soil that’s at least 60°F—warmer than you’d think—and plant seeds only 1 inch deep. Too shallow, and they’ll dry out; too deep, and they’ll struggle to break through. A light sprinkle of compost on top helps retain moisture while keeping the soil loose.
Within 5-10 days, you’ll see those first tiny leaves pushing through, and that’s when the real work begins.
Once they’re up, keep the soil consistently damp but never soggy—beans hate wet feet. Thin seedlings to 3-4 inches apart as soon as they have two true leaves, and watch them grow into bushy, productive plants.
The payoff? You’ll be snipping fresh pods in weeks, not months, and your neighbors will be asking for your secrets.
This method works in containers or garden beds, in cool spring soil or warm summer patches. The key is consistency—once you nail the timing and moisture, you’ll have beans faster than you ever thought possible. Let’s get those seeds in the ground!
📚 In This Guide
- What you need
- Instructions
- Tips and common mistakes
- Wrapping up and next steps
What you need
- ● Bush bean seeds: 50-100 high-quality, non-GMO seeds (e.g., Phaseolus vulgaris varieties like 'Blue Lake' or 'Contender').
- ● Seed-starting mix: 10-15 lbs of sterile, well-draining potting mix (avoid garden soil—it’s too dense!).
- ● Containers: 6-8 biodegradable seedling pots (2-3 inches deep) or a shallow tray with drainage holes.
- ● Watering can or spray bottle: For gentle, even moisture (avoid over-saturating!).
- ○ Grow lights (optional but recommended): 1 full-spectrum LED light (12-16 inches above seedlings) for 12-14 hours/day.
- ○ Heat mat (optional): A small seedling mat (70-80°F range) to speed germination.
- ● Fertilizer: A balanced, water-soluble fertilizer (5-5-5 or 10-10-10) for post-germination growth.
- ● Plant labels: Small sticks or tags to mark seed varieties.
- ● Trowel or spoon: For gently pressing seeds into soil (no deeper than 1 inch!).
- ● Humidity dome or plastic wrap: To retain moisture during germination.
- ○ Thermometer (optional): To monitor soil temperature (ideal: 70-85°F).
- ● Pruning shears (later stage): For trimming leggy seedlings (if needed).
Step-by-Step instructions for growing bush bean seedlings
Here’s how to get your bush beans sprouting in days and thriving in weeks.
Prepare Your Containers and Soil
Use the 4-inch deep containers to give roots room to spread without overcrowding. Fill them with 2 gallons of well-draining potting mix, leaving about ½ inch of space at the top. Moisten the soil until it’s damp but not soggy—think of a wrung-out sponge. This prevents waterlogging, which can rot seeds before they even sprout.
If your mix feels gritty, add a handful of compost to boost nutrients. I like to run my finger through the soil—it should hold shape when squeezed but break apart easily. This ensures roots get both air and moisture without suffocating.
Plant Seeds at the Right Depth and Spacing
Drop 2-3 seeds per container, about 1 inch deep. Planting too shallow can dry them out, while burying them too deep slows germination. Space seeds 1 inch apart—this gives each seedling room to grow without competing for light or nutrients.
After planting, gently press the soil around the seeds to secure them. Water lightly with a spray bottle until the surface looks evenly moist. Avoid soaking the soil, as this can wash seeds deeper or create pockets of air that prevent root contact.
Create Ideal Germination Conditions
Place the containers in a warm spot, ideally between 70-85°F. A sunny windowsill or under a grow light works best. Bush beans sprout fastest in warmth—you’ll see tiny green shoots in just 3-5 days if conditions are right.
Cover the containers loosely with plastic wrap or a humidity dome to trap heat and moisture. Check daily for condensation—if the inside fogs up, you’ve got the perfect environment. Remove the cover once sprouts appear to prevent mold from forming on tender leaves.
Thin Seedlings for Stronger Growth
Once seedlings reach 2 inches tall, thin to the strongest one per container. Use small scissors to snip weaker stems at the base—this avoids disturbing the roots of the plant you’re keeping. You’ll notice the remaining seedling perks up almost immediately, as it no longer shares nutrients.
After thinning, place the containers in full sun for at least 6-8 hours daily. Bush beans need bright light to stay compact and bushy. If leaves start stretching or turning pale, your plants need more light—move them closer to the window or under the grow light.
Water and Fertilize for Bushy Plants
Water when the top inch of soil feels dry, usually every 2-3 days. Let water run through the drainage holes to flush out excess salts. Overwatering causes yellow leaves, while underwatering stunts growth—both are easy to spot if you check soil moisture regularly.
When seedlings have 4-5 leaves, mix 1 tablespoon of balanced fertilizer into the soil. This gives them a nutrient boost without burning tender roots. You’ll see new leaves emerge within a week—that’s your signal everything is working.
Tips & tricks for perfect bush bean seedlings
Here's how to turn those slow-growing seeds into sturdy, bushy plants in record time—without the guesswork.
Soil Prep Secret: Before adding compost, mix in a handful of perlite or vermiculite to improve drainage. I like to sift it through my fingers to distribute it evenly—this prevents waterlogging in Step 1, which is critical for preventing seed rot. The right soil texture gives roots oxygen while holding moisture, and that's what speeds up germination.
Germination Speed Hack: For even faster sprouts in Step 3, soak your seeds overnight in a damp paper towel before planting. Place them in a warm spot (70-85°F) and check daily—they'll sprout in just 24-48 hours. This pre-sprouting trick cuts your waiting time in half while ensuring every seed has a head start. Just remember to plant them at the same 1-inch depth afterward.
The Light Factor: If your seedlings start stretching toward the light in Step 4, they're telling you they need more. Move them within 6 inches of a bright window or under grow lights for those crucial 6-8 hours daily. I've seen leggy plants straighten up within 24 hours after moving them closer to light—it's like watching a plant do a growth spurt right before your eyes.
Watering Wisdom: In Step 5, use a spray bottle for the first week to avoid disturbing the soil surface where seeds are germinating. Once established, water at the base rather than overhead to prevent fungal diseases. I check soil moisture by sticking my finger in—if it feels dry just below the surface, that's your signal to water. This method prevents both overwatering and underwatering, both of which can stall growth.
Pro Tips for Bush Bean Seedling
- Here's how to turn those slow-growing seeds into sturdy, bushy plants in record time—without the guesswork.
- Soil Prep Secret: Before adding compost, mix in a handful of perlite or vermiculite to improve drainage.
- Germination Speed Hack: For even faster sprouts in Step 3, soak your seeds overnight in a damp paper towel before planting.
Frequently asked questions
Got questions about growing bush bean seedlings? You’re not alone! Here are answers to the most common queries to help you nurture thriving plants in no time.
How long does it take for bush bean seedlings to sprout?
With the right conditions (warm soil, 70–80°F, and moisture), bush bean seedlings typically sprout in 5–10 days. If your soil is cooler, germination may take up to 2–3 weeks. Keep seeds consistently moist but avoid waterlogging—they need air too!
When is the best time to plant bush bean seedlings outdoors?
Wait until the soil is at least 60°F and all frost risk has passed. For most climates, this means after the last spring frost (usually late April–June, depending on your zone). Bush beans love warmth and won’t tolerate cold soil—patience pays off!
Can I transplant bush bean seedlings, or should I direct-sow?
Bush beans hate being transplanted—their delicate roots struggle with disturbance. For best results, direct-sow seeds 1 inch deep, 3–4 inches apart, in rows 18–24 inches apart. If you must transplant, do it only when seedlings are tiny (1–2 inches tall) and keep them well-watered.
Why are my bush bean seedlings wilting or turning yellow?
Wilting or yellowing often signals overwatering, underwatering, or pests. Check the soil moisture—it should stay evenly damp but not soggy. Look for aphids or spider mites on undersides of leaves. If roots look mushy, it’s root rot; if dry, they’re thirsty. Adjust care and monitor!
Do bush bean seedlings need special care in hot weather?
Yes! In heat, mulch around seedlings to retain moisture and cool roots. Water early in the morning to reduce evaporation, and provide afternoon shade if temperatures exceed 90°F. Avoid overhead watering—it can spread disease. Bush beans thrive with consistent care!
Wrapping up and next steps
Growing bush bean seedlings fast and strong is totally within your reach—with the right prep, patience, and a few pro tricks! 🌱 By focusing on soil warmth, consistent moisture, and proper spacing, you’ll be harvesting fresh, bushy plants in just a few weeks.
Don’t let setbacks discourage you; even experienced gardeners face challenges, but each seed you plant is a step toward a thriving garden.
Ready to level up your harvest? Start by testing your soil and prepping your space—then sow those seeds with confidence! And if you’re hungry for more tips, explore our guides on pruning techniques or companion planting to maximize your garden’s potential. Happy growing! 🌿