Lawn
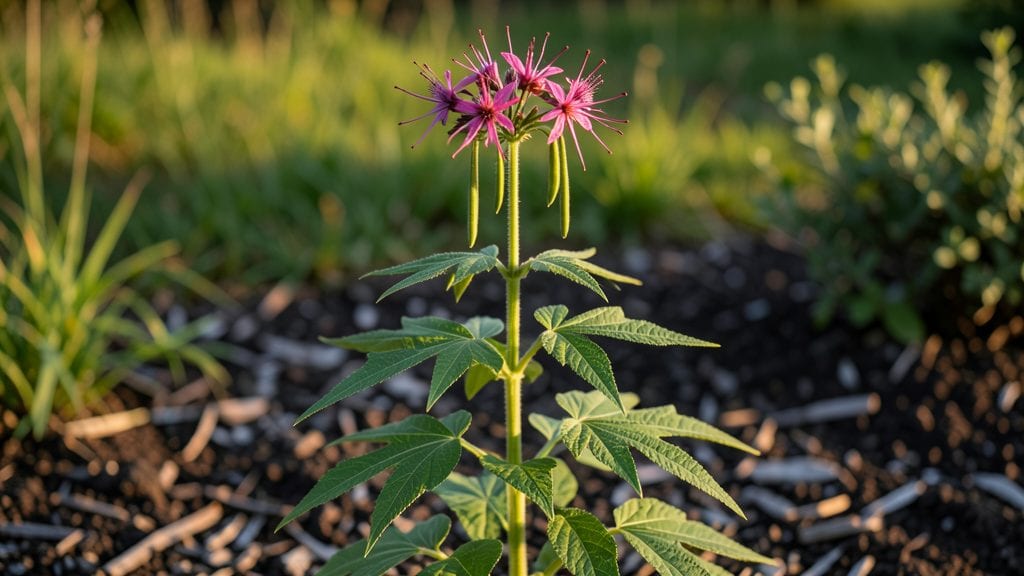
Those cleome seed pods turn summer gardens into living sculptures—spiky, dramatic, and effortlessly vertical. 🌿 I’ve watched them transform bare corners into eye-catching focal points with almost no work from me, and the best part? They’re packed with seeds for next year’s show.
Harvesting is simple: wait until pods turn brown and crispy, then snip them before they split open. Store the seeds in a paper envelope in a cool, dry spot—they’ll stay viable for years.
The real trick is encouraging healthy pods in the first place, which means deadheading spent blooms and giving plants plenty of sun.
By late summer, you’ll have armfuls of pods ready for drying, and the process itself is oddly satisfying—like collecting nature’s own confetti. The seeds are easy to germinate, so you’ll have next year’s vertical drama growing before you know it.
Perfect for cutting gardens, dried arrangements, or just adding whimsy to your yard. Let’s dive into the full process—from harvest to replanting—so you can make these pods a yearly tradition.
📚 In This Guide
- What you need
- Instructions
- Tips and common mistakes
- Wrapping up and next steps
What you need
- ● Cleome seeds: 10–20 seeds (choose a variety like Cleome hassleriana for vibrant blooms).
- ● Well-draining potting mix: 5–10 gallons (look for a blend with perlite or sand for aeration).
- ● Containers or garden bed: Option 1: Tall, narrow pots (12–18" deep) for vertical displays.
- ● Option 2: Raised garden beds (minimum 6" depth).
- ● Option 3: Hanging baskets (with drainage holes).
- ● Drainage material: Small gravel or pebbles (1–2 cups per container).
- ● Watering can or hose with a gentle spray nozzle.
- ○ Gloves (optional but recommended)—cleome leaves can be prickly!
- ● Trowel or small shovel for planting.
- ● Pruning shears (for deadheading or shaping plants later).
- ● Sunlight access: Full sun (6+ hours/day) or partial shade (4+ hours).
- ● Patience! 🐢 Cleome grows fast but needs time to establish.
- ● Fertilizer: Balanced 10-10-10 or slow-release granules (sprinkle lightly at planting).
- ● Mulch: Organic mulch (e.g., straw) to retain moisture.
- ● Stakes or trellis: For taller varieties (though cleome often self-supports).
- ● Decorative rocks or pebbles: To enhance vertical displays.
Step-by-Step guide to growing cleome seed pods for striking vertical interest
Here's how to coax those iconic cleome seed pods into your garden with almost no fuss.
🌱 Step 1: Choose the Perfect Planting Location
Cleome thrives in full sun, so pick a spot that gets at least 6-8 hours of direct sunlight daily. I always look for areas with afternoon sun exposure—this is when cleome really stretches toward the sky and produces those dramatic seed pods. The soil doesn't need to be fancy, but it should drain well. If your garden soil is heavy clay, amend it with a 2-3 inch layer of compost before planting.
Watch for areas where other plants have grown well—cleome loves the same conditions as sun-loving annuals. You'll see the tallest stems and most abundant pods when plants have plenty of space to spread their roots. Space seedlings 12-18 inches apart to give them room to grow their signature vertical form.
💧 Step 2: Plant and Water Consistently
Start by digging a hole slightly deeper than the plant's root ball. Gently place the cleome plant in the hole and fill it with soil, pressing lightly around the base to eliminate air pockets. Water immediately after planting to help settle the soil and encourage root contact. Cleome plants need 1 inch of water per week, but they're surprisingly drought-tolerant once established.
Here's the thing—cleome hates soggy feet. Water deeply but infrequently, allowing the top 1-2 inches of soil to dry out between waterings. You'll know it's time to water when the soil feels dry to the touch about an inch below the surface. Overwatering leads to weak stems that can't support those heavy seed pods.
☀️ Step 3: Provide Support for Maximum Vertical Drama
Cleome stems are strong, but those heavy seed pods can cause them to flop if left unsupported. I like to install 3-4 foot tall stakes or a simple trellis at planting time. Place the support near each plant and loosely tie the main stem to it as it grows using soft plant ties or even old pantyhose. This keeps the plant upright without restricting growth.
Watch for the first true leaves to appear—this is when you should start training the plant. Gently guide the main stem along the support, letting side branches grow naturally. You'll see the most dramatic vertical effect when the seed pods hang down like nature's chandeliers. If you skip this step, expect some flopping by midsummer.
✂️ Step 4: Deadhead and Maintain Through the Season
To encourage more flowering and seed pod production, I deadhead spent blooms regularly. Simply pinch off the faded flowers with your fingers or snip them with clean scissors. This redirects the plant's energy toward producing new blooms instead of setting seed. You'll notice a fresh flush of flowers within 2-3 weeks of consistent deadheading.
Cleome is generally pest-free, but keep an eye out for aphids on new growth. A strong spray of water usually dislodges them, but if they persist, treat with neem oil. The key to maintaining cleome's dramatic appearance is regular deadheading and occasional pruning of any leggy growth. You'll see the most impressive seed pods when the plant focuses its energy on vertical growth rather than sprawling sideways.
🌿 Step 5: Enjoy and Collect Seed Pods for Next Season
As summer progresses, those distinctive seed pods will form along the stems. Leave some pods on the plant for natural seed collection—simply wait until they turn brown and dry completely. They'll pop open dramatically when touched, releasing seeds for next year's planting. You'll see the pods form most abundantly on the upper portions of the plant, which is why keeping it vertical is so important.
For a continuous display, allow some pods to mature while deadheading others to encourage new blooms. The more you maintain the plant, the longer it will produce those eye-catching seed pods. By late summer, your cleome will be the star of the vertical garden, with its unique seed pods adding texture and drama to any landscape.
Tips & tricks for perfect cleome seed pods
Here's what I've learned after growing cleome for years—these simple tricks make all the difference for dramatic vertical displays.
Sunlight Secret: In Step 1, when choosing your location, prioritize that afternoon sun exposure. Cleome plants will stretch dramatically toward the late afternoon sun, creating those signature vertical lines. If you notice your plants leaning too much, rotate them slightly every few days to encourage even growth. The more direct sunlight they get, especially those crucial 6-8 hours, the more abundant those iconic seed pods will be.
Watering Wisdom: The 1-2 inch soil dryness test in Step 2 is your best friend. I've seen cleome plants with weak stems from overwatering—those heavy seed pods need strong support! Water deeply but infrequently, and always check that inch below the surface before watering again. In hot climates, you might need to water every 5-6 days instead of weekly to avoid soggy soil.
Support Strategy: Don't wait until you see flopping to install those 3-4 foot tall stakes in Step 3. Set up your supports at planting time! I use bamboo stakes because they're sturdy yet flexible enough to guide the plant's natural growth. Loosely tying the main stem with soft plant ties (or even old pantyhose) gives the plant room to grow without restricting it. This is where you'll see the most dramatic vertical effect—those seed pods hanging like nature's chandeliers.
Deadheading Timing: The 2-3 week flush of new flowers after deadheading in Step 4 is worth the effort. I set a reminder to check my cleome every 5-7 days during peak bloom. Simply pinch off those faded flowers with your fingers—no need for scissors. This redirecting of energy is what gives you continuous blooms and ultimately more seed pods. The more you maintain this habit, the longer your cleome will produce that eye-catching vertical drama.
Pro Tips for Cleome Seed Pods
- Here's what I've learned after growing cleome for years—these simple tricks make all the difference for dramatic vertical displays.
- Sunlight Secret: In Step 1, when choosing your location, prioritize that afternoon sun exposure.
- Watering Wisdom: The 1-2 inch soil dryness test in Step 2 is your best friend.
Frequently asked questions
Got questions about those striking cleome seed pods? You’re not alone!
Whether you’re curious about their care, growth habits, or creative uses, we’ve got answers to help your garden shine with minimal fuss.
Why do cleome seed pods explode when they’re ripe?
Nature’s fireworks! Cleome seed pods dehisce (split open) when mature to scatter seeds—this explosive action is called ballistic seed dispersal. No need to worry; it’s just their way of spreading! If you want to save seeds, collect pods before they pop (usually when they’re brown and crispy).
How long does it take for cleome seed pods to form after flowering?
Patience pays off! After cleome flowers bloom (typically 6–8 weeks after planting), seed pods form in 4–6 weeks. Keep an eye out for pods turning from green to tan—this signals ripeness. If pods dry too fast, try misting them lightly to slow the process.
Can I grow cleome seed pods indoors or in containers?
Cleome thrives in 5-gallon containers or larger with well-draining soil. Place them in full sun (6+ hours/day) and ensure pots have drainage holes. Dwarf varieties like ‘Pink Queen’ work best for smaller spaces. Just avoid overwatering—cleome hates soggy roots!
What should I do if my cleome pods never form or turn brown?
Don’t panic! Common culprits include:
- Poor pollination: Hand-pollinate with a soft brush if bees are scarce.
- Over-fertilizing: Too much nitrogen = lush leaves, fewer flowers/pods. Use a low-nitrogen fertilizer.
- Extreme heat/drought: Mulch and water deeply (but not excessively) to encourage blooms.
Are cleome seed pods safe for kids or pets?
Generally yes—cleome pods are non-toxic to humans and pets. However, the explosive seed dispersal can startle kids (or cats!). For a fun activity, let kids collect dried pods and pop them safely in a bowl (supervised, of course!). Always monitor pets nibbling on garden plants.
Wrapping up and next steps
Cleome seed pods bring striking visual drama to your garden with their spiky, architectural charm—and the best part? They thrive with minimal fuss!
Whether you're drawn to their bold vertical presence or their low-maintenance appeal, these plants are a game-changer for adding height and texture to any outdoor space. 🌿✨
Ready to transform your garden? Start by planting a few cleome seeds this season and watch your space come alive with effortless elegance. Happy gardening! 🌱