Flowers
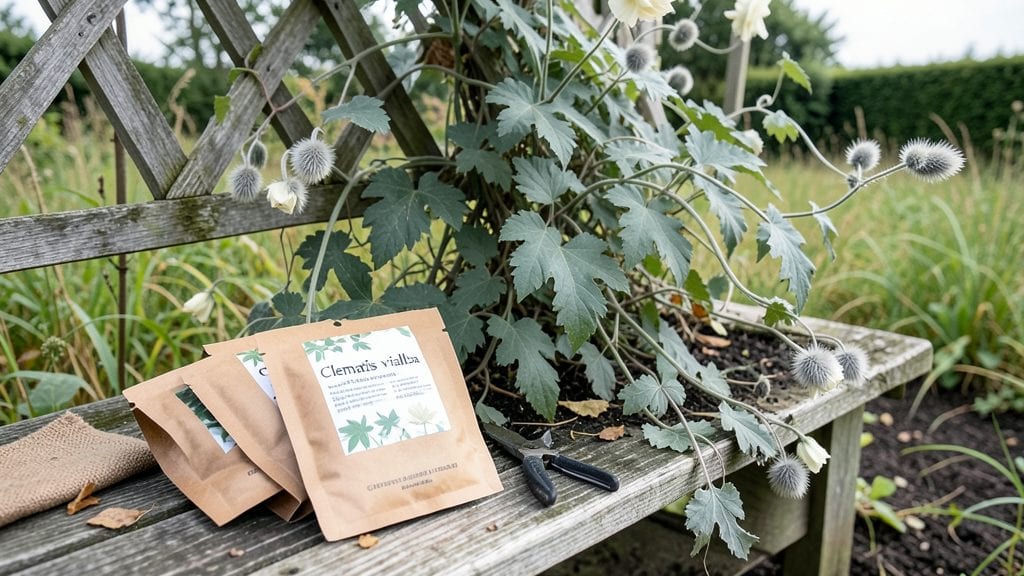
Cold stratification transforms tough climbing flower seeds into vibrant spring blooms that climb your trellis like a dream. 🌱 I’ve struggled with seeds that refused to sprout until I cracked the timing—now my morning glories and sweet peas emerge strong every year.
The secret lies in mimicking winter’s chill before planting, a process that unlocks germination rates most gardeners miss.
You’ll need a few simple supplies: paper towels or a damp paper towel sandwich, a sealed plastic bag, and your freezer. Most climbing seeds—clematis, sweet peas, and morning glories—need 4-8 weeks of cold treatment, but timing varies by variety.
After stratification, sow seeds in well-draining soil and watch them race toward sunlight, producing lush vines by late spring.
The payoff is worth the patience: fragrant sweet peas cascading over arches, clematis with velvety blooms reaching for trellises, and morning glories unfurling daily like nature’s own clock. Each vine becomes a living tapestry, turning fences and arbors into vertical gardens that bloom for weeks.
Troubleshooting early? Keep soil moist but not soggy—root rot is the silent killer of young climbers.
This method works for any climate, though southern gardeners may skip stratification for heat-loving varieties like passionflowers. The key is consistency: mark your calendar, set reminders, and soon you’ll have a trellis full of color that neighbors will envy. Ready to grow upward?
📚 In This Guide
- What you need
- Instructions
- Tips and common mistakes
- Wrapping up and next steps
What you need
- ● Climbing flower seeds – Choose fast-growing varieties like Clematis, Morning Glory, or Sweet Peas. Buy 1-2 seed packets (50-100 seeds each) for optimal variety.
- ● Cold stratification setup: A ziplock bag or small container (e.g., plastic cup or seed tray).
- ● Moistened paper towels or peat moss (enough to lightly cover seeds).
- ● Refrigerator (set to 34–40°F (1–4°C) for stratification).
- ● Planting containers – 4–6 inch pots with drainage holes (1-2 per seedling) or a seed-starting tray.
- ● Well-draining potting mix – 2–3 gallons (look for a blend labeled for seedlings or seed-starting).
- ● Grow lights or sunny windowsill – Ensure 6–8 hours of light daily post-stratification.
- ● Misting bottle – For gentle watering to keep soil moist but not soggy.
- ● Hand trowel – For transplanting seedlings (small, 3–4 inch blade works best).
- ● Plant labels – To track varieties and planting dates.
- ○ Humidity dome – Helps retain moisture during germination (optional but helpful for slow starters).
- ● Fertilizer – A balanced, water-soluble fertilizer (e.g., 10-10-10) for post-germination growth (use sparingly!).
- ● Garden twine or trellis – For supporting seedlings as they grow (even small stakes work!).
Step-by-Step instructions for cold stratifying climbing flower seeds
Cold stratification mimics winter's natural process—here's how to awaken seeds for bold spring climbers.
🌱 Step 1: Prepare Seeds and Moisten the Growing Medium
Fill a shallow container with 2-3 inches of moistened peat moss or coconut coir—these materials retain moisture while allowing airflow. I like to mix in a small handful of perlite to prevent compaction. Sprinkle the seeds evenly across the surface, spacing them 1 inch apart. Press them lightly into the medium so they make contact but don't bury them—most climbing flower seeds need light to germinate.
Mist the container gently until the medium feels like a damp sponge. Overwatering now causes rot, but too little moisture halts stratification. Place a plastic bag loosely over the container to maintain humidity without trapping excess heat. Check weekly—if the medium dries out, mist again. This step ensures seeds stay hydrated while cold exposure does its work.
❄️ Step 2: Stratify in the Refrigerator for 4-12 Weeks
Store the container in your refrigerator's crisping drawer, where temperatures hover around 35-45°F. Most climbing flower seeds need 6-12 weeks of cold treatment—check your seed packet for specifics. I mark the start date on the bag so I don't forget. Avoid freezing temperatures; seeds can survive brief cold snaps but prolonged freezing kills them.
During stratification, seeds undergo biochemical changes that break dormancy. You won't see growth yet—this is the waiting phase. I like to check weekly for condensation inside the bag. If you see frost forming, move the container to a slightly warmer fridge section. Patience here pays off with stronger, more vigorous seedlings later.
☀️ Step 3: Move to Warmth and Light for Germination
Once the cold period ends, transfer the container to a warm, bright spot—a sunny windowsill or under grow lights works best. Keep the medium consistently moist but not soggy. Germination typically begins in 7-21 days, depending on the seed type. You'll see tiny green shoots push through the surface first—this is your cue to remove the plastic bag and increase airflow.
Place a humidity dome over the container if seedlings appear leggy or weak. Leggy growth means insufficient light—adjust your setup immediately. Once first true leaves (not the initial seed leaves) appear, you can transplant seedlings into individual pots. This step is where seeds finally reward your patience with visible progress.
🪴 Step 4: Transplant Seedlings to Individual Pots
Fill 3-inch pots with a light, well-draining potting mix. Gently remove each seedling using a small spoon or your fingers, taking care not to damage the delicate roots. Plant each seedling 1 inch deep, firming the soil around the base to eliminate air pockets. Water lightly after transplanting to settle the soil.
Place the pots under bright, indirect light for the first week to help seedlings adjust. After that, gradually introduce them to full sun over 5-7 days. Hardening off prevents shock and ensures strong, resilient plants ready for outdoor planting. This is where your cold-stratified seeds gain their legendary vigor compared to direct-sown varieties.
Tips & tricks for perfect cold stratification of climbing flower seeds
Mastering cold stratification transforms mediocre germination rates into reliable, vigorous growth—here's how to optimize every stage.
The Moisture Balance: In Step 1, aim for a medium that feels like a wrung-out sponge—not dripping wet, but never bone-dry. I test this by squeezing a handful: one drop should form, but not a stream. Overwatering triggers fungal growth, while too little moisture halts the stratification process entirely. For extra insurance, I place a small dish of water near the container to maintain humidity without direct contact.
Temperature Precision: The 35-45°F range in Step 2 is critical—any colder risks freezing damage, while warmer temperatures won't trigger dormancy. Most refrigerators fluctuate, so I monitor the crisping drawer weekly. If condensation forms on the bag, your seeds are getting too cold; move to a slightly warmer section. For seeds requiring longer stratification (like clematis), I extend the 6-12 week window to 14 weeks—just track individual varieties separately.
Light Exposure Secret: Most climbing flower seeds need light to germinate, which is why we don't bury them in Step 1. However, the plastic bag creates a light barrier. I solve this by using a semi-transparent bag or making small holes in the bag to allow indirect light penetration. This prevents leggy seedlings while still maintaining humidity. Once you see those first green shoots in Step 3, you'll know you've struck the perfect balance.
Transplant Timing: In Step 4, wait until you see first true leaves—not the initial seed leaves—before transplanting. These true leaves indicate the seedling has established its root system and is ready for more space. I also recommend hardening off seedlings gradually over 5-7 days by placing them outside in progressively longer intervals. This mimics natural conditions and prevents transplant shock that could derail all your stratification efforts.
Pro Tips for Climbing Flower Seeds
- Mastering cold stratification transforms mediocre germination rates into reliable, vigorous growth—here's how to optimize every stage.
- The Moisture Balance: In Step 1, aim for a medium that feels like a wrung-out sponge—not dripping wet, but never bone-dry.
- Temperature Precision: The 35-45°F range in Step 2 is critical—any colder risks freezing damage, while warmer temperatures won't trigger dormancy.
Frequently asked questions
Got questions about growing climbing flower seeds?
You’re not alone! Here are answers to the most common queries to help you succeed with your vibrant spring blooms.
What is cold stratification, and why do climbing flower seeds need it?
Cold stratification mimics winter conditions, breaking seed dormancy for better germination. Many climbing flowers—like clematis, morning glories, or sweet peas—require this process to sprout reliably. Without it, seeds may stay dormant or grow weakly. Think of it as a natural "wake-up call" for your seeds!
How long should I cold stratify climbing flower seeds?
Most climbing flower seeds need 4–12 weeks in the fridge (34–40°F). Check the seed packet for specifics—some, like sweet peas, thrive with 6–8 weeks, while others (e.g., wisteria) may need up to 3 months. Place them in a sealed bag with damp paper towels or sphagnum moss, then store in the fridge’s crisper drawer.
Can I skip cold stratification if I plant seeds outdoors in fall?
Yes! Planting seeds outdoors in late fall or early winter (before hard frosts) lets nature handle stratification. Just cover them lightly with soil or mulch. This works well for hardy climbers like honeysuckle or some clematis varieties. Monitor moisture—soil should stay damp but not soggy.
What if my seeds don’t germinate after stratification?
Don’t panic! Try these fixes:
- Check moisture: Seeds need consistent dampness (not waterlogged). Use a spray bottle to keep soil lightly moist.
- Test viability: Soak seeds in warm water overnight. If some float, they’re likely non-viable.
- Adjust light/temp: Most climbing seeds germinate best at 65–75°F with indirect light. A heat mat can help if your home runs cool.
- Try scarification: For tough seed coats, lightly sandpaper or nick them before replanting.
Are there climbing flowers that don’t need cold stratification?
Some fast-growing climbers, like morning glories or black-eyed Susans, germinate fine without stratification. Tropical climbers (e.g., passionflowers) also skip this step. Always check the seed packet or a reliable source—many modern hybrids are bred for easier growing.
Pro Tip:
Label your seeds and stratification dates! Misplaced seeds or forgotten timelines can lead to wasted effort. Use a small chalkboard or sticky notes near your fridge. A little organization goes a long way for spring success!
Wrapping up and next steps
Growing climbing flowers from seeds is a rewarding journey that brings vibrant color and life to your garden! 🌸 By mastering the cold stratification timeline, you’ll set your seeds up for success, ensuring stunning spring blooms that climb trellises, fences, or arbors with ease.
Whether you’re a seasoned gardener or just starting out, this process is your secret to effortless, lush growth—so grab those seeds and get ready to transform your outdoor space!
Ready to take the next step? Start your stratification process now and watch your garden come alive with cascading beauty! 🌱 For extra tips, check out our seed-starting guide to maximize your success.