Vegetables
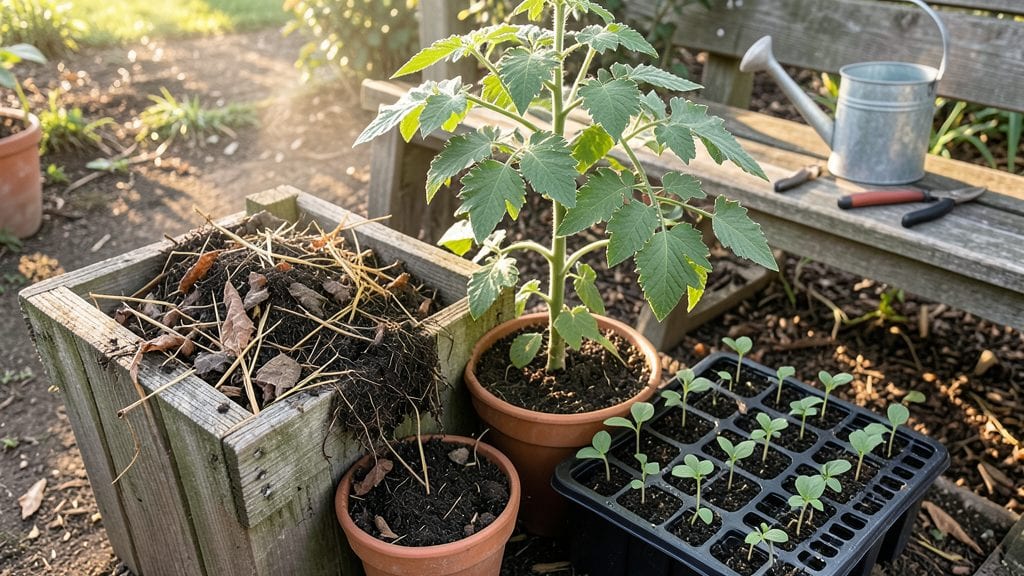
Using compost for tomato seeds gives you seedlings that outpace store-bought plants by weeks. 🌱 I learned the hard way that regular potting mix leaves seeds struggling—until I swapped in a homemade compost blend.
The difference is night and day: faster germination, sturdier stems, and leaves that stay vibrant instead of yellowing.
The right mix is simple: combine equal parts compost with a light amendment like perlite or coconut coir to prevent compaction. Store-bought compost works in a pinch, but homemade—especially well-aged—packs more microbial life that seeds crave.
Too much nitrogen-rich compost? Dilute it with vermiculite to avoid leggy, weak seedlings that flop over.
You’ll know it’s working when seedlings emerge with bold green cotyledons and roots that fill the container within 3-4 weeks. The soil stays moist without soggy spots, and the scent is rich and earthy—not musty or chemical. Avoid overwatering; compost holds moisture, but roots need air too.
This method works for both early indoor starts and direct-sown seeds in warm climates. The same principles apply whether you’re growing heirlooms or hybrids—just adjust the compost-to-soil ratio based on how rich your compost is. Ready to give your tomato seeds the head start they deserve?
📚 In This Guide
- What you need
- Instructions
- Tips and common mistakes
- Wrapping up and next steps
What you need
- ● Compost: 3-5 gallons of well-aged, finished compost (dark brown/black, crumbly, and earthy-smelling). Avoid fresh manure or undecomposed materials.
- ● Seed-starting mix: 2-3 gallons of sterile, peat-free potting soil (or coco coir for a sustainable option). Avoid garden soil—it may contain pathogens.
- ● Tomato seeds: High-quality, heirloom, or hybrid seeds (check seed packets for germination rates). Aim for 3-5 seeds per cell if using trays.
- ● Containers: Seed trays with drainage holes (1020-cell trays work well), OR
- ● Small pots (3-4 inches deep) with drainage holes.
- ● Watering can or spray bottle: With a fine mist nozzle to avoid disturbing seeds.
- ● Plastic wrap or humidity dome: To retain moisture while seeds germinate.
- ○ Gloves: Optional but helpful for handling compost and soil.
- ● Small hand trowel or spoon: For mixing compost and soil evenly.
- ● Labeling tags: To mark seed varieties and planting dates.
- ● Grow lights or sunny windowsill: Tomato seeds need 6-8 hours of light daily after germination.
- ○ Heat mat (optional): Speeds up germination if your space is cool (<65°F/18°C).
- ○ Fertilizer (optional):
- ● Fish emulsion (1-2 tbsp per gallon of water) or seaweed extract for a nutrient boost after sprouting.
- ● Avoid high-nitrogen fertilizers until seedlings develop true leaves (2nd set).
Step-by-Step guide to using compost for tomato seedlings
Here's how to transform your garden waste into the perfect nutrient boost for tomato seeds.
🌱 Step 1: Prepare Your Compost for Seed Starting
Use finished compost—not fresh manure or half-decomposed material—that looks like dark, crumbly soil with no recognizable chunks. I sift mine through a ¼-inch mesh screen to remove large particles that could disrupt seed placement. This ensures a fine, even texture that seeds can easily push through during germination.
Mix your compost with sterile seed-starting mix in a 1:3 ratio (1 part compost to 3 parts seed mix). The seed mix provides structure while the compost delivers concentrated nutrients. For 4 servings, blend 1 cup compost with 3 cups seed-starting mix. This balance prevents compaction while giving seedlings the nutrient head start they crave.
💧 Step 2: Moisten the Mix Before Planting
Compost holds moisture differently than pure seed mix, so I water the blend 24 hours before sowing. Use a spray bottle to mist until the mix feels like a damp sponge—not dripping, but uniformly moist. This pre-hydration prevents seeds from drying out during the critical first days of germination.
Check moisture by squeezing a handful: it should hold together briefly but not leave watery streaks. If it crumbles, add more water. If it sticks together, let it dry slightly. The goal is consistent moisture without saturation, which can suffocate seeds.
☀️ Step 3: Sow Seeds in the Nutrient-Rich Mix
Fill your seed trays or pots with the moistened mix, pressing down lightly to eliminate air pockets. Plant tomato seeds ¼ inch deep—just below the seed's diameter—using a toothpick or pencil for precision. I like to place 2 seeds per cell since tomatoes germinate unevenly, but thin to the strongest seedling later.
Cover the tray with a clear plastic dome or plastic wrap to retain warmth and humidity. Place it in a warm spot (75-85°F)—a seedling heat mat works wonders. You'll see first sprouts in 5-10 days, but keep the dome off once 50% of seeds germinate to prevent fungal issues.
🌿 Step 4: Fertilize Lightly After True Leaves Appear
When seedlings develop their first true leaves (not the initial cotyledons), switch to a half-strength liquid fertilizer like fish emulsion or seaweed extract. I dilute it to ¼ strength to avoid burning tender roots. Apply directly to the soil, not the leaves, and water lightly afterward to distribute nutrients evenly.
This is where compost's slow-release magic shines. The seedlings will grow sturdier stems and darker green leaves within a week, signaling they're absorbing nutrients efficiently. Avoid over-fertilizing—tomato seedlings can't handle high salts early on.
⏰ Step 5: Harden Off and Transplant with Confidence
Two weeks before your last frost, begin hardening off seedlings by placing them outside in partial shade for 1-2 hours daily. Gradually increase exposure over 10-14 days, watching for strong, upright growth—a sign they're ready for the garden. The compost's nutrients ensure they'll bounce back from transplant shock.
When transplanting, bury seedlings deeper than their original depth (up to the first true leaves). This encourages root development along the buried stem. Water deeply at the base, not overhead, to preserve the compost's moisture-retaining properties.
Tips & tricks for perfect compost-based tomato seedlings
These game-changing strategies will help you maximize the benefits of compost while avoiding common pitfalls that sabotage seedling growth.
Compost Quality is Everything: The difference between thriving seedlings and stunted growth often comes down to compost quality. In Step 1, when sifting through your ¼-inch mesh screen, look for a uniform texture without any gritty particles. I've found that compost with visible chunks can disrupt seed placement and create air pockets that prevent even moisture distribution. For best results, use compost that's been fully decomposed for at least 6 months—it should smell earthy, not pungent.
Moisture Balance is Critical: The 24-hour pre-hydration in Step 2 is non-negotiable for seed germination. What nobody tells you is that compost can be tricky to judge—it often feels drier than it appears. After misting, press your thumb into the mix: if it springs back slowly (not instantly), you've achieved that perfect "damp sponge" consistency. Too wet, and you risk suffocating seeds; too dry, and they'll fail to germinate. I keep a spray bottle handy to make final adjustments right before sowing.
Temperature Control Makes All the Difference: While the instructions specify a warm spot (75-85°F), I've learned that maintaining consistent warmth is more important than hitting the exact range. In Step 3, I use a small seedling heat mat under my trays to create a stable environment. The key is avoiding temperature swings—even a 10°F drop can shock delicate seedlings. If your home runs cool, consider placing the trays on top of your refrigerator (not inside) for that extra warmth without risking overheating.
Fertilizer Timing is an Art: The instructions mention applying half-strength liquid fertilizer after true leaves appear, but the real secret lies in the consistency. In Step 4, I've found that applying fertilizer every 7-10 days (rather than just once) gives seedlings a steady nutrient supply. The compost provides a base, but young seedlings need that extra boost to develop strong stems. Just remember: always water lightly after fertilizing to prevent salt buildup that can damage tender roots.
Pro Tips for Compost For Tomato Seeds
- These game-changing strategies will help you maximize the benefits of compost while avoiding common pitfalls that sabotage seedling growth.
- Compost Quality is Everything: The difference between thriving seedlings and stunted growth often comes down to compost quality.
- Moisture Balance is Critical: The 24-hour pre-hydration in Step 2 is non-negotiable for seed germination.
Frequently asked questions
Got questions about using compost for tomato seeds?
You’re not alone! Here are answers to the most common queries to help you grow thriving tomato plants from the start.
Can I use any compost for tomato seeds?
Not all compost is equal! Use well-aged, nutrient-rich compost (like homemade or store-bought organic compost) with a balanced mix of nitrogen, phosphorus, and potassium. Avoid fresh manure or compost with high salt content, as it can harm delicate seeds. Aim for a dark, crumbly texture with a mild earthy smell.
How long before compost is ready to use for seeds?
Compost should be fully decomposed—at least 3–6 months old—to avoid overheating or harmful pathogens. Test it by squeezing a handful: if it holds shape but crumbles easily, it’s ready! For faster results, mix it with sterilized potting soil (50/50 ratio) to improve aeration and drainage.
What if my compost smells bad or has mold?
Bad smells (rotten eggs, ammonia) or mold mean your compost isn’t fully broken down. Fix it by:
- Adding dry materials (straw, shredded leaves) to balance moisture.
- Turning the pile to aerate it.
- Using a small amount (10–20%) in seed-starting mix to dilute contaminants.
Do tomato seeds need compost directly, or should I mix it with soil?
For seeds, compost alone is too dense—always mix it with light, sterile potting soil (e.g., 1 part compost to 3 parts soil). This prevents compaction and improves drainage. Once seedlings sprout, you can increase the compost ratio to 30–50% for stronger plants.
Can I reuse compost from last year’s tomato plants?
Yes, but sterilize it first to kill pests/diseases (like blight or nematodes). Spread it in the sun for a week or bake it at 180°F (82°C) for 30 minutes. Avoid reusing compost from diseased plants without treatment—prevention is key! Add a handful of neem cake or mycorrhizal fungi to boost immunity.
Wrapping up and next steps
Growing tomato seeds in nutrient-rich compost is a rewarding way to kickstart your gardening journey! 🌱 By providing the right balance of organic matter, moisture, and warmth, you’ll give your seedlings the strongest foundation for healthy growth.
Whether you’re a beginner or a seasoned gardener, this simple method ensures your tomatoes thrive from the very first sprout.
Now that you’re armed with the knowledge, it’s time to roll up your sleeves and get planting! Start small—test your compost mix, monitor your seeds, and adjust as needed. Before you know it, you’ll be harvesting juicy, homegrown tomatoes straight from your compost-powered garden. Happy growing! 🍅✨