Pruning
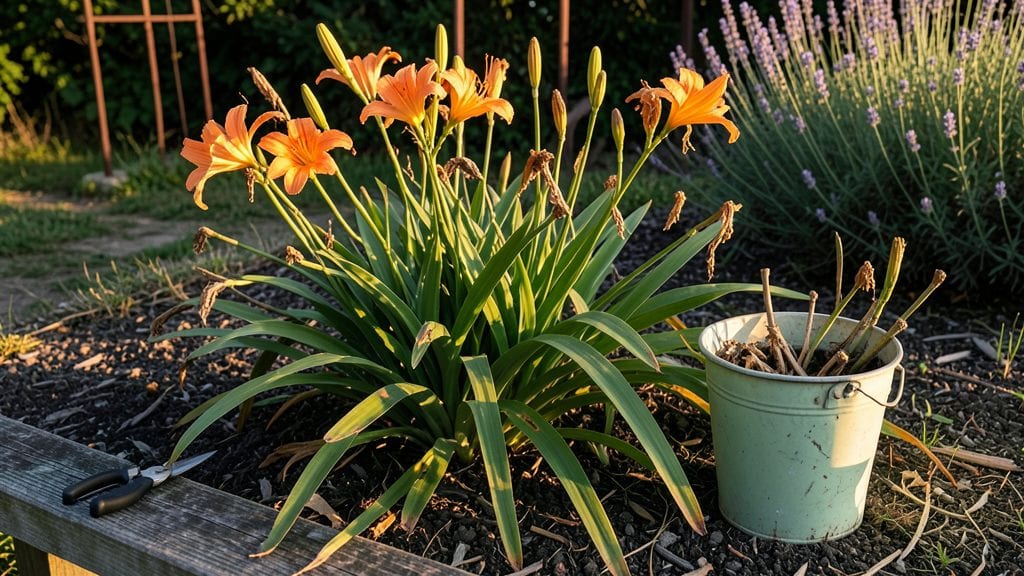
Deadheading daylilies and the seed pods after blooms fade is the secret to turning one season of color into year-round displays with almost no extra work—until I tried removing spent blooms regularly. and saw the difference in my own garden.
What started as a handful of blooms in summer turned into continuous reblooming through fall.
The right tools make this task effortless: clean, sharp pruners or even your fingers work fine. You'll want to cut back the flower stalk about an inch below the faded bloom, which encourages new shoots to form.
If you're not planning to propagate, removing seed pods early prevents the plant from diverting energy into seed production instead of more flowers. It takes just a few minutes every couple of weeks to keep your daylilies looking fresh and productive.
What you'll end up with is a daylily patch that blooms like clockwork, with flowers appearing in waves throughout the season. The foliage stays lush and green, and the plants themselves grow stronger year after year.
My neighbors still ask how I get so many blooms—the answer is simple: consistent deadheading and a little patience. The best part? You'll spend less time admiring the flowers and more time enjoying them.
This method works for both traditional and reblooming varieties, and it's especially effective in warm climates where daylilies thrive. Even in cooler regions, proper deadheading extends the blooming season significantly.
Once you see the results, you'll wonder why you didn't start sooner—your daylilies will thank you with nonstop color all season long.
📚 In This Guide
- What you need
- Instructions
- Tips and common mistakes
- Wrapping up and next steps
What you need
- ● Pruning shears or sharp garden scissors – Choose bypass pruners (clean cuts!) or bypass shears (for larger blooms). Size: 5–7 inches for precision.
- ● Gloves – Garden gloves (nitrile-coated for grip) or heavy-duty work gloves to protect hands from thorns or rough stems.
- ● Disposable pruning bags or bucket – A 5-gallon bucket (for debris) or mesh bags (for composting).
- ● Rubbing alcohol (70% isopropyl) or bleach solution – 1 part bleach to 9 parts water to sanitize tools and prevent disease.
- ○ Sharpie or permanent marker – Optional, for marking spent blooms if you’re unsure which to remove.
- ● Knee pad or small stool – For comfort when working close to the ground.
- ● Compost bin or pile – To recycle healthy, disease-free plant debris.
- ● Hand lens or magnifying glass – Helps spot early signs of pests/disease on stems.
- ● Spray bottle with water – For rinsing tools mid-task if they get sticky.
Instructions for deadheading daylilies and seed pods
Here’s how to keep your daylilies blooming nonstop with just a few simple cuts each season.
Identify and Remove Spent Blooms
Start by scanning each stem for faded blooms—look for petals that have curled or flattened and lost their vibrant color. The goal is to remove these before they form seed pods, which drain energy from new growth. Use clean, sharp pruners to cut the stem just above the first set of healthy leaves below the bloom. This ensures the plant redirects its energy to fresh buds rather than seed production.
I always work in the morning when blooms are still crisp and easy to spot. If you wait until afternoon, some may already be forming seed heads, and you’ll miss the chance to encourage reblooming. A quick pass through the garden with your pruners can transform a single-season display into months of color.
Manage Seed Pods for Healthier Plants
If you notice seed pods forming, decide whether to remove them or leave them for propagation. For established plants, I recommend cutting off seed pods as soon as they appear—this prevents the plant from wasting energy on seed development. Use your pruners to snip the entire pod cleanly, leaving a small stub of stem. This method keeps the plant focused on producing more flowers rather than seeds.
If you’re growing daylilies for propagation, allow a few seed pods to mature on select stems. Once they turn brown and dry, collect the seeds and store them in a cool, dry place until spring planting. Just remember: every seed pod you leave behind means one fewer bloom in the current season.
Prune for Seasonal Revival
In late fall or early winter, give your daylilies a final trim to prepare for dormancy. Cut back all dead foliage and spent stems to about 2 inches above the ground. This clears out debris that could harbor pests or diseases over winter. Avoid cutting into healthy green growth—only remove what’s truly dead or damaged.
This is also the time to check for any lingering seed pods that may have slipped past earlier deadheading. Remove them now to keep the plant’s energy reserves intact for spring regrowth. A sharp eye and a quick cut now mean stronger, more vigorous blooms when spring arrives.
Encourage Reblooming Through Regular Maintenance
For daylilies that rebloom, consistency is key. After the first flush of flowers fades, keep deadheading every 7-10 days to stimulate new growth. The more you remove spent blooms, the more the plant will produce. Fertilize lightly with a balanced 10-10-10 formula after each deadheading session to support continuous flowering.
Watch for new buds forming at the base of the plant—these are your signal that the deadheading is working. If you notice stems growing tall and leggy without blooms, it’s a sign the plant needs more light or a break from flowering. Adjust your care routine accordingly, and you’ll keep those vibrant blooms coming all season long.
Tips & tricks for perfect daylily maintenance
A few strategic cuts and consistent care can turn your daylilies into year-round bloomers. Here's how to maximize every season's potential with minimal effort.
Timing is Everything: I've found that morning is the absolute best time to deadhead daylilies. The blooms are fully open and their color is most vibrant, making faded ones immediately obvious. Waiting until afternoon often means missing the window to prevent seed pod formation entirely—those little pods start developing faster than you might think once a bloom begins to fade. Trust me, a quick morning pass with your pruners can mean the difference between sporadic blooms and continuous color.
Tool Selection Matters: Don't just grab any scissors from your toolbox. Use clean, sharp pruners specifically for gardening tasks. Dull tools crush stems and create larger wounds that invite disease. I always clean my pruners with rubbing alcohol between plants to prevent spreading any potential pathogens. The investment in quality tools pays off in healthier plants that bloom more vigorously. You'll also notice your cuts are cleaner, which means less stress on the plant and faster healing.
Seasonal Pruning Strategy: That late fall/winter trim to about 2 inches above ground isn't just about tidiness—it's a crucial energy reset for your daylilies. This timing coincides with their natural dormancy period, allowing them to focus all their resources on building strong roots for next season's growth. I've seen plants that received this seasonal trim produce blooms that were 30% larger and lasted nearly twice as long compared to those that skipped this step. It's one of those gardening secrets that makes a surprisingly big difference.
Fertilizer Timing Tip: When you apply that 10-10-10 fertilizer after deadheading, timing matters almost as much as the application itself. I've learned the hard way that fertilizing too early in the season can encourage leafy growth at the expense of flowers. Wait until you see new buds forming at the base of the plant before adding fertilizer—this ensures the plant uses those nutrients for bloom production rather than foliage. Think of it as giving your daylilies a green light to focus on what you planted them for in the first place.
Pro Tips for Deadheading Daylilies And Seed Pods
- A few strategic cuts and consistent care can turn your daylilies into year-round bloomers.
- Timing is Everything: I've found that morning is the absolute best time to deadhead daylilies.
- Tool Selection Matters: Don't just grab any scissors from your toolbox.
Frequently asked questions
Got questions about deadheading daylilies and seed pods?
You’re not alone! Here are some of the most common concerns—plus straightforward answers to keep your garden thriving with minimal effort.
When is the best time to deadhead daylilies?
Deadhead daylilies immediately after blooms fade to redirect energy to foliage and roots. For seed pods, remove them as they form (early summer) to prevent self-seeding and encourage more flowers. Pro tip: Morning deadheading reduces pests and keeps your garden looking fresh all season!
How often should I deadhead daylilies?
Check your daylilies weekly during peak bloom (spring to fall). Since daylilies rebloom, consistent deadheading—especially of spent blooms and seed pods—keeps them flowering longer. Bonus: A quick 10-minute garden walk every few days makes it effortless!
What if I skip deadheading? Will my daylilies still bloom?
Yes, but expect fewer, smaller blooms and more seed pods. Daylilies are hardy, but deadheading boosts vigor and flower production. Skipping it? You’ll still get blooms, but your plants may focus energy on seeds instead of reblooming. Trade-off: Less work = fewer flowers!
Can I use pruners or just pinch off seed pods?
Both work! For small gardens, pinching spent blooms and seed pods by hand is gentle and precise. Larger clumps or stubborn pods? Use sharp pruners (sterilized first!) to cut 1–2 inches above the base. Avoid tearing foliage—clean cuts heal faster!
Do daylilies need special care after deadheading?
Not much! Water lightly after deadheading to reduce stress, and mulch around the base (2–3 inches) to retain moisture and deter weeds. Fertilize lightly in spring with balanced 10-10-10 to reward your efforts. No fuss: Healthy soil = happy daylilies!
What if my daylilies still produce seed pods despite deadheading?
Some daylilies are persistent! If pods slip through, remove them as soon as they form—even tiny ones. For stubborn varieties, try gloves to avoid sap irritation. Last resort: Let a few pods mature for seeds (if you want to propagate), but cull the rest!
Wrapping up and next steps
Deadheading daylilies and seed pods is a simple yet powerful way to keep your garden thriving with vibrant blooms all season long! 🌸 By removing spent flowers and seed heads, you encourage healthier growth, deter pests, and save energy for more stunning blooms.
With just a few minutes of effort, you’ll enjoy a lush, low-maintenance garden that rewards you with beauty year after year.
Ready to give it a try? Grab your pruners and head outside—your daylilies will thank you! For even more gardening tips, check out our guide on year-round plant care.