Lawn
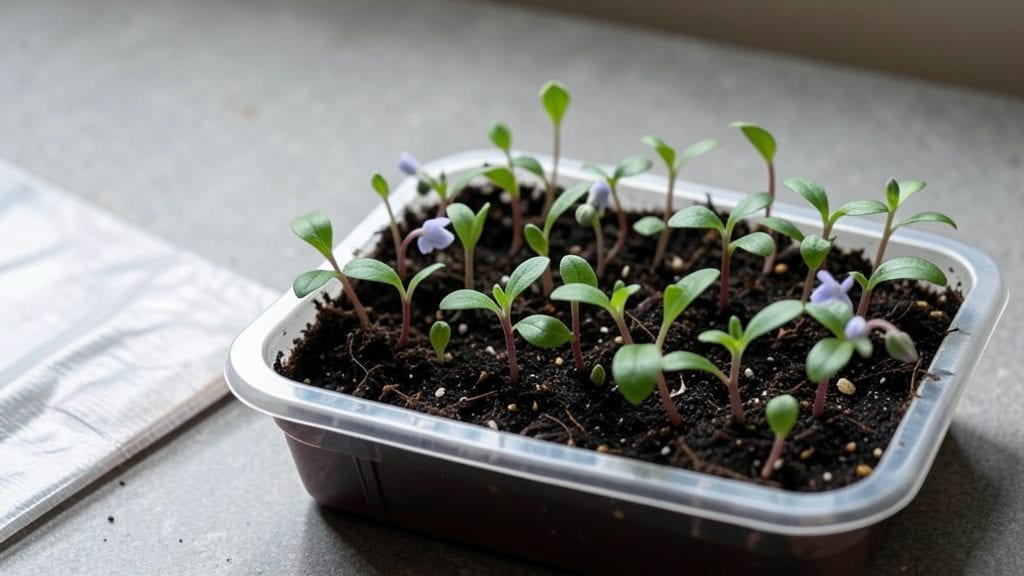
Deep seed trays give seedlings the room to grow roots that reach deep into the soil before transplanting—something shallow trays just can’t match. 🌱 I’ve watched seedlings in regular trays develop weak, tangled roots that break when moved, but those in deep trays come out strong and ready to thrive in the ground.
The secret isn’t just depth; it’s how moisture stays balanced in those layers, encouraging roots to explore downward instead of circling in frustration.
You’ll need trays that are at least 6 inches deep—plastic or biodegradable—and a well-draining seed-starting mix that holds moisture without turning soggy. Fill them halfway, plant your seeds, and keep the soil consistently damp, not soaked.
The deeper roots mean less transplant shock, and you’ll see seedlings that pop out of the ground like they’ve been there all along. It’s the difference between fragile starts and plants that take off running.
Start with fast-growing plants like lettuce or radishes to see results in weeks, then move to slower growers like tomatoes or peppers. The key is patience—roots need time to strengthen, and the payoff is seedlings that handle transplanting like pros.
You’ll notice the difference in just a few weeks, with plants that don’t wilt or struggle once they hit the garden.
Plastic trays are durable and reusable, while biodegradable ones eliminate the need to disturb roots at all. Either way, you’re giving your seedlings the best possible start—one that turns weak starts into garden-ready powerhouses. Ready to try it?
📚 In This Guide
- What you need
- Instructions
- Tips and common mistakes
- Wrapping up and next steps
What you need
- ● Deep seed trays: 1-2 trays (6–12" deep, with drainage holes). Pro tip: Opt for trays with clear sides for monitoring root growth!
- ● Growing medium: Potting soil: 5–10 lbs (sterilized, seed-starting mix preferred)
- ● Perlite or vermiculite: 1–2 cups (for aeration and moisture retention)
- ○ Coco coir or peat moss: 1–2 cups (optional, for extra moisture control)
- ● Seeds: Your chosen variety (check seed packet for spacing/depth guidelines).
- ● Watering can or spray bottle: With a fine mist nozzle for gentle hydration.
- ● Trowel or small shovel: For layering soil and seeds.
- ● Plastic wrap or humidity dome: To retain moisture during germination.
- ● Grow lights or sunny windowsill: 6+ hours of light daily (LED grow lights are ideal).
- ● Bottom tray or saucer: To catch excess water and prevent messes.
- ● pH testing kit: Ensure your soil is in the ideal range (5.8–6.8 for most seeds).
- ● Heat mat (for warm-season seeds): Keeps soil cozy for faster germination.
- ● Labeling tags: Track seed varieties and planting dates.
- ● Fertilizer (low-dose): A balanced starter fertilizer (5-10-5 ratio) for later stages.
How to use deep seed trays for healthier seedlings
These trays aren’t just deeper—they’re a game-changer for moisture control and root strength.
🌱 Step 1: Prepare the Tray and Moisture Layers
Start by placing your deep seed tray on a stable, level surface. The extra depth lets you create moisture layers that keep roots hydrated without drowning them. At the bottom, add a 1-inch layer of coarse perlite or vermiculite—this creates airflow and prevents compaction at the roots.
Next, pour 2 inches of your seed-starting mix into the tray. Press it down lightly with your fingers until it’s firm but not packed. The goal is to eliminate air pockets while keeping the mix loose enough for tender roots to spread. Here’s the trick—I like to tap the tray gently on the table 3-4 times to settle everything evenly.
💧 Step 2: Sow Seeds and Control Moisture Zones
Sow your seeds according to the packet instructions, but with one key difference: space them ½ inch apart instead of the usual ¼ inch. The extra room lets roots explore without competing for moisture. Cover them with a ¼-inch layer of fresh seed-starting mix, then mist the surface lightly with water until it’s damp but not soggy.
Here’s where the deep tray shines: Add a 1-inch layer of moistened coconut coir or peat moss on top of the soil. This top layer stays consistently moist while allowing excess water to drain downward, creating a perfect humidity gradient. You’ll see seedlings emerge faster because the roots have steady access to moisture without sitting in wet soil.
☀️ Step 3: Maintain Even Moisture Without Overwatering
Place your tray in a warm, bright spot with indirect light for the first 3-5 days—this prevents seedlings from stretching toward light too quickly. Once sprouts appear, move them to 4-6 hours of direct light daily. The deep tray’s design means you’ll water every 4-5 days instead of daily, because the lower layers hold moisture longer.
Check moisture by pressing your finger 1 inch into the soil—if it feels dry, water gently at the base until moisture reaches 1 inch deep. Avoid wetting the leaves, as this can cause disease. You’ll know you’ve got the right balance when the top layer dries slightly between waterings, but the lower soil stays consistently damp.
🌿 Step 4: Transplant When Roots Fill the Depth
Seedlings are ready to transplant when their roots fill at least 2 inches of the tray’s depth. Gently remove them by sliding a small knife around the root ball—this preserves the moisture layers you’ve built. The deep tray’s structure means you won’t disturb delicate roots like you would with shallow cells.
Plant them in their final containers at the same depth they were growing in the tray. The extra root length you’ve developed means they’ll establish 2-3 weeks faster than seedlings from shallow trays. Water deeply after transplanting to settle the soil around the roots, and you’ll see new growth within 5-7 days.
Tips & tricks for perfect deep seed tray setups
Here's what I've learned after years of experimenting with these moisture magic trays—these little tricks make all the difference for your seedlings.
Layering Secret: The key to those perfect moisture layers is consistency in each step. When you add your 1-inch layer of coarse perlite or vermiculite at the bottom, sift it through a fine mesh screen first. This prevents clumping that can create dry pockets where roots won't grow. I also like to sprinkle a tiny bit of seed-starting mix with the perlite—just enough to help it settle evenly when you add the 2 inches of main mix. This creates a gradual transition that roots love to explore.
Seed Spacing Hack: That ½ inch spacing between seeds might seem generous, but trust me—it's worth it. I've found that using a toothpick to gently make small divots before planting helps maintain this spacing perfectly. For larger seeds, you can even use a popsicle stick to create deeper planting holes that prevent them from sinking too low in the moist top layer. The extra room gives roots room to branch out without competing for the same moisture.
Transplant Timing: Waiting until roots fill at least 2 inches of depth is crucial, but don't wait until you see roots growing out the bottom. That's a sign you've missed the perfect window. Instead, check by gently pressing on the sides of the tray—if the root ball feels firmly established but still has room to expand, that's your cue. I've found that seedlings transplanted at this stage establish 2-3 weeks faster because their roots are already strong and ready to spread into their new home.
Light Transition Tip: When moving seedlings from indirect light to 4-6 hours of direct light, do it gradually over 3-4 days. Start with just 1 hour of direct light on day one, then increase by 1 hour each day. This prevents that dreaded "leggy" growth where seedlings stretch desperately toward light. The deep tray's moisture layers actually help with this transition—roots have steady hydration while they adjust to stronger light conditions.
Pro Tips for Deep Seed Trays
- Here's what I've learned after years of experimenting with these moisture magic trays—these little tricks make all the difference for your seedlings.
- Layering Secret: The key to those perfect moisture layers is consistency in each step.
- Seed Spacing Hack: That ½ inch spacing between seeds might seem generous, but trust me—it's worth it.
Frequently asked questions
Got questions about deep seed trays?
You’re not alone! Here are some common concerns—and straightforward answers—to help you grow with confidence.
What’s the best depth for deep seed trays to promote root growth?
For most grasses and lawn seeds, aim for 4–6 inches deep. This depth balances moisture retention with aeration, encouraging strong root development without risking rot. Adjust slightly for delicate seeds (like fine fescue)—keep them in 3–4 inches of soil mix. Always include drainage holes to prevent waterlogging!
How long does it take to see results with deep seed trays?
Germination timelines vary by seed type, but you’ll typically spot sprouts in 7–21 days under ideal conditions (warmth, consistent moisture, and sunlight). For deep-rooted grasses like Kentucky bluegrass, roots may take 4–6 weeks to fully establish. Patience pays off—stronger roots mean a resilient lawn!
Do I need to water differently with deep seed trays?
Yes! Deep trays hold moisture longer, so water lightly but frequently—keep the top 1–2 inches of soil damp (not soggy). Use a spray nozzle to avoid displacing seeds. Once seedlings emerge, reduce frequency but increase depth to encourage deeper root penetration. Pro tip: Water in the early morning to minimize evaporation.
Can I reuse deep seed trays for multiple planting seasons?
Clean trays thoroughly between uses with a 10% bleach solution (or vinegar) to kill pathogens. Rinse well to remove residue. If trays show signs of warping or cracks, replace them—structural integrity matters for even moisture distribution. Store empty trays in a dry place to extend their lifespan.
What if my seeds aren’t germinating in deep trays?
Check these troubleshooters:
- Temperature: Most lawn seeds need 60–75°F soil temps. Use a seedling heat mat if needed.
- Moisture: Overwatering can suffocate seeds; underwatering dries them out. Aim for consistent dampness.
- Light: Place trays in bright, indirect light (or under grow lights) for 12+ hours daily.
- Seed viability: Test a few seeds in a damp paper towel—if they don’t sprout in 7–10 days, they may be old.
Wrapping up and next steps
Mastering the use of deep seed trays is your secret weapon for nurturing robust root systems and thriving lawns! 🌱 By controlling moisture layers and providing the right conditions, you’re setting your seeds up for success—whether you’re a seasoned gardener or just starting out.
The key is patience and consistency, so don’t hesitate to experiment with different setups to find what works best for your space and climate.
Ready to transform your lawn? Start small—try a single tray with your favorite grass seed, monitor progress, and scale up as you gain confidence. Happy planting! 🌿