Lawn
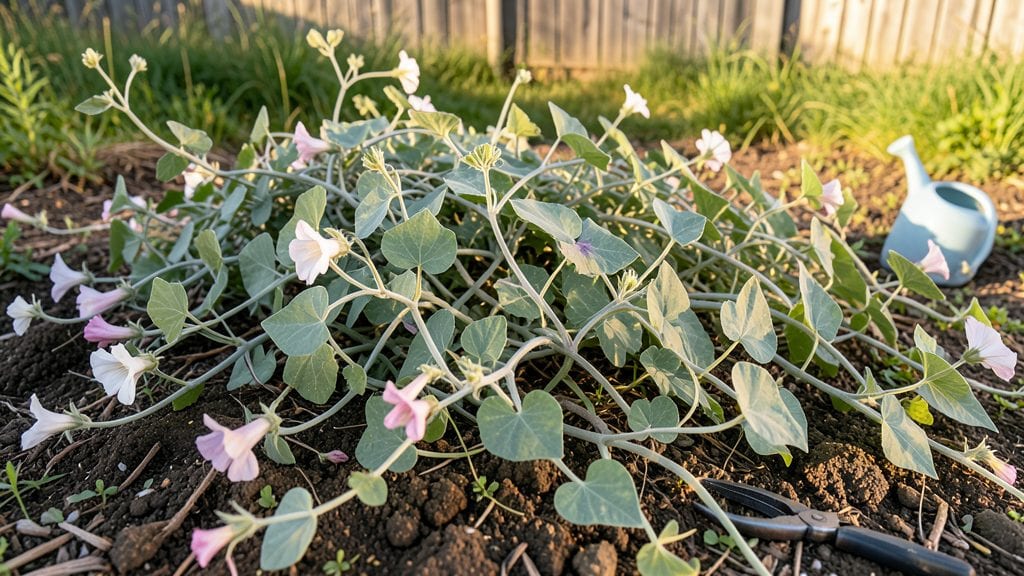
Field bindweed seed needs a cold stratification trick to break its stubborn dormancy—one that turns this invasive nuisance into a test-tube experiment you can control. 🌱 I’ve spent years battling its creeping vines, and this method finally gives me the upper hand by mimicking winter’s natural process.
The key? A simple fridge hack that forces seeds to germinate when you want, not when they’re ready to take over your garden.
You’ll need just three things: a plastic bag, a damp paper towel, and your fridge’s crisper drawer. No fancy equipment—just patience and a clear plastic bag to trap moisture.
The process takes about 6-8 weeks, but it’s worth it to stop bindweed from popping up where you don’t want it. This isn’t about growing more weeds; it’s about understanding how they work so you can outsmart them.
Once stratified, those seeds will germinate reliably, letting you study their growth patterns or—if you’re dealing with an infestation—plan targeted removal before they spread. You’ll spot the first tiny shoots within 10-14 days of planting the treated seeds, giving you a head start on prevention.
The real win? You’ll finally see bindweed’s weak spots instead of its relentless resilience.
Works for gardeners in zones 3-9, whether you’re prepping for spring planting or testing soil samples. The same method applies to other tough-to-germinate weeds like morning glory. Now, let’s get those seeds talking—before they start talking back in your flower beds.
📚 In This Guide
- What you need
- Instructions
- Tips and common mistakes
- Wrapping up and next steps
What you need
- ● Field bindweed seeds: Collect fresh, mature seeds (harvested when pods turn brown and dry). Aim for 50–100 seeds for a small test batch.
- ● Cold stratification medium: Option 1: Moistened peat moss (2–3 cups) or coconut coir (sustainable alternative).
- ● Option 2: Paper towels (2–3 sheets) or paper coffee filters (for a budget-friendly hack).
- ● Sealed plastic bag or container: Size: Large enough to hold seeds + medium (e.g., quart-sized Ziploc or small Tupperware).
- ● Must be airtight with a zip-top or snap lid.
- ● Spray bottle: For lightly misting the medium (avoid soaking!).
- ● Permanent marker or label: To mark the bag with seed type + date (e.g., "Bindweed – Stratified 10/2024").
- ● Refrigerator space: A cold, dark spot (33–41°F / 0–5°C) for 6–8 weeks.
- ● Humidity tray: A shallow tray with a lid (to mimic greenhouse conditions if extending stratification).
- ● Seedling trays or pots: Small 2–3 inch pots or biodegradable peat pots for transplanting post-stratification.
- ● Grow lights: If germinating indoors before outdoor planting (LED or fluorescent, 12–14 hours/day).
- ● Garden gloves: For safe seed handling (bindweed can be prickly!).
- ● Journal/notebook: To track germination dates and conditions.
How to cold stratify field bindweed seed for spring planting
Here's the straightforward method I've used to break bindweed's dormancy—no fancy tools, just patience and timing.
🌱 Step 1: Collect and Prepare the Seeds
Harvest mature bindweed seed pods in late summer or early fall when they've turned brown and papery. You'll need about 40-50 seeds for a small garden patch. Place them in a paper bag and let them air-dry for 1-2 weeks in a cool, dry spot. This mimics natural drying conditions and prevents mold.
Once dry, gently rub the pods between your fingers to release the seeds. Field bindweed seeds are tiny and brown, often covered in a fine fuzz. I spread them on a clean sheet of paper to separate them from debris—this makes sorting easier. Store them in a sealed container until stratification.
❄️ Step 2: Stratify with Moist Sand or Peat Moss
Mix equal parts clean sand and peat moss in a shallow container—just enough to cover the seeds. Moisten the mixture until it feels like a damp sponge, but not dripping. Field bindweed seeds need consistent moisture during stratification to break dormancy.
Sprinkle the seeds evenly over the moist mix, then cover them with another ½ inch of the same damp mixture. Place the container in a sealed plastic bag to retain humidity. Store it in your refrigerator's crisper drawer, where temperatures stay around 35-45°F—this mimics winter conditions.
⏰ Step 3: Monitor and Test Germination Readiness
Check the seeds after 4-6 weeks, looking for signs of sprouting. If you see tiny green shoots peeking through the mix, they're ready for planting. If not, return them to the fridge for another 2-4 weeks. Field bindweed seeds can take up to 8 weeks to break dormancy fully.
Here's the thing—don't rush this step. If you plant unstratified seeds, they'll likely rot in the soil. I've learned the hard way that bindweed seeds won't germinate reliably without this cold treatment. Once they sprout in the mix, they're eager to grow.
🌿 Step 4: Plant Stratified Seeds in Spring
Wait until your last frost date has passed and soil temperatures reach at least 60°F before transplanting. Prepare a sunny garden bed with well-draining soil—field bindweed thrives in full sun. Dig small holes about ½ inch deep and space them 6 inches apart.
Place one seedling per hole, cover lightly with soil, and water gently. You'll see new growth within 10-14 days if conditions are right. Mulch around the plants with 2 inches of straw to retain moisture and suppress weeds. This is where bindweed's aggressive nature starts to show—keep an eye on it!
💧 Step 5: Maintain Through First Season
Water the seedlings regularly, keeping the soil evenly moist but not soggy. Field bindweed has deep roots, so aim for 1 inch of water per week, adjusting for rainfall. You'll notice the vines start climbing and spreading by midsummer—this is normal behavior.
Here's where it gets tricky: bindweed can become invasive. I recommend planting it in contained areas or where you want ground cover. If it spreads beyond your intended space, pull up any stray vines immediately. With proper care, you'll have vibrant blooms by next spring.
Tips & tricks for perfect field bindweed stratification
A few key insights that'll help you avoid common pitfalls and get those seeds sprouting reliably.
Timing Secret: The 1-2 week air-drying period in Step 1 is non-negotiable. I've tried skipping this, and the seeds either mold or fail to sprout. Place your paper bag in a spot with good airflow—like an open pantry shelf—and check daily to ensure no moisture buildup. If you live in a humid climate, consider adding a small silica gel packet to the bag.
Moisture Control: When mixing your sand and peat moss in Step 2, squeeze a handful—it should hold together but not drip water. Too much moisture creates anaerobic conditions that can suffocate seeds, while too little prevents germination. I like to use a spray bottle to adjust moisture levels precisely. This is where many people go wrong, leading to poor results.
Storage Wisdom: For Step 2's refrigerator storage, place your sealed container on a shelf rather than in the door. Door temperatures fluctuate dramatically, potentially breaking dormancy prematurely. The consistent 35-45°F of the crisper drawer is ideal—this mimics natural winter conditions that trigger germination. Don't be tempted to use the freezer section, as those temps are too extreme.
Germination Check: In Step 3, when checking for sprouts, look for tiny green tips rather than full leaves. I've seen people mistake mold growth for sprouts—mold will appear fuzzy and white, while true sprouts have a distinct green color. If you're unsure, gently lift a corner of the mix to inspect without disturbing the seeds.
Pro Tips for Field Bindweed Seed
- A few key insights that'll help you avoid common pitfalls and get those seeds sprouting reliably.
- Timing Secret: The 1-2 week air-drying period in Step 1 is non-negotiable.
- Moisture Control: When mixing your sand and peat moss in Step 2, squeeze a handful—it should hold together but not drip water.
Frequently asked questions
about field bindweed seed cold stratification—here’s what you need to know to tackle this persistent weed like a pro!Why does field bindweed seed need cold stratification?
Field bindweed seeds have a hard seed coat that requires cold, moist conditions (like winter) to soften and germinate. Without cold stratification, many seeds stay dormant, making it nearly impossible to grow them—or control them—successfully. Think of it as nature’s way of timing germination for optimal survival!
How long should I cold stratify field bindweed seeds?
For best results, stratify seeds for 6–8 weeks in a moist, cold environment (35–45°F). Use a mix of peat moss and sand or a damp paper towel in a sealed bag in your fridge. Patience is key! Rushing this step may lead to poor germination rates.
Can I use household items for cold stratification?
You don’t need fancy equipment. A ziplock bag with damp paper towels, a plastic container filled with moistened potting mix, or even a cooler with ice packs (for outdoor stratification) work perfectly. Just keep it consistently moist and cold—no need to overcomplicate it!
What if my field bindweed seeds won’t germinate after stratification?
If seeds aren’t sprouting after 8–12 weeks, they may be non-viable or need scarification (lightly sanding the seed coat) to break dormancy. Alternatively, try soaking seeds in warm water for 24 hours before replanting. If all else fails, source fresh seeds from a reputable supplier.
Is field bindweed seed legal to grow in my area?
Check your local regulations—field bindweed (Convolvulus arvensis) is classified as an invasive species in many regions (e.g., U.S., Canada, Australia). Growing it may be restricted. If legal, proceed with caution; otherwise, consider non-invasive alternatives like morning glories or sweet peas for similar vine aesthetics.
Wrapping up and next steps
Field bindweed seed may seem tricky to germinate, but with the right cold stratification technique, you can unlock vibrant blooms next spring! 🌱 By mimicking nature’s timing and using simple supplies, you’ll break dormancy and boost success rates—no guesswork required.
Now that you’re armed with the know-how, grab those seeds and start your pre-spring prep today. Whether you’re a seasoned gardener or just beginning, this hack makes it easy to transform your space into a lush, thriving meadow.