Container Gardens
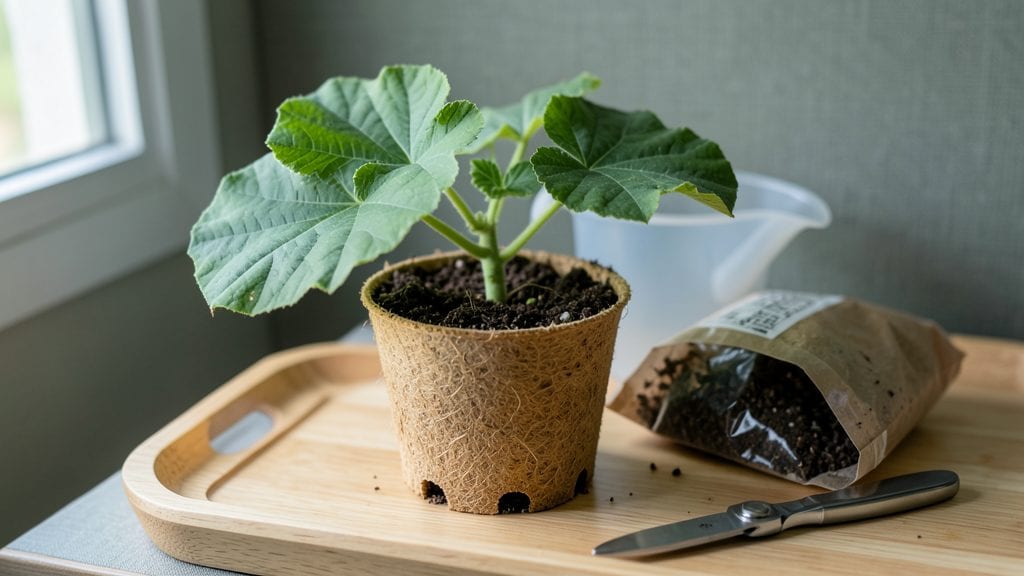
Growing pumpkin seeds indoors starts with the right variety—compact bush types like 'Jack Be Little' or 'Minnesota Golden' thrive in containers and won't overwhelm your space. I learned this the hard way after watching vining varieties strangle my apartment shelves.
The key is matching plant ambition to your light and room layout, and these small-fruit types deliver real harvests without the chaos.
You’ll need a 5-gallon container with drainage, a mix of potting soil and compost, and a sunny windowsill getting at least 6 hours of light daily.
Most people underestimate how fast seedlings stretch toward weak light—mine grew lanky and sad until I added a grow light for 12 hours a day.
The soil should stay moist but never soggy; stick your finger in to check before watering, and always use room-temperature water to avoid shocking the roots.
By week 6, you’ll see those first yellow-green tendrils unfurling, and with proper care, you can transplant them outside after the last frost. The real magic happens when those tiny flowers appear—each one a potential pumpkin, even in a 5-gallon pot.
The trick is patience; these plants take their time, but the payoff is worth it when you harvest your own mini pumpkins by late summer.
Fair warning: these aren’t your grandma’s giant pumpkins, but they’re perfect for pies, roasting, or even carving. If you’re in a small space or urban apartment, this method proves you don’t need a backyard to grow something extraordinary. Let’s get those seeds started!
📚 In This Guide
- What you need
- Instructions
- Tips and common mistakes
- Wrapping up and next steps
What you need
- ● Pumpkin seeds: 3–5 fresh, organic seeds (save seeds from store-bought pumpkins if they’re labeled "heirloom" or organic).
- ● Growing container: 1–2 biodegradable peat pots (3–4 inches wide) or
- ● 1 small seed tray with drainage holes (6–8 inches long).
- ● High-quality potting mix: 1–2 cups of seed-starting mix (lightweight, sterile, and well-draining). Avoid garden soil!
- ● Watering can or spray bottle: With a fine mist setting for gentle hydration.
- ○ Grow lights (optional but recommended): 1 LED grow light (12–15 watts, full-spectrum) or
- ● 1 sunlight-reflective tray to maximize window light.
- ○ Heat mat (optional): 1 small seedling heat mat (70–80°F) to speed germination in cooler homes.
- ○ Fertilizer (optional): 1 tsp balanced liquid fertilizer (5-5-5 or 10-10-10) diluted to half-strength for first feeding.
- ● A sunny windowsill (south-facing is ideal) or a grow light setup (12–16 hours of light daily).
- ● Warmth: Ideal germination temp is 70–90°F. Avoid drafts or cold windowsills!
- ● Patience: Germination takes 7–14 days—stay consistent with care!
Step-by-step instructions for growing pumpkin seeds indoors
Here’s how to transform a bright windowsill into a thriving pumpkin seedling nursery—no greenhouse needed.
Prepare Containers and Seed Starting Mix
Use the 4-inch diameter biodegradable pots for each of the 4 seeds you’re starting. Fill each pot with 1/3 of the 2 gallons of seed-starting mix, pressing it down gently to eliminate air pockets. The mix should feel like a damp sponge—neither soggy nor dry. I like to add a pinch of 1 tablespoon of compost to each pot to give the seedlings a nutrient boost right from the start.
Leave about 1 inch of space between the soil surface and the pot’s rim. This prevents overflow when watering and gives young roots room to establish. Tap each pot lightly on the table to settle the soil evenly. If the mix shifts too much, add a little more to maintain that 1-inch headspace.
Sow Seeds at the Right Depth and Moisten
Place 1 seed in the center of each pot, pressing it 1 inch deep into the soil. Pumpkin seeds are large, so they don’t need light to germinate—just consistent moisture and warmth. Use your finger to create a small dimple if the soil resists, then drop the seed in and cover it completely with soil.
Water each pot gently with the spray bottle, misting until the soil feels uniformly damp 1 inch down. Avoid soaking the surface—you want moisture to penetrate evenly without creating a crust. I find it helpful to water in the morning so any excess moisture can evaporate by evening, reducing the risk of fungal issues.
Provide Warmth and Humidity for Germination
Place the pots in a seedling heat mat set to 80-85°F, which mimics the warmth of a garden bed. Cover each pot loosely with a plastic dome to retain humidity, but leave a small gap for airflow—condensation should form on the inside, but the soil shouldn’t feel clammy. Germination typically takes 7-14 days, depending on your home’s temperature and humidity.
Check the soil daily with your finger. If the top 1/4 inch feels dry, mist lightly again. Overwatering at this stage can suffocate the seeds, so err on the side of slight dryness. Once the first true leaves (not the initial seed leaves) appear, remove the domes immediately to prevent damping-off, a fungal disease that attacks young seedlings.
Move to Bright, Direct Light and Fertilize
As soon as the seedlings emerge, place them within 6 inches of a south-facing window or under a grow light for 14-16 hours of light daily. Pumpkin seedlings grow fast but become leggy if stretched for sunlight. Rotate the pots a quarter turn every 2 days so they grow straight and sturdy. You’ll notice the stems thickening and leaves darkening—signs of strong, healthy growth.
After 2 weeks, when the seedlings have 2-3 true leaves, dissolve 1 teaspoon of liquid fertilizer in 1 gallon of water and water each pot with this mixture. This gives them a gentle nutrient boost without overwhelming their delicate roots. Avoid fertilizing again until you see 4-5 true leaves, about 3 weeks later.
Transplant Outdoors When Ready
Once the seedlings are 4-6 weeks old and have 4-5 true leaves, they’re ready to move outdoors. Harden them off by placing them in a sheltered, shaded spot for 1-2 hours the first day, gradually increasing exposure over 7-10 days. Watch for wilting or yellowing leaves—this means they’re not ready for full sun yet.
Transplant on a cloudy day or in the late afternoon to reduce stress. Bury the seedlings 1 inch deeper than they were in their pots, as pumpkins develop roots along their stems. Water deeply at the base, and mulch with 1 inch of straw to retain moisture and regulate soil temperature. Your seedlings will thank you with vigorous growth once they’re in the ground.
Tips & tricks for perfect indoor pumpkin seedlings
A few strategic tweaks can transform your windowsill into a thriving pumpkin nursery—here's what I've learned from years of trial and error.
Soil Depth and Air Pocket Elimination: When filling your 4-inch pots with one-third of the 2 gallons of seed-starting mix, press firmly but gently to eliminate air pockets. I've found that using a small wooden dowel or even a pencil works perfectly to poke through the soil after filling. This creates a more consistent growing medium where roots can establish without struggling against trapped air. The 1-inch headspace you maintain isn't just for watering—it allows for proper root expansion as your seedlings grow.
Germination Temperature Consistency: The 80-85°F range on your seedling heat mat is non-negotiable for reliable germination. I recommend placing a small thermometer near the pots to verify the temperature—some heat mats can fluctuate. If your home tends to be cooler, consider adding a second heat mat or using a small space heater nearby (safely positioned). The difference between 75°F and 85°F can mean the difference between germination in 7 days versus 14 days.
Light Rotation Strategy: For the critical 14-16 hours of light daily, implement a systematic rotation schedule. I mark each pot with a small dot on one side using a permanent marker, then rotate them a quarter turn every 2 days. This prevents the seedlings from leaning toward the light source. You'll notice the stems develop a slight spiral pattern—this is actually beneficial as it helps strengthen the stem structure for when you transplant outdoors.
Fertilizer Timing Precision: The 2-week mark for your first fertilization is perfect timing, but precision matters. When you dissolve 1 teaspoon of liquid fertilizer in 1 gallon of water, use a clean spray bottle to apply it evenly to the soil surface rather than pouring it directly. This prevents fertilizer burn on the delicate seedlings. The second fertilization at 3 weeks should be half-strength (½ teaspoon per gallon) to avoid overwhelming the young plants as they prepare for transplanting.
Pro Tips for Growing Pumpkin Seeds Indoors
- A few strategic tweaks can transform your windowsill into a thriving pumpkin nursery—here's what I've learned from years of trial and error.
- Soil Depth and Air Pocket Elimination: When filling your 4-inch pots with one-third of the 2 gallons of seed-starting mix, press firmly but gently to eliminate air pockets.
- Germination Temperature Consistency: The 80-85°F range on your seedling heat mat is non-negotiable for reliable germination.
Frequently asked questions
about growing pumpkin seeds indoors—because even experts start with questions! Here are answers to the most common ones to help you avoid pitfalls and grow confidently.Can I grow pumpkin seeds indoors without a grow light?
While possible, it’s challenging! Pumpkins need 6–8 hours of direct sunlight daily. A south-facing window may work, but a grow light (LED or fluorescent) ensures consistent growth. Without one, seedlings may stretch weakly (leggy) or fail to thrive. If you’re committed to natural light, rotate your container weekly for even exposure.
How long does it take for pumpkin seeds to sprout indoors?
Most pumpkin seeds sprout in 7–14 days indoors, depending on warmth and moisture. Keep soil 70–85°F (use a heating mat if needed) and mist lightly daily. If seeds don’t sprout in 3 weeks, they may be old or dormant—try soaking them overnight in warm water before replanting.
What’s the best indoor container size for pumpkin seeds?
Start with small pots (3–4 inches wide) for seeds, then transplant seedlings to 5-gallon containers or larger (pumpkins need space!). Use well-draining soil and ensure containers have drainage holes. If using fabric pots, opt for 7+ gallons—pumpkins spread fast!
Why are my indoor pumpkin seedlings turning yellow?
Yellow leaves usually signal overwatering, nutrient deficiency, or poor drainage. Check soil moisture (top inch should dry between waterings) and ensure pots aren’t soggy. Add a balanced fertilizer (like 10-10-10) when seedlings have 2 true leaves. If lower leaves yellow first, it’s often natural aging—remove them to redirect energy to new growth.
Can I grow pumpkin seeds indoors year-round?
Yes, but with adjustments! Pumpkins thrive in warmth (70–90°F), so use a grow light and maintain humidity (60–70%) with a humidity dome or tray of water. In winter, a heat mat or sunny window helps. Just note: indoor pumpkins may not fruit as heavily as outdoor varieties—choose compact types like ‘Jack Be Little’ for better success.
Wrapping up and next steps
Growing pumpkin seeds indoors is a rewarding journey that brings a taste of harvest season right to your windowsill! 🌱 With just a few supplies and consistent care, you’ll watch tiny sprouts transform into thriving vines—ready to transfer outside (or enjoy as microgreens) in just six weeks. Don’t let small spaces stop you: this method proves that even urban gardeners can cultivate big flavors with patience and creativity.
Ready to take the next step? Start with one seedling and experiment with varieties like Jack Be Little or Baby Boo—then share your progress with fellow plant lovers! Whether you’re growing for fun, food, or future transplants, your green thumb is already on the rise. Happy growing!