Planting
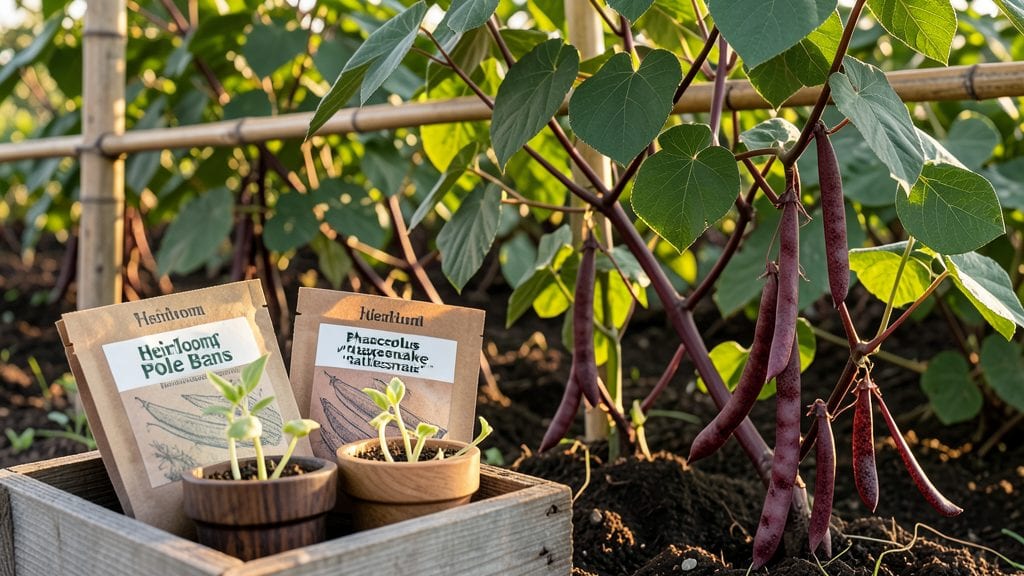
Growing heirloom plant seeds unlocks flavors and varieties you’ll never find in stores—think tomatoes that melt on your tongue or beans with stripes like a rainbow. 🌱 I’ve been saving seeds for years, and the difference in taste and texture is shocking compared to hybrids.
These seeds aren’t just plants; they’re living pieces of history, passed down through generations.
The first step is finding the right seeds—avoid big-box stores and instead turn to seed banks or trusted online sellers. Look for open-pollinated varieties so you can save seeds year after year.
Once you’ve got them, proper storage is key: keep them cool, dry, and in airtight containers to maintain viability for years. A simple jar in the fridge works just fine.
Planting heirloom seeds is no different than growing regular varieties, but the payoff is worth it. You’ll harvest vegetables with deeper colors, richer flavors, and textures that make every bite special.
Plus, you’re helping preserve biodiversity one seed at a time. The first tomatoes I grew from heirloom seeds had a sweetness that changed how I garden forever.
This method works for any climate or space, from a tiny balcony to a sprawling backyard. Start small with a few varieties, and soon you’ll be swapping seeds with neighbors or saving your own.
The best part? Every seed you save keeps these rare plants alive for future generations. Let’s get growing!
📚 In This Guide
- What you need
- Instructions
- Tips and common mistakes
- Wrapping up and next steps
What you need
- ● Heirloom seeds (1–5 packets, depending on variety and space): Choose certified organic or non-GMO seeds for best results.
- ● Popular picks: Brandywine Tomatoes, Cherokee Purple Eggplants, or Black Krim Tomatoes.
- ● Seed-starting trays or biodegradable pots (50–100 cell trays or 2–4" pots).
- ● High-quality seed-starting mix (sterile, peat-free, and well-draining).
- ● Grow lights or sunny windowsill (6–8 hours of light daily for seedlings).
- ● Misting bottle or spray nozzle (for gentle watering).
- ● Small hand trowel (for transplanting seedlings).
- ● Garden soil or compost (rich, well-draining mix amended with compost).
- ● Watering can or hose with a gentle spray setting.
- ● Gloves and knee pads (for comfort and protection).
- ● Seed heat mat (speeds up germination for slow starters like peppers).
- ● pH testing kit (to monitor soil acidity, ideal range: 6.0–7.0 for most heirlooms).
- ● Compost thermometer (ensures soil warmth for tropical varieties).
- ● Row covers or cloches (protects seedlings from pests and cold snaps).
- ● Label markers and stakes (to track varieties and support tall plants).
- ● Organic pest control (neem oil, diatomaceous earth, or companion plants).
Step-by-Step instructions for cultivating heirloom plant seeds
Here's how to nurture rare heirloom seeds into thriving plants that deliver exceptional flavor and beauty.
🌱 Step 1: Select and Prepare Your Heirloom Seeds
Choose seeds from trusted sources—heirlooms often carry unique traits that need proper growing conditions. Before planting, I like to soak seeds overnight in lukewarm water to soften their tough outer shells. This speeds up germination, especially for varieties like heirloom tomatoes or peppers that have thick seed coats. Drain them in the morning and let them dry slightly before handling.
Label each seed packet with the variety name and planting date. Heirlooms often have distinct characteristics, and keeping track ensures you don’t mix them up later. Store unused seeds in a cool, dry place—heirloom seeds can last years if kept properly.
💧 Step 2: Start Seeds Indoors for Early Growth
Fill your seed-starting trays with the sterile seed-starting mix and moisten it until evenly damp. Heirloom seeds often germinate best in warm soil (75-85°F), so use a seedling heat mat if your home runs cooler. Plant seeds at a depth of about twice their diameter—too deep slows germination, while too shallow risks drying them out.
Cover the trays with plastic wrap or a humidity dome to retain moisture, but remove it as soon as seedlings emerge. Keep the soil consistently moist but never soggy—heirloom seedlings are delicate and prone to damping-off if overwatered. Place trays in a bright spot, but avoid direct sunlight until sprouts appear.
☀️ Step 3: Provide Light and Gradually Acclimate Seedlings
Once seedlings show their first true leaves (not the initial cotyledons), move them under grow lights or to a south-facing window. Heirloom varieties often need 14-16 hours of light daily to grow strong and compact. If using a grow light, keep it 2-4 inches above the plants and raise it as they grow to prevent legginess.
After 2-3 weeks, start hardening off seedlings by placing them outside in a sheltered spot for 1-2 hours daily. Gradually increase their outdoor time over 10-14 days to toughen them up. Watch for signs of stress—wilting or yellowing leaves mean they’re not ready yet.
🌿 Step 4: Transplant and Care for Mature Heirloom Plants
Transplant seedlings outdoors after the last frost date, when soil temperatures reach at least 60°F. Space heirloom plants according to their mature size—crowding can reduce yields and encourage disease. Water deeply at transplanting to settle the soil and reduce shock.
Heirloom plants often thrive with mulch around their bases to retain moisture and suppress weeds. Water at the base of the plant in the morning to prevent fungal issues, and avoid wetting leaves. Fertilize lightly with a balanced organic fertilizer every 4-6 weeks to support their unique growth patterns.
✂️ Step 5: Harvest and Save Seeds for Future Seasons
Harvest heirloom plants at their peak for the best flavor and quality. Some, like tomatoes, should be picked when fully colored but still firm. Others, like beans or peppers, are ready when they reach their mature size. Handle them gently to avoid bruising—heirloom varieties often have thinner skins.
To save seeds for next year, let a few plants mature fully. Collect seeds from the healthiest specimens, clean them thoroughly, and dry them in a cool, dark place. Label them clearly—heirloom seeds are treasures worth preserving for future gardens.
Tips & tricks for perfect heirloom seed cultivation
Working with heirloom seeds means paying attention to details that make all the difference between mediocre sprouts and thriving plants. These are the secrets I've learned after years of growing rare varieties.
The Soaking Secret: For Step 1, don't rush the overnight soaking—especially for thick-coated varieties like heirloom tomatoes or peppers. The lukewarm water should cover the seeds completely. I've found that adding a pinch of honey or molasses (about 1 teaspoon per cup of water) can boost germination rates by providing natural sugars. After soaking, pat them dry with a paper towel to prevent mold, then let them rest at room temperature for about 30 minutes before planting. This extra step prevents them from sticking to the soil.
Heat Control for Germination: In Step 2, maintaining that 75-85°F soil temperature is crucial, but don't overlook the importance of consistent moisture. I use a small spray bottle to mist the soil surface daily rather than watering from above, which helps prevent damping-off disease. For extra insurance, place a thermometer in your seed-starting mix—some homes have hot spots near heating vents that can exceed 85°F and actually inhibit germination. If your home stays cooler, a seedling heat mat set to 75°F works wonders.
Lighting Strategy: When your seedlings show their first true leaves in Step 3, you'll need to provide those 14-16 hours of light daily. If using grow lights, I've found that a simple timer set for 16 hours on/8 hours off eliminates guesswork. For window-growing, rotate your trays daily so all seedlings get equal light exposure—you'll notice the ones closest to the glass stretching toward the light while others remain stunted. And remember, those 2-4 inches of distance from grow lights? That's measured from the tallest seedling, not the tray edge.
Transplanting Wisdom: For Step 4, timing your transplant is everything. Check your local last frost date, but also verify soil temperature with a thermometer—it needs to stay above 60°F for at least 5 days in a row. I like to transplant on an overcast day to reduce stress on delicate heirloom seedlings. When digging holes, make them slightly larger than your seedling's root ball and mix in some compost. This gives roots room to establish without disturbance while providing nutrients right where they need them.
Pro Tips for Heirloom Plant Seeds
- Working with heirloom seeds means paying attention to details that make all the difference between mediocre sprouts and thriving plants.
- The Soaking Secret: For Step 1, don't rush the overnight soaking—especially for thick-coated varieties like heirloom tomatoes or peppers.
- Heat Control for Germination: In Step 2, maintaining that 75-85°F soil temperature is crucial, but don't overlook the importance of consistent moisture.
Frequently asked questions
Got questions about heirloom seeds? You’re not alone—these rare varieties come with unique considerations! Here are answers to the most common queries to help you grow with confidence.
What’s the best time to plant heirloom seeds?
Heirloom seeds thrive when planted at the optimal time for their variety. Check the seed packet for specifics—most follow standard seasonal guidelines (e.g., cool-season crops like lettuce in early spring/fall; warm-season tomatoes in late spring). For year-round harvests, stagger plantings every 2–3 weeks or use season extenders like row covers.
Are heirloom seeds more expensive than hybrid seeds?
Yes, heirloom seeds often cost 2–5x more than hybrids due to their rarity, open-pollinated nature, and smaller-scale production. However, they’re non-GMO, saveable for future seasons, and prized for flavor and biodiversity—making them a long-term investment. Start with a few varieties to test before committing to bulk purchases.
How do I store heirloom seeds for next year?
Proper storage ensures viability for 2–5 years (or longer for hardy varieties). Keep seeds in a cool (32–41°F), dry place (like a fridge or airtight container with silica gel). Label each type with the variety name and harvest year—mislabeling is a common pitfall! Avoid humidity or sunlight, which degrade seeds faster.
Can I save seeds from heirloom plants I grow?
Heirloom seeds are open-pollinated, meaning you can harvest, dry, and replant them year after year. For best results:
- Let 10–15% of plants fully mature to produce seeds (e.g., tomatoes, beans).
- Dry seeds completely (1–2 weeks in a dark, well-ventilated spot).
- Store in paper envelopes (not plastic) to prevent moisture buildup.
Why did my heirloom seeds fail to germinate?
Common culprits include:
- Old seeds: Test viability by soaking in water (floated seeds are likely dead).
- Incorrect moisture/temperature: Most seeds need consistent warmth (70–85°F) and moisture—not soggy soil.
- Poor soil contact: Press seeds lightly into soil (depth = 2–3x seed size).
- Disease or pests: Sterilize soil with hydrogen peroxide (3%) if fungal issues recur.
Wrapping up and next steps
Preserving the legacy of heirloom plant seeds isn’t just about growing food—it’s about celebrating biodiversity, heritage, and self-sufficiency. 🌱 Whether you’re a seasoned gardener or just starting, these rare varieties offer flavors, resilience, and stories worth nurturing.
Your next step? Start small—save seeds from this season’s harvest, swap with fellow gardeners, or explore local seed libraries. The future of gardening begins with the seeds you choose today!