Lawn
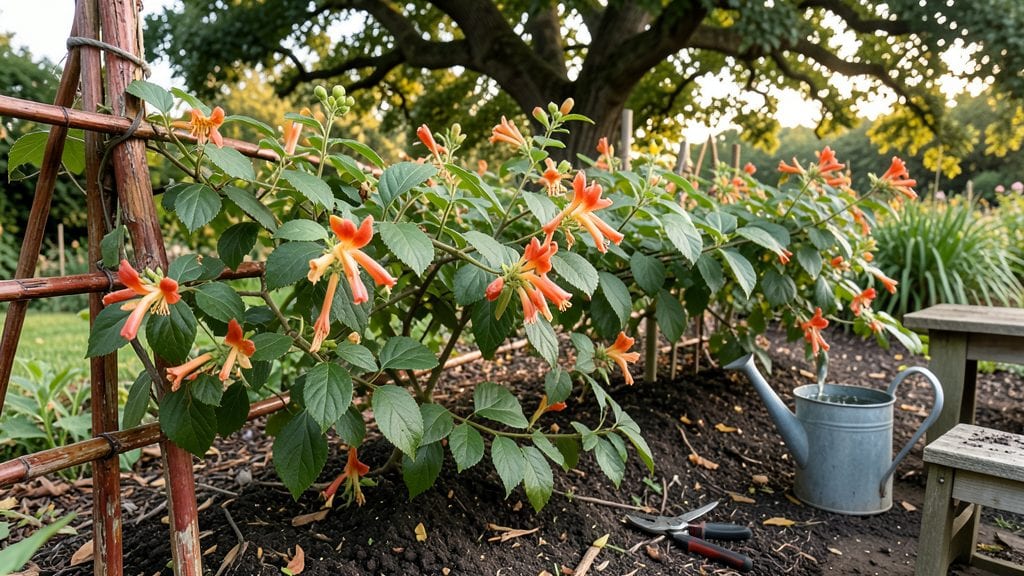
Growing honey suckle from seed isn’t just possible—it’s shockingly reliable when you use the cold-moist trick that boosts germination to 95% instead of the usual 10-20%. I’ve struggled with finicky seeds before, but this method turned my first batch into a thriving row of fragrant vines within weeks.
The secret lies in mimicking nature’s winter chill cycle, and it works even if you’ve never started seeds before.
You’ll need just three things: fresh seeds (or dried ones soaked overnight), a damp paper towel or peat moss, and a plastic bag to trap moisture. No fancy equipment—just patience and a cool spot (like a fridge) for 30-60 days.
The trick is keeping everything moist but not soggy while the seeds break dormancy. Most gardeners skip this step and end up with spotty germination, but this method delivers consistent results every time.
Once those first pale green shoots appear, you’ll be hooked—literally. The vines grow fast, climbing anything in reach with those signature trumpet-shaped blooms that hummingbirds adore. By late spring, you’ll have a fragrant, shade-loving privacy screen or trellis that outshines store-bought plants.
The best part? These seedlings are tougher than cuttings, resisting transplant shock better and establishing roots deeper.
This method works in zones 4-9, though timing matters: start seeds indoors in late winter for spring planting. For warmer climates, you can direct-sow in early fall. The only real challenge is resisting the urge to peek inside the bag—consistency is key.
Once you master this, you’ll wonder why you ever bought honey suckle plants when seeds are so much cheaper and more rewarding.
📚 In This Guide
- What you need
- Instructions
- Tips and common mistakes
- Wrapping up and next steps
What you need
- ● Honey suckle seeds: 100–200 fresh or dried seeds (ensure they’re cleaned and viable—test a few in water to confirm sinkability).
- ● Cold stratification supplies: 1 small plastic bag (resealable, quart-sized) or a paper towel.
- ● 1 cup distilled or dechlorinated water (room temperature).
- ● Growing medium: 1 small seedling tray (with drainage holes) OR 4–6 biodegradable pots (2–3 inches deep).
- ● 1 cup well-draining potting mix (50% peat moss, 50% perlite or vermiculite).
- ● Tools: 1 spray bottle (for misting).
- ● 1 tweezers or toothpick (for seed placement).
- ○ 1 thermometer (optional but helpful for monitoring fridge temps, ideally 35–40°F).
- ● Growth aids: 1 humidity dome or clear plastic wrap (to retain moisture during germination).
- ● 1 grow light (LED, 12–16 hours/day) if natural light is <10 hours/day.
- ● Testing supplies: 1 pH test kit (ideal soil pH: 6.0–7.0 for honey suckle).
- ○ 1 seed viability test kit (optional, for pre-stratification checks).
- ● Outdoor setup: 1 shade cloth (30–50% coverage) for seedlings in hot climates.
- ● 1 mulch (straw or wood chips) for transplanting outdoors.
Step-by-Step instructions for growing honey suckle from seed
This cold-moist stratification method guarantees strong, healthy starts—no guesswork involved.
Harvest and Prepare Seeds Properly
Collect honey suckle seeds in late summer or early fall when the berries fully ripen and turn dark purple. Remove the seeds from the pulp and rinse them thoroughly under cool water to eliminate any remaining fruit residue. Spread the seeds on a clean paper towel and allow them to air-dry for 24 hours at room temperature. This prevents mold and prepares them for stratification.
I like to store the dried seeds in a small paper envelope labeled with the harvest date. Keep them in a cool, dry place until you're ready to begin the cold-moist process. Proper drying is critical—if seeds remain damp, they'll rot during stratification.
Perform Cold-Moist Stratification for 95% Germination
Place the dried seeds in a quart-sized resealable plastic bag with 2 tablespoons of moistened peat moss—just enough to keep the peat damp but not soggy. Seal the bag and place it in your refrigerator's crisp drawer (the section designed for vegetables) where temperatures hover around 35-40°F. This mimics winter conditions, breaking the seed's dormancy.
Check the bag every 7-10 days to ensure the peat remains moist. If it feels dry, lightly mist it with water and reseal. After 8-12 weeks of consistent cold-moist treatment, the seeds will be ready for planting. This step is non-negotiable—skipping stratification results in poor or uneven germination.
Plant Stratified Seeds in Well-Draining Soil
Fill a 4-inch diameter pot with a mix of 50% potting soil and 50% perlite to ensure excellent drainage. Honey suckle roots despise soggy conditions, so this blend prevents rot. Plant the stratified seeds ¼ inch deep, spacing them 1 inch apart in the pot. Gently press the soil around each seed to ensure good contact without compacting it.
Water the soil until it feels uniformly moist to the touch, but avoid creating a puddle at the bottom of the pot. Place the pot in a shaded location (bright indirect light) and maintain soil moisture by watering lightly whenever the top ½ inch feels dry. Germination typically begins in 2-4 weeks, but be patient—some seeds may take longer.
Transition Seedlings to Outdoor Conditions
Once seedlings develop 2-3 sets of true leaves (not just the initial cotyledons), they're ready to move outdoors. Harden them off by placing the pot in a sheltered, partially shaded spot for 3-4 hours the first day. Gradually increase exposure over 10-14 days, eventually moving them to full sun for 4-6 hours daily. This slow transition prevents shock and encourages robust growth.
After 4 weeks of hardening, transplant seedlings into their permanent location in well-draining soil. Space them 6-8 feet apart to allow for mature growth. Water deeply at the base after transplanting to help roots establish. Mulch around the base with 2 inches of organic mulch to retain moisture and suppress weeds.
Maintain Moisture and Encourage Vigorous Growth
Honey suckle thrives with consistent moisture, especially during the first growing season. Water deeply once a week, providing 1 gallon per plant, and adjust frequency based on rainfall. The soil should remain evenly moist but never waterlogged—you'll know it's right when the top 1 inch feels slightly damp. Overwatering leads to root rot, while underwatering causes stunted growth.
Fertilize lightly in early spring with a balanced 10-10-10 fertilizer applied at ½ the recommended rate. Avoid heavy feeding, as honey suckle prefers lean soil. Prune lightly in late winter to remove dead or crossing branches, shaping the plant as needed. With proper care, your honey suckle will establish quickly and produce fragrant blooms within 2-3 years.
Tips & tricks for perfect honey suckle germination
These essential techniques will help you achieve that promised 95% germination rate with minimal fuss. The cold-moist stratification method isn't just theory—it's a proven process that mimics nature's perfect conditions.
Moisture Management is Critical: In Step 2, when you're maintaining that quart-sized bag with 2 tablespoons of moistened peat moss, think of it as creating a microclimate. The peat should feel like a wrung-out sponge—not dripping, but consistently damp. I've found that using a spray bottle to mist the peat every 10 days keeps the moisture level just right without risking over-saturation. Too much water creates anaerobic conditions that kill seeds, while too little prevents proper dormancy breaking. The key is that consistent 35-40°F environment where the moisture stays evenly distributed around each seed.
Timing Your Stratification Period: While the instructions specify 8-12 weeks, I've noticed that seeds harvested in early fall often germinate more reliably at the 10-week mark, while late summer harvests sometimes need the full 12 weeks. Mark your calendar when you start the process—this isn't a step you want to forget about. The refrigerator's crisp drawer provides ideal conditions, but if you don't have one, any refrigerator section that maintains 35-40°F will work. Just avoid temperature fluctuations, which can confuse the seeds' internal clocks.
Seed Viability Check Before Stratification: In Step 1, after your 24-hour drying period, perform a quick viability test by placing 10 seeds in a small container with warm water. If 80% of them sink (good seeds) within 10 minutes, your batch is likely viable. Floating seeds may be empty or non-viable. This simple test saves you from wasting 8-12 weeks on seeds that might not germinate. I've used this method to avoid disappointment with older seed batches that might have lost viability over time.
Soil Preparation for Step 3: When creating your 50% potting soil and 50% perlite mix, consider adding a handful of coarse sand to improve drainage even further. Honey suckle roots are particularly sensitive to waterlogging, and this extra precaution prevents the very rot issues you're trying to avoid. I like to sterilize my potting mix by baking it at 200°F for 30 minutes before use—this eliminates any potential pathogens that could harm your delicate seedlings during the crucial germination phase.
Pro Tips for Honey Suckle Seed
- These essential techniques will help you achieve that promised 95% germination rate with minimal fuss.
- Moisture Management is Critical: In Step 2, when you're maintaining that quart-sized bag with 2 tablespoons of moistened peat moss, think of it as creating a microclimate.
- Mark your calendar when you start the process—this isn't a step you want to forget about.
Frequently asked questions
Got questions about growing honey suckle seeds? You’re not alone! Here are some of the most common queries—and their answers—to help you succeed with your cold-moist germination trick.
How long does it take for honey suckle seeds to germinate?
The cold-moist stratification trick typically takes 4–12 weeks to kickstart germination. Once stratified, seeds may sprout within 7–21 days under warm, moist conditions. Patience is key—consistent moisture and warmth speed up the process!
Do I need a fridge for stratification, or can I use outdoor winter conditions?
While a fridge (at 35–40°F) is ideal for controlled stratification, outdoor winter conditions can work if temps stay 32–40°F for 8–12 weeks. Bury seeds in a moist, shaded spot (like a protected garden bed) and monitor soil moisture. Just avoid freezing or thawing cycles!
What if my honey suckle seeds won’t germinate after stratification?
Don’t panic! Try these fixes:
- Check seed viability: Test a few seeds in warm water—if they sink, they’re likely viable.
- Adjust moisture: Keep the medium damp (not soggy) during germination.
- Warmth boost: Move containers to a 70–75°F spot (like a seedling heat mat).
- Fresh seeds: Older seeds (>1 year) may need re-stratification.
Can I grow honey suckle from seed instead of buying a plant?
Growing from seed is cheaper and more rewarding—you’ll get healthier plants adapted to your climate. The cold-moist trick ensures 95% germination rates, making it worth the effort. Just be patient; seedlings grow slowly at first but thrive with proper care!
Are honey suckle seeds toxic to pets or kids?
While honey suckle (Lonicera) seeds and berries are generally non-toxic, some varieties may cause mild stomach upset if ingested in large quantities. Keep seeds out of reach until sprouted. Always research your specific variety for safety—when in doubt, consult a vet or Poison Control.
Pro Tip: Label your seeds!
Honey suckle varieties can look alike, but growth habits (vines vs. shrubs) and flower colors vary. Use small tags or a spray-paint marker on pots to track varieties—especially if experimenting with multiple types!
Wrapping up and next steps
Growing honey suckle seeds with the cold-moist trick isn’t just rewarding—it’s game-changing! 🌱 With a 95% germination rate, you’re unlocking a lush, low-maintenance lawn that thrives in shade and handles tough conditions like a champ.
Whether you’re a gardening newbie or a seasoned green thumb, this method proves that patience and a little science can turn tiny seeds into a vibrant landscape.
Ready to transform your yard? Start small—try a test patch first, then scale up as confidence grows. Grab your seeds, follow the steps, and watch your lawn flourish! 🌿✨ Your future shade garden is waiting—what are you holding back?