Pests
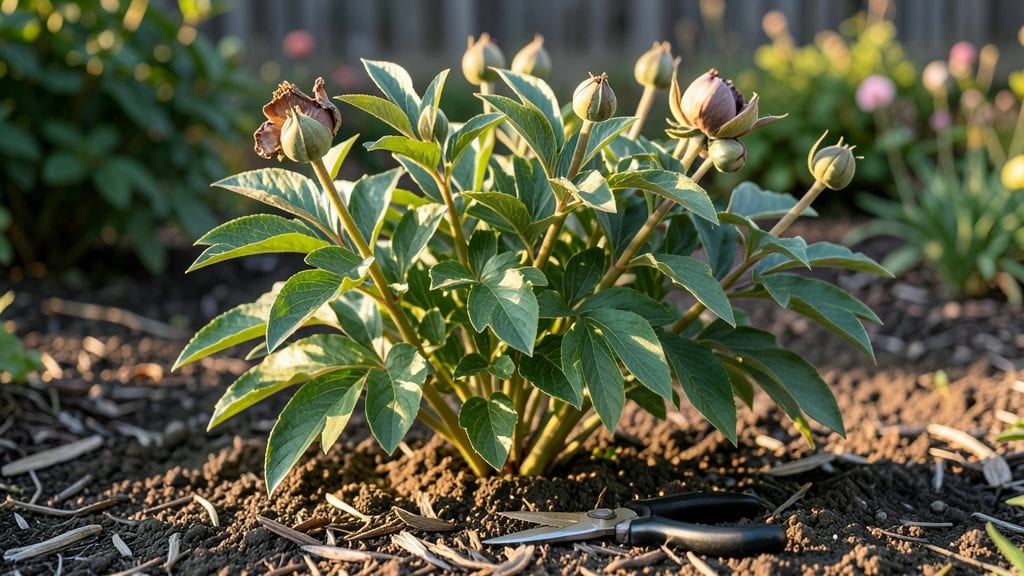
Growing peonies from seed demands patience, but the cold stratification method transforms those tiny seeds into reliable blooms next spring. 🌱 I’ve watched dormant peony pods turn into vibrant plants using this exact technique—it’s the only way to bypass the decades-long wait of traditional propagation.
The process mimics nature’s winter dormancy, breaking seed dormancy so you can finally see those lush, fragrant blooms in your garden.
You’ll need fresh peony pods (or purchased seeds), a sealed plastic bag, and a refrigerator for stratification. The key is timing: collect pods when they’re fully ripe in late summer, extract the seeds, and stratify them for 90-120 days before planting.
This cold treatment tricks seeds into thinking winter has passed, jumpstarting germination when you finally plant them in spring.
The payoff arrives in 2-3 years with healthy, vigorous plants that reward you with classic peony blooms. Unlike division—which guarantees blooms but limits variety—seeds let you experiment with heirloom colors and rare cultivars.
Just be prepared for slower growth; peonies from seed take time, but the results are worth it for collectors and patient gardeners.
For those short on time, reputable suppliers offer pre-stratified seeds, but DIY stratification gives you full control. Either way, this method turns a high-risk gamble into a foolproof way to grow peonies from the ground up. Ready to start your cold treatment today?
📚 In This Guide
- What you need
- Instructions
- Tips and common mistakes
- Wrapping up and next steps
What you need
- ● Peony seeds: Fresh, viable seeds (preferably from a reputable supplier or your own garden). Aim for at least 10 seeds to maximize success.
- ● Cold stratification setup: Small paper towel or coir (coconut fiber)
- ● Plastic ziplock bag (quart-sized or larger)
- ● Resealable container (e.g., a clean, labeled Tupperware) or a seedling tray with drainage holes
- ● Growing medium: Potting mix (well-draining, sterile blend—look for a seed-starting mix with perlite or vermiculite)
- ○ Optional: A 50/50 mix of potting soil and sand/perlite for extra aeration
- ● Spray bottle (for gentle watering)
- ● Small hand trowel (for transplanting seedlings)
- ● Plant labels (to track varieties)
- ● Patience: Peonies grown from seed take 3–5 years to bloom—plan ahead! 🌱📅
- ● Space: A cool, dark spot (like a fridge or unheated garage) for stratification (40–50°F ideal).
- ○ Grow lights: Optional for seedlings (if natural light is limited indoors).
- ○ Humidity dome: Optional to retain moisture during germination.
- ● Fertilizer: A balanced, water-soluble fertilizer (e.g., 10-10-10) for seedlings after true leaves appear.
- ● Outdoor garden bed: Prepared with loamy, well-draining soil (amend with compost if needed) for transplanting.
Step-by-step instructions for harvesting and stratifying peony seeds
Peony seeds need patience and precision—here’s how to collect them properly and break dormancy for next year’s blooms.
🌱 Step 1: Harvest Mature Peony Seed Pods
Wait until late summer or early fall when seed pods turn brown and papery—this signals full maturity. Gently twist each pod from the stem and place them in a paper bag to dry indoors for 1-2 weeks. Avoid moisture during this time, as dampness accelerates spoilage. If pods split open prematurely, collect the seeds immediately and let them dry on a paper towel.
Peony seeds are tiny, flat, and dark brown—almost like miniature beans. I like to spread them on a clean sheet of paper to sort through any debris. Store the dried pods or seeds in an envelope labeled with the variety and harvest date. This ensures you’ll know exactly what you’re working with when stratification begins.
💧 Step 2: Extract and Prepare Seeds for Stratification
Once fully dry, carefully open the pods to release the seeds. Use a small spoon or your fingers to avoid crushing them—peony seeds are delicate. Place them in a paper towel-lined container (like a shallow plastic or ceramic dish) and lightly mist with water until the towel is damp but not soggy. This mimics the natural moisture they’d experience in soil.
Cover the container loosely with plastic wrap or a damp cloth to maintain humidity, then refrigerate for 3-4 months. This cold stratification mimics winter conditions, breaking seed dormancy. Check the towel monthly—if it dries out, mist again lightly. Overwatering now will cause mold, so keep it just damp enough to feel slightly moist to the touch.
☀️ Step 3: Sow Stratified Seeds in Early Spring
After the cold period, remove the seeds from the fridge and let them sit at room temperature for 1-2 days to acclimate. Fill small pots or seed trays with sterile potting mix (avoid garden soil—it’s too dense and may harbor pathogens). Plant seeds ¼ inch deep, spacing them 1 inch apart to allow room for growth. Lightly cover with additional mix and mist the surface until evenly moist.
Place the trays in a warm, bright location (around 65-70°F) but avoid direct sunlight, which can overheat the soil. Peony seedlings are slow to germinate—expect sprouts in 4-8 weeks. Be patient; rushing this step often leads to weak or failed seedlings. Keep the soil consistently moist but never waterlogged, as peony roots are sensitive to rot.
⏰ Step 4: Transplant Seedlings After True Leaves Form
Once seedlings develop 2-3 sets of true leaves (not just the initial cotyledons), they’re ready to move. Gently remove them from the tray, being careful not to damage the delicate roots. Transplant into individual 4-inch pots filled with the same potting mix, burying them to the same depth they were growing before. Water lightly after transplanting to settle the soil.
Place the pots in partial shade for the first week to reduce stress. After that, gradually introduce them to morning sun before moving them to full sunlight by late spring. Peony seedlings grow slowly, so don’t expect blooms for 2-3 years—focus on establishing strong roots first. This patience pays off with robust, long-lived plants.
Tips & tricks for perfect peony seed stratification
Mastering peony seed germination takes more than just patience—it requires precision in timing and technique. Here are the key strategies that will give you the best chance at reliable blooms next spring.
Timing is Everything: In Step 1, don't rush the drying process. Those 1-2 weeks of indoor drying are critical for preventing mold and ensuring seed viability. I've seen beginners skip this step and end up with seeds that either won't germinate or develop fungal issues. Place your pods in a dry, well-ventilated area away from direct sunlight—think of it like curing leather, not baking cookies.
Stratification Secrets: The 3-4 months of cold stratification in Step 2 is where the magic happens, but it's easy to mess this up. I recommend using a refrigerator's crisper drawer for more consistent humidity control. If you're worried about forgetting, set a reminder for your monthly moisture checks—damp (not wet) paper towels are key. Too much moisture causes mold; too little prevents germination. This is where most people fail, so pay attention to that towel's texture!
Germination Realities: Step 3's 4-8 weeks germination window might seem long, but it's crucial to resist the urge to rush. I've tried using heat mats to speed things up, but peony seeds actually germinate better at the cooler 65-70°F range. Place your trays near a south-facing window but avoid direct sunlight—think bright, indirect light like a library reading nook. And remember, patience is your friend here; weak seedlings often come from impatient gardeners.
Transplanting Wisdom: When you reach Step 4 and those 2-3 sets of true leaves appear, handle those seedlings like they're made of glass. Peony roots are famously delicate, so use a small spoon or your fingers to gently lift them from the tray. I've found that transplanting into 4-inch pots gives them enough room to develop strong roots before their first winter. And that first week in partial shade is non-negotiable—it's their recovery period after the transplant shock.
Pro Tips for Get Peony Seeds
- Mastering peony seed germination takes more than just patience—it requires precision in timing and technique.
- Timing is Everything: In Step 1, don't rush the drying process.
- Stratification Secrets: The 3-4 months of cold stratification in Step 2 is where the magic happens, but it's easy to mess this up.
Frequently asked questions
Got questions about peony seeds? You’re not alone! Here are answers to the most common concerns—from timing to troubleshooting—to help you succeed with your cold stratification project.
How long should I cold stratify peony seeds?
Peony seeds need at least 3–4 months of cold stratification (ideally 4–6 months) for the best germination rates. Place them in the fridge (or outdoors in winter if your climate is cold enough) to mimic natural conditions. Patience pays off—rushing this step often leads to poor or no sprouting!
Can I skip cold stratification and just plant peony seeds directly?
While some seeds might germinate without stratification, peony seeds are dormant and require cold treatment to break dormancy. Skipping this step usually results in weak or no growth. If you’re impatient, try soaking seeds in warm water for 24 hours first, but cold stratification is still the gold standard for reliable results.
What’s the best way to store peony seeds during stratification?
Keep seeds in a moist, well-draining medium like damp sand, perlite, or paper towels inside a sealed plastic bag with small air holes. Store them in the fridge (34–40°F) and check monthly to ensure they stay moist but not soggy. Label the bag with the seed type and date!
Will pests or mold ruin my peony seeds during stratification?
Pests (like mold or fungus) are rare but possible if conditions are too damp. Use sterilized containers and avoid overwatering. If you notice fuzzy growth or foul smells, discard the seeds and start fresh. A light dusting of cinnamon (a natural antifungal) can help prevent issues without harming the seeds.
How do I know if my peony seeds are still viable?
Fresh peony seeds are firm, plump, and dark-colored. If they’re shriveled, discolored, or smell off, they’ve likely lost viability. Test a few seeds by cutting them open—if the inside is dry or hollow, they won’t sprout. When in doubt, source seeds from reputable suppliers for the best odds!
Wrapping up and next steps
Growing peonies from seed is a rewarding journey that demands patience—but with the right steps, you’re well on your way to stunning blooms next spring! 🌸 By mastering cold stratification and providing consistent care, you’ll unlock the magic of these classic flowers.
Now that you’re armed with the know-how, it’s time to roll up your sleeves and give it a try.
Ready to take the next step? Start by selecting healthy seeds, gathering your supplies, and setting up your stratification station. And remember: even if not every seed sprouts, each attempt brings you closer to success. Happy gardening! 🌱