Pests
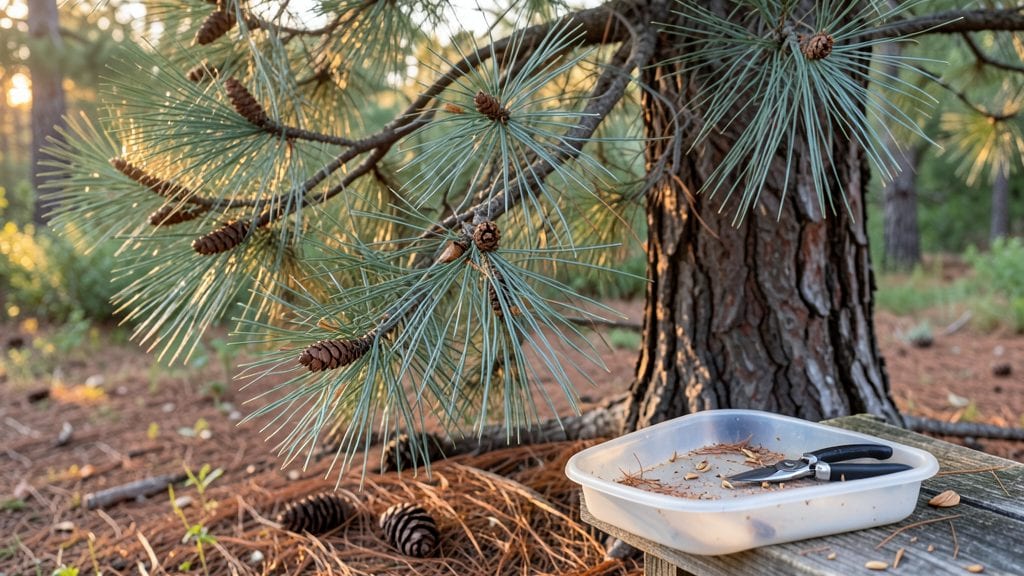
Getting pine cone seeds starts with finding the right cones—those with brown, papery scales that open just a crack when dry. 🌲 I learned this the hard way after trying to extract seeds from green cones that never released anything.
The best time to harvest is late fall or early winter, when cones are fully mature but haven’t yet shed their seeds.
You’ll need a few simple tools: gloves to protect your hands, a bucket for collecting seeds, and a dry, warm spot to process them. Once you’ve gathered cones, place them in a paper bag and let them sit for a few days—they’ll open naturally, revealing the seeds inside.
This method preserves viability far better than forcing them open.
The real secret lies in stratification: after extracting the seeds, mix them with slightly damp sand and refrigerate for 30-60 days to mimic winter conditions. This breaks dormancy, ensuring higher germination rates when you finally plant them in well-draining soil. Most seeds sprout within 4-8 weeks under ideal conditions.
Whether you’re growing ornamental pines or restoring native forests, this approach works for white pine, ponderosa, or jack pine seeds. Just avoid overwatering—pine seeds rot quickly if kept too moist. The patience pays off with sturdy seedlings that thrive for decades.
📚 In This Guide
- What you need
- Instructions
- Tips and common mistakes
- Wrapping up and next steps
What you need
- ● Mature pine cones: Collect only fully open pine cones (like those from Pinus species) from healthy, disease-free trees. Aim for at least 5-10 cones to maximize your chances of finding viable seeds.
- ● Sharp scissors or pruning shears: Use sterilized, clean tools to avoid damaging seeds or introducing pathogens. A small pair of bypass pruners works best for delicate cones.
- ● Paper towels or newspaper: A flat, dry surface (like a baking sheet lined with paper) to lay out seeds for drying.
- ● Small containers or ziplock bags: For storing seeds temporarily. Use breathable containers (like paper bags) to prevent mold if humidity is high.
- ● Pencil or toothpick: To gently pry open stubborn pine cones or separate seeds.
- ● Magnifying glass: Helps spot tiny seeds hidden in cone scales.
- ● Labeling tags: If collecting from multiple trees, label seeds by species/type.
- ● Desiccant packets: Place in storage bags to absorb excess moisture and extend seed viability.
- ● Seedling trays or pots: For immediate germination (if you’re ready to plant right away!).
Step-by-Step instructions for extracting pine cone seeds
Here's the proven method I use to collect, prepare, and store pine cone seeds for successful germination.
🌱 Step 1: Collect and Prepare Fresh Pine Cones
Gather pine cones from healthy, mature trees in late summer or early fall when they're still green and tightly closed. Avoid cones that are already open—they've already released their seeds. Look for cones that feel firm to the touch and have tightly shut scales. I collect them after a light rain when they're easier to spot on the forest floor.
Once home, place the cones in a warm, dry spot indoors for 2-4 weeks. This mimics winter conditions and helps the cones open naturally. You'll know they're ready when most scales open slightly and seeds become visible. Don't rush this process—patience ensures better seed viability. If your climate is humid, spread them on a tray with a paper towel underneath to absorb excess moisture.
🌿 Step 2: Extract Seeds from Opened Pine Cones
When the cones open, place them on a clean white sheet of paper or a baking tray. I like to work outdoors or over a large surface to avoid seed loss. Gently tap each cone with a wooden spoon or your fingers to dislodge the seeds. The seeds will fall out naturally—don't force them or you might damage the delicate wings.
Separate the seeds from the empty cone fragments by gently blowing or using a small brush. The viable seeds will have small, papery wings and look like tiny helicopter blades. Discard any seeds that appear shriveled, discolored, or lack wings—they won't germinate. Store the good seeds in a paper envelope (not plastic) in a cool, dry place until you're ready to sow them.
💧 Step 3: Stratify Seeds for Better Germination
Pine seeds require stratification—a cold treatment—to break dormancy. Mix the seeds with a moistened peat moss or sand in a sealed plastic bag. I use about 1 part seeds to 3 parts moist medium to prevent molding. Place the bag in your refrigerator's crisper drawer (not freezer) for 30-90 days. Check monthly to ensure the medium stays moist but not soggy.
After stratification, the seeds will look plump and firm. This process mimics winter conditions and signals the seed that spring has arrived. Some pine species need longer stratification—if you're unsure, err on the longer side. The cold treatment is crucial; without it, germination rates drop dramatically. I label each bag with the pine species and stratification start date to keep track.
☀️ Step 4: Sow Stratified Seeds in Prepared Soil
Fill small pots or seed trays with well-draining potting mix (I use a blend of 50% peat moss and 50% perlite). Moisten the soil until it's damp but not wet. Plant the stratified seeds 1/4 inch deep, spacing them 1-2 inches apart. The winged seeds make planting easy—just place them gently on the soil surface and press lightly.
Cover the pots with clear plastic wrap or a humidity dome to retain moisture and warmth. Place them in a warm location (65-75°F) with bright, indirect light. Avoid direct sunlight at this stage—it can overheat the soil. Germination can take 4-12 weeks, depending on the pine species. Patience is key; some seeds may take longer to sprout, but don't give up after a few weeks.
✂️ Step 5: Transplant Seedlings to Outdoor Nursery Beds
Once seedlings develop 2-3 sets of true needles (not the initial cotyledons), they're ready for transplanting. Harden them off by gradually exposing them to outdoor conditions over 1-2 weeks. Start with 1-2 hours of shade and slowly increase their time outside and sun exposure. Watch for signs of stress like wilting or yellowing needles—these indicate they're not ready yet.
Plant the hardened-off seedlings in a sheltered outdoor nursery bed with well-draining soil. Space them 6-12 inches apart, depending on the pine species. Mulch lightly with pine needles or wood chips to retain moisture and mimic their natural habitat. Young pine seedlings grow slowly, so avoid disturbing them once planted. Water deeply once a week during dry spells, ensuring the soil stays moist but not waterlogged.
Tips & tricks for perfect pine cone seed extraction
A few strategic moves can transform this simple process into a foolproof germination foundation.
Timing is Everything in Step 1: The 2-4 week drying period isn't just about opening cones—it's about mimicking nature's winter conditions. Place cones near a sunny window where they'll get indirect light during the day and cooler temperatures at night. I've found that cones dried at 75°F (the upper end of the ideal range) open most consistently within 2 weeks, while cooler homes may need the full 4 weeks. Check daily after week 2—you'll notice the scales beginning to part slightly when they're ready.
Seed Extraction Technique: When tapping cones in Step 2, work over a large tray or even a clean shower curtain to catch every seed. The wings are delicate, so avoid vigorous shaking—gently tap each scale with your fingers or a wooden spoon. I've saved seeds that would have been lost by using a small handheld vacuum with a fine mesh bag attachment. Store extracted seeds in labeled paper envelopes with the collection date—they'll stay viable for up to 6 months in cool, dry conditions.
Stratification Secrets: The 30-90 day cold treatment in Step 3 is non-negotiable for pine seeds, but proper moisture control is key. I use a 1:3 seed-to-medium ratio because too much moisture causes mold while too little prevents proper hydration. Place your bag in the crisper drawer where temperatures stay consistently around 35-40°F. Check monthly by gently squeezing the bag—it should feel like a damp sponge, not a wet rag. Some species like white pine germinate faster (30-60 days) while others like ponderosa may need the full 90 days.
Transplanting Readiness: Those 1-2 weeks of hardening off in Step 5 are crucial for survival. Start with just 1 hour of shade on day 1, then increase by 30 minutes daily. Watch for the seedlings' response—healthy ones will darken slightly when exposed to light, while stressed ones may develop yellow tips. I've lost entire batches by rushing this process, so when in doubt, keep them shaded longer. The first true needles should appear within 2-3 weeks of transplanting, signaling they're properly established.
Pro Tips for Get Pine Cone Seeds
- A few strategic moves can transform this simple process into a foolproof germination foundation.
- Timing is Everything in Step 1: The 2-4 week drying period isn't just about opening cones—it's about mimicking nature's winter conditions.
- Seed Extraction Technique: When tapping cones in Step 2, work over a large tray or even a clean shower curtain to catch every seed.
Frequently asked questions
Got questions about harvesting and growing pine cone seeds? You’re not alone!
Here are the most common queries—and straightforward answers—to help you navigate the process like a pro.
How do I know if a pine cone has viable seeds?
Look for closed pine cones with tight, unopened scales—these are fresh and likely to contain seeds. Avoid cones that are dry, cracked, or falling apart, as their seeds may be nonviable. If you’re unsure, gently tap the cone: if seeds rattle inside, they’re still good!
When is the best time to collect pine cones for seeds?
The ideal window is late summer to early fall (August–October), when cones are mature but haven’t fully opened. Wait until cones are brown and dry—if they release seeds easily when shaken, you’ve missed the boat! Store them in a cool, dry place until you’re ready to extract seeds.
What if my pine cones won’t open naturally?
No stress! Try these tricks:
- Bake them: Place cones in a 150°F (65°C) oven for 1–2 hours to dry them out.
- Soak in water: Submerge cones overnight to soften scales, then let them dry.
- Freeze them: A 24-hour freeze can shock cones open.
Can I grow pine trees from store-bought pine cones?
Yes, but success depends on the species. Native pine cones (like white pine or ponderosa) work best. Avoid ornamental or hybrid cones—they’re often sterile. If you’re unsure, ask a local nursery or check online for your region’s seed-bearing pines.
Why aren’t my pine seeds germinating?
Germination can be finicky! Common culprits:
- Improper stratification (cold treatment)—most pine seeds need 30–90 days in the fridge.
- Poor moisture control: Keep soil damp but not soggy.
- Low light levels: Place seeds in bright, indirect light.
- Old or low-quality seeds: Freshness matters!
Wrapping up and next steps
You’ve got all the tools and know-how to unlock the hidden potential of pine cones—now it’s time to put that knowledge to work! 🌱 Whether you’re aiming to grow your own pine trees, experiment with eco-friendly projects, or simply satisfy your curiosity, harvesting and germinating pine cone seeds is easier than you think.
Start small, stay patient, and let nature guide the way—your green thumb (or budding interest) will thank you!
Ready to dive deeper? Head to your local nursery or forest and collect those cones today—your future pine saplings (or science experiment) are waiting! 🌲✨