Size
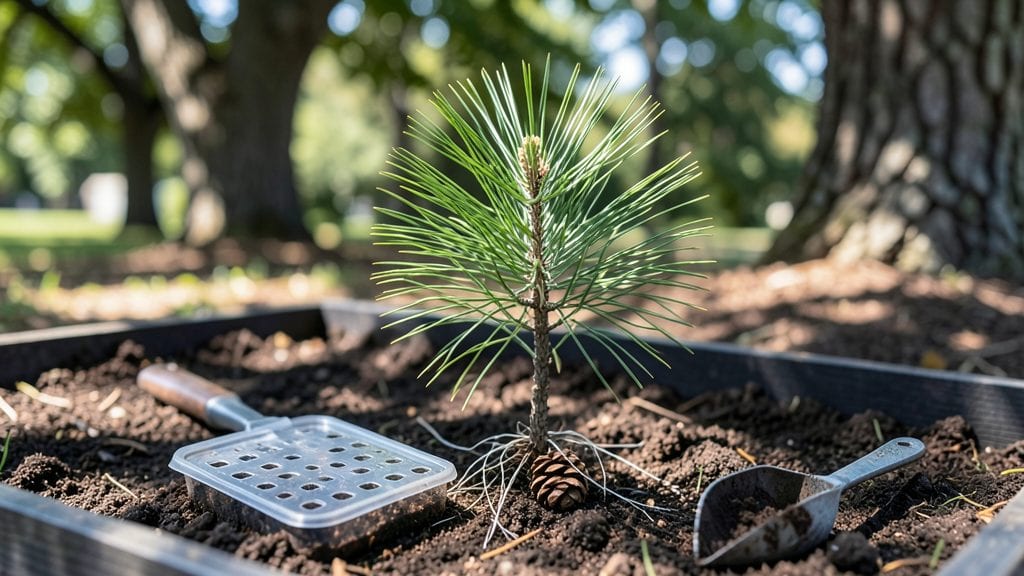
Growing pine cone seeds turns your yard into a living privacy screen that never loses its beauty. 🌲 I’ve watched my own seedlings grow from tiny specks into towering evergreens, and the process is surprisingly simple once you know the tricks—like breaking dormancy and giving them the right light.
The payoff? A fragrant, wind-resistant screen that outlasts any fence or lattice.
You’ll need pine cones from fast-growing species like ponderosa or loblolly, a warm spot for stratification, and patience—pine seedlings take years to mature but reward you with decades of shade and wildlife habitat.
The key is mimicking nature: cold treatment to wake the seeds, well-draining soil, and full sun from day one. Most people skip the stratification step and wonder why nothing sprouts.
Within 8-12 weeks, you’ll see the first green needles push through the soil, signaling success. These young trees need consistent moisture but hate soggy roots, so mulch heavily once established.
By year three, they’ll be tall enough to block nosy neighbors—and the scent of pine needles in summer air? Priceless.
Works best in zones 5-9, though some varieties handle colder climates. For faster results, start with 2-3 year old seedlings, but the satisfaction of growing from seed is unmatched. Ready to plant your future forest?
📚 In This Guide
- What you need
- Instructions
- Tips and common mistakes
- Wrapping up and next steps
What you need
- ● Fresh pine cones (from Pinus species like ponderosa, lodgepole, or white pine—collect 10-20 cones for a small screen or 50+ for a dense hedge).
- ● Scissors or pruning shears (to open cones and trim excess material).
- ● Water (for soaking and hydration—room-temperature, filtered water works best).
- ● Seed-starting mix (1-2 gallons of sterile, well-draining potting soil with perlite or vermiculite).
- ● Small pots or seed trays (with drainage holes—4-6 inch pots for individual cones or a 10x20-inch tray for bulk sowing).
- ● Plastic wrap or humidity dome (to retain moisture while seeds germinate).
- ● Grow lights or sunny windowsill (cones need 6-8 hours of light daily; a LED grow light is ideal).
- ○ Heat mat (optional but helpful—keeps soil 70-80°F for faster germination).
- ● Spray bottle (for gentle watering to avoid disturbing seeds).
- ● Fertilizer (balanced 10-10-10 or slow-release granules—wait until seedlings are 3-4 inches tall).
- ● Transplanting tools (small trowel or spoon for moving seedlings to outdoor beds).
- ● Mulch (pine bark or straw to retain moisture and suppress weeds once planted outdoors).
- ○ Gloves (optional—pine needles can be prickly!).
Step-by-Step instructions for growing pine cone seeds
Here’s the straightforward method I’ve used to grow healthy pine seedlings from cones—no special equipment needed.
🌱 Step 1: Collect and Prepare Fresh Pine Cones
Gather mature but not fully opened pine cones from the ground in late fall or winter. Avoid cones still attached to trees—they won’t have fully developed seeds. Place them in a large bowl and soak in warm water for 24-48 hours. This softens the scales so seeds can be extracted easily.
After soaking, lay the cones on a clean towel and gently pry open the scales with your fingers. You’ll find small, winged seeds inside—these are your planting material. Collect them in a small container and let them dry at room temperature for 24 hours before storing. This prevents mold and ensures better germination.
💧 Step 2: Stratify Seeds for Better Germination
Pine seeds need cold stratification to break dormancy. Mix the dried seeds with damp sand or peat moss in a ziplock bag and place it in the refrigerator for 6-8 weeks. Check weekly to ensure the mix stays moist—never soggy. This mimics winter conditions and signals the seeds it’s time to grow.
After stratification, remove the seeds from the fridge and let them sit at room temperature for 3-5 days to acclimate. This gradual shift prevents shock and improves germination rates. You’ll know they’re ready when the sand feels just damp to the touch, like a wrung-out sponge.
☀️ Step 3: Plant Seeds in Well-Draining Soil
Fill small pots (3-4 inches deep) with a mix of 50% potting soil and 50% perlite to ensure drainage. Plant seeds ¼ inch deep, spacing them 1 inch apart in the pot. Press the soil lightly around them to secure without compacting. Pine seedlings hate waterlogged roots, so this airy mix is critical.
Place the pots in a shady spot (bright, indirect light) until germination, which can take 4-12 weeks. Keep the soil consistently moist but never waterlogged—stick your finger in to check top inch of soil. If it’s dry, water gently until moisture seeps from the bottom of the pot.
🌿 Step 4: Transplant Seedlings to Outdoor Conditions
Once seedlings reach 3-4 inches tall with two sets of true needles, they’re ready for their first outdoor exposure. Harden them off by placing pots in a sheltered, shaded spot for 1-2 hours the first day, gradually increasing time over 10-14 days. This prepares them for full sun without shock.
After hardening, transplant seedlings to their permanent location in well-draining soil with full sun exposure. Space them 6-10 feet apart, depending on the pine species. Water deeply after planting to settle the roots, then reduce watering—pine seedlings thrive in drier conditions once established.
⏰ Step 5: Maintain Through the First Growing Season
Young pine seedlings need minimal care but benefit from mulch to retain moisture and suppress weeds. Apply a 2-inch layer of pine straw or wood chips around the base, keeping it 2 inches away from the trunk. This mimics their natural habitat and reduces watering needs.
Fertilize lightly in early spring with a balanced, slow-release fertilizer (10-10-10) to support growth. Avoid heavy-handed feeding—pine trees grow slowly and prefer lean soil. Monitor for pests like pine bark beetles or spider mites, treating with neem oil if needed. With patience, your seedlings will grow into a lush, natural privacy screen in just a few years.
Tips & tricks for perfect pine cone seedlings
A few strategic moves can transform your pine cone seedling success rate from hit-or-miss to consistently thriving. These are the lessons I learned after watching my first batch of seedlings either rot or never sprout.
Timing is Everything: In Step 1, those 24-48 hours of soaking aren't just about softening the cones—they're also about preventing mold. I learned this the hard way after ruining three batches with overly wet cones. Use warm water (around 80°F) and change it halfway through if it cools. The cones should feel pliable but not waterlogged when you test them. After extraction, that 24-hour drying period at room temperature is non-negotiable—it's the difference between moldy seeds and healthy ones ready for stratification.
Stratification Secrets: The 6-8 weeks in the fridge during Step 2 might feel like forever, but this cold treatment mimics winter conditions that trigger germination. Here's what I do differently: I use a small mesh bag inside the ziplock to keep seeds from getting buried in sand. Also, I label the bag with the date—this prevents the "I forgot where I put them" syndrome. After removing from cold, the 3-5 days at room temperature are crucial for preventing shock. If your seeds feel clumpy or smell musty after stratification, they've been too wet—start over with fresh damp sand.
Soil Science: In Step 3, that 50/50 potting soil to perlite mix isn't just about drainage—it's about aeration. I've found that adding a handful of orchid bark to the mix gives even better airflow to those delicate roots. When planting at ¼ inch deep, think "lightly covered" rather than buried. The spacing of 1 inch apart might seem generous, but crowded seedlings compete for nutrients and light. For the germination phase, I use a clear plastic dome over the pot to maintain humidity until sprouts appear, then remove it to prevent mold.
Transplanting Wisdom: The 3-4 inch height requirement in Step 4 isn't arbitrary—it's when seedlings develop enough root mass to handle outdoor conditions. When hardening off, I increase exposure time by 30 minutes daily rather than the full 1-2 hours jump. For permanent planting, I dig holes twice as wide as the root ball to minimize transplant shock. The 6-10 feet spacing might seem excessive, but remember: these trees will grow for decades.
Pro Tips for Grow Pine Cone Seeds
- A few strategic moves can transform your pine cone seedling success rate from hit-or-miss to consistently thriving.
- Timing is Everything: In Step 1, those 24-48 hours of soaking aren't just about softening the cones—they're also about preventing mold.
- Stratification Secrets: The 6-8 weeks in the fridge during Step 2 might feel like forever, but this cold treatment mimics winter conditions that trigger germination.
Frequently asked questions
Got questions about growing pine cone seeds? You’re not alone—this process can feel a little mysterious at first! Below, we’ve rounded up the most common questions (and answers) to help you grow with confidence.
How long does it take for pine cone seeds to germinate?
Germination can take anywhere from 4 to 12 weeks, depending on the species, soil conditions, and temperature. Some pine seeds (like those from Pinus strobus) germinate faster in warm, moist soil, while others may take longer. Patience is key—keep the soil consistently damp and monitor progress!
Can I grow pine trees from any pine cone?
Not all pine cones will yield viable seeds! Focus on mature, healthy cones from female cones (the larger, woody ones). Avoid cones from ornamental pines or those that are diseased, dried out, or pest-damaged. If you’re unsure, opt for seeds from a trusted nursery or local forestry program.
What’s the best time of year to plant pine seeds?
Plant pine seeds in early fall (September–October) for natural stratification (a cold period that mimics winter) or in late winter (February–March) after cold-stratifying them indoors. Avoid planting in summer heat, as the soil can dry out too quickly, reducing germination rates.
Do pine seedlings need full sun?
Yes! Pine seedlings thrive in full sun (6+ hours daily), but young saplings can be sensitive to intense afternoon heat. If planting in hot climates, provide light shade during the first growing season to prevent stress. Once established, most pines tolerate full sun beautifully.
Why aren’t my pine seeds sprouting?
Several factors could delay germination:
- Lack of stratification: Many pine seeds need a cold period (4–6 weeks in the fridge) to break dormancy.
- Poor soil drainage: Waterlogged soil suffocates seeds—use a mix with perlite or sand.
- Improper depth: Plant seeds ¼ inch deep; deeper planting can hinder sprouting.
- Old or low-quality seeds: Fresh seeds (1–2 years old) germinate best.
Wrapping up and next steps
Growing pine cone seeds into a lush, evergreen privacy screen is a rewarding journey that connects you with nature—literally! 🌱 With the right soil, patience, and care, you’ll soon enjoy the beauty and benefits of a thriving pine tree.
Whether you’re a beginner or a seasoned gardener, every small step brings you closer to your green oasis.
Ready to take the next step? Start by planting your first batch of seeds this season—and don’t forget to share your progress with fellow gardening enthusiasts. Happy growing! 🌿