Picking
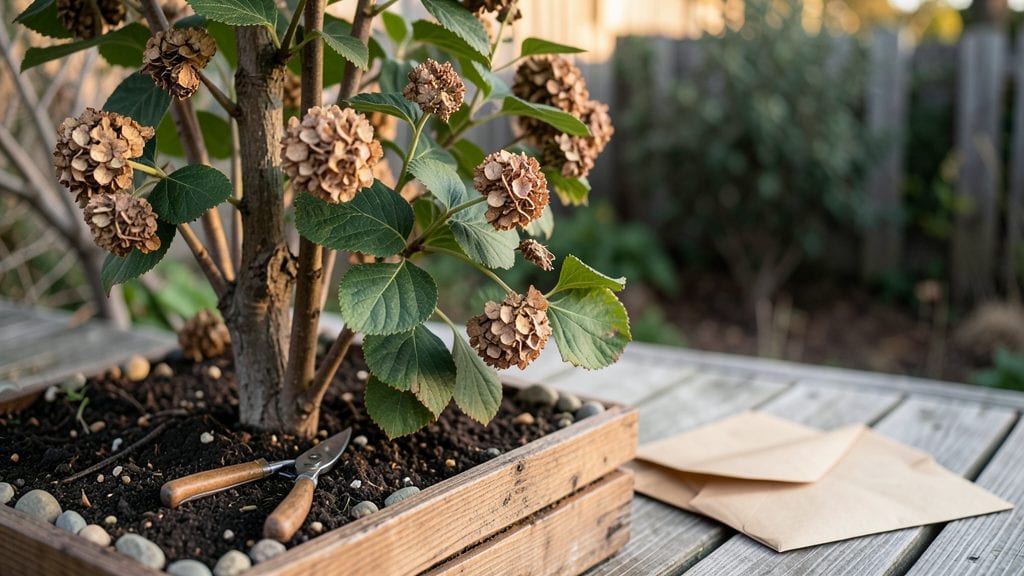
Harvesting hydrangea seeds isn't just about saving pretty seed heads—it's your ticket to growing rare varieties that won't show up in nurseries. 🌸 The key moment arrives in late fall when those papery seed pods turn from green to tan, splitting open just enough to reveal tiny seeds inside.
I learned this the hard way by waiting too long and watching seeds scatter before I could collect them.
You'll need just three things: sharp scissors, a brown paper bag, and patience. Cut the seed heads when they're fully dried but still attached—this usually happens after the first frost when the plant has gone dormant.
The seeds inside stay viable for months if stored properly, so timing matters more than you'd think.
Once you've collected them, let the seed heads dry completely in a warm, dry spot for about two weeks. Then gently rub the pods between your fingers to release the seeds.
Store them in an airtight container in a cool, dark place until spring. When you finally plant them, expect germination to take about 30-60 days—longer than most gardeners realize.
Here's the secret most guides skip: hydrangea seeds need cold stratification to break dormancy. Pop them in the fridge for 6-8 weeks before planting, and you'll see those first tiny sprouts emerge with far better success. The payoff? Unique hydrangeas that might just become your garden's standout stars.
📚 In This Guide
- What you need
- Instructions
- Tips and common mistakes
- Wrapping up and next steps
What you need
- ● Mature hydrangea flowers: Choose dried, brown seed heads (not fresh blooms!) from late fall to early winter. Aim for at least 3–5 healthy seed heads per variety.
- ● Sharp pruning shears or scissors: A clean cut prevents damage to the seed pods. Opt for bypass pruners (not anvil-type) for precision.
- ● Paper bags or breathable seed envelopes: Use unbleached, kraft paper bags (size: ~8x10 inches) or perforated seed envelopes to store seeds. Avoid plastic—it traps moisture!
- ● Labeling tags or masking tape + marker: Label each bag with the hydrangea variety (e.g., "Endless Summer," "Nikko Blue") and the harvest date.
- ● Drying tray or wire rack: A flat, elevated surface (like a baking sheet or mesh rack) to air-dry seeds for 1–2 weeks.
- ○ Fine-mesh sieve (optional but helpful): A #10–#20 sieve (0.05–0.03-inch holes) to separate seeds from chaff after drying.
- ● Desiccant packets: Place a few silica gel packets in sealed containers to keep seeds dry long-term.
- ● Seed viability test kit: A floating test (fill a glass with water, drop seeds in—viable ones sink!) or a paper towel germination test to check seed health.
- ● Gloves (nitrile or cotton): Protects hands from prickly seed heads and sap.
- ● Notebook or seed-tracking app: Log harvest dates, varieties, and germination notes for future reference.
Step-by-Step guide to harvesting hydrangea seeds
Timing and technique make all the difference when collecting hydrangea seeds.
🌿 Step 1: Identify Mature Seed Heads
Wait until late fall or early winter when the seed heads turn a dry, papery brown—this signals full maturity. The seed pods will feel crisp and hollow when squeezed gently. I always harvest on a dry day to avoid moisture issues. Look for clusters of small, hard capsules that resemble tiny pinecones.
Don't rush—green or partially dried heads won't yield viable seeds. The seeds inside need complete maturity to germinate properly. If you see any remaining flowers still attached, those heads aren't ready yet. Patience here ensures better germination rates later.
✂️ Step 2: Carefully Remove Seed Heads
Use clean, sharp pruning shears to snip the entire seed head cluster from the stem, leaving about ½ inch of stem attached. This prevents damaging the plant and makes handling easier. Place the harvested heads in a paper bag—this allows airflow while keeping seeds contained.
Work systematically from one cluster to the next. I like to lay out a tarp beneath the plant first to catch any stray seeds that might fall during harvesting. This also makes cleanup easier afterward. Avoid shaking the heads—seeds will scatter and become lost.
🪴 Step 3: Dry and Process the Seed Heads
Spread the harvested heads on a clean, dry surface indoors where they can air-dry completely for about 1-2 weeks. You'll know they're ready when the capsules open naturally and release tiny, brown seeds. I place them on a mesh screen or paper towels to prevent mold growth.
Once fully dry, gently rub the seed heads between your fingers or use a small sieve to separate the seeds from the chaff. The viable seeds will be small, hard, and dark brown. Discard any empty capsules or debris. Store the seeds in a labeled paper envelope in a cool, dry place.
🌱 Step 4: Stratify for Better Germination
Hydrangea seeds require a cold period to break dormancy. Place the seeds in a sealed plastic bag with slightly damp sand or peat moss, then refrigerate for 60-90 days. Check monthly to ensure the mix stays slightly moist but not soggy. This mimics winter conditions and significantly improves germination rates.
After stratification, sow the seeds in a well-draining seed-starting mix at a depth of about ¼ inch. Keep the soil consistently moist and provide warmth (around 65-70°F) until germination occurs, which typically takes 2-4 weeks. Patience during this phase pays off with stronger seedlings.
☀️ Step 5: Transplant Seedlings Carefully
Once seedlings develop 2-3 true leaves, they're ready for transplanting. Choose a location with partial shade and well-draining soil. Hydrangeas dislike soggy roots, so amend the soil with compost if needed. Plant each seedling at the same depth it grew in its container.
Water thoroughly after transplanting to settle the soil around the roots. Space seedlings about 12 inches apart to allow for future growth. Mulch lightly with organic material to retain moisture and suppress weeds. With proper care, your hydrangeas will reward you with beautiful blooms in just a few seasons.
Tips & tricks for perfect hydrangea seed harvesting
Timing and technique are everything when harvesting hydrangea seeds—here's how to avoid common pitfalls and maximize your success.
Timing is Everything: Don't harvest too early! The seed heads must be completely dry and papery brown—this usually happens in late fall or early winter. I learned this the hard way after harvesting green heads that yielded no viable seeds. For best results, wait until the seed pods feel crisp and hollow when gently squeezed. This ensures maximum germination potential.
Harvesting Technique: In Step 2, when removing seed heads, leave about ½ inch of stem attached. This prevents damaging the plant and makes handling easier. I also recommend laying down a tarp beneath the plant before harvesting—this catches any stray seeds that might fall, saving you from losing precious seeds to wind or accidental drops. Work systematically from one cluster to the next to maintain organization.
Drying Strategy: When drying your seed heads for 1-2 weeks, place them on a mesh screen or paper towels rather than directly on a surface. This prevents mold growth from trapped moisture. I've found that spreading them out in a single layer with good airflow is crucial. Watch for the capsules to open naturally and release tiny brown seeds—this is your cue that they're ready for processing.
Stratification Insight: The 60-90 day cold stratification period is non-negotiable for hydrangea seeds. I've seen germination rates improve dramatically when seeds undergo this cold treatment. Use slightly damp sand or peat moss in your sealed bag, and check monthly to ensure it stays moist but not soggy. This mimics natural winter conditions and breaks seed dormancy effectively.
Pro Tips for Harvest Hydrangea Seeds
- Timing and technique are everything when harvesting hydrangea seeds—here's how to avoid common pitfalls and maximize your success.
- Timing is Everything: Don't harvest too early!
- Harvesting Technique: In Step 2, when removing seed heads, leave about ½ inch of stem attached.
Frequently asked questions
Got questions about harvesting hydrangea seeds? You’re not alone! Here are answers to the most common queries to help you navigate the process with confidence.
When is the best time to harvest hydrangea seeds?
The ideal time to harvest hydrangea seeds is in late fall or early winter, after the seed heads have dried out and turned brown. This usually happens 2–3 months after flowering. Harvesting too early (when seeds are still green) can reduce viability, while waiting too long risks seed loss from weather or wildlife.
How do I know if the seeds inside are mature and ready for harvesting?
Mature hydrangea seeds are small, hard, and dark brown, often found nestled inside dried seed heads. Gently open a seed head—if the seeds rattle inside or pop out easily, they’re ready! Avoid harvesting if seeds are still soft or moist, as they won’t germinate well.
Can I harvest seeds from any hydrangea variety, or are some better than others?
Most hydrangea varieties—like Hydrangea macrophylla (bigleaf) or Hydrangea paniculata (panicle)—produce viable seeds, but sterile cultivars (e.g., 'Endless Summer') won’t yield seeds. Focus on wild-type or seed-producing hybrids for the best results. Check plant tags or ask local nurseries for seed-friendly varieties!
What should I do if my seed heads freeze before I can harvest them?
Don’t worry! Frozen seed heads can still yield viable seeds. Let them thaw indoors, then gently crush the dried heads to release seeds. Store them in a cool, dry place (like a paper envelope) until you’re ready to sow. If mold appears, discard the seeds—they’ve likely lost viability.
How long can I store harvested hydrangea seeds before planting?
Hydrangea seeds remain viable for 1–2 years if stored properly in a cool (35–40°F), dry environment. Use airtight containers or sealed envelopes to prevent moisture damage. For best germination rates, plant them within 6 months if possible!
Wrapping up and next steps
Harvesting hydrangea seeds is a rewarding way to grow new plants while preserving your garden’s beauty! By following these steps—identifying mature seed heads, collecting seeds at the right time, and storing them properly—you’ll set yourself up for successful germination and future blooms. 🌱
Now that you’re equipped with the know-how, why not give it a try? Start small with a few seed heads, experiment with different varieties, and enjoy the thrill of nurturing your own hydrangeas from seed. Happy gardening!