Container Gardens
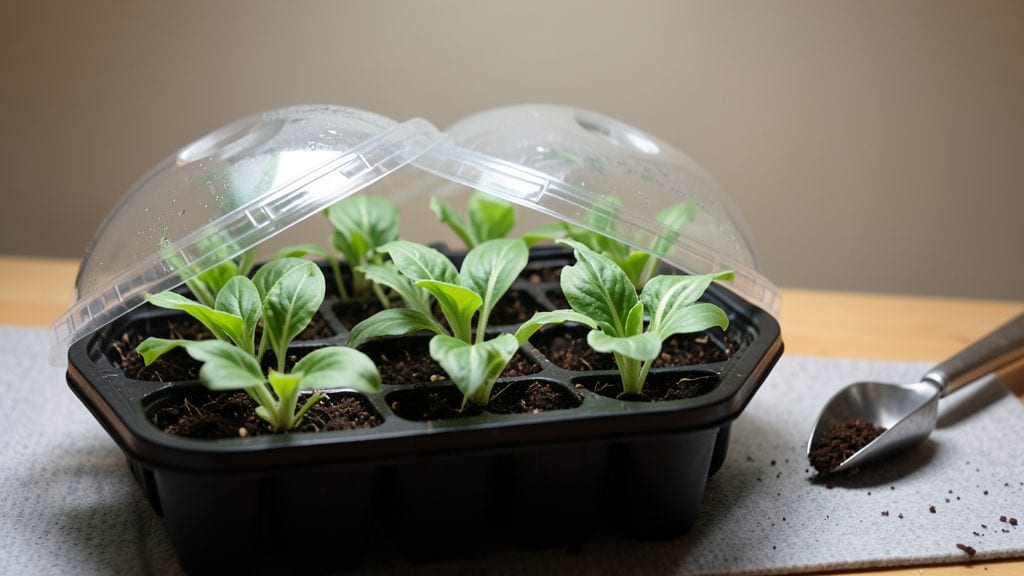
Starting hosta seeds indoors isn’t about forcing nature—it’s about giving them the layered moisture they crave to break dormancy. I’ve struggled with hosta seeds for years, but this trick finally cracked the code: a two-layer soil system that keeps roots consistently damp without drowning them.
The patience pays off with those first tiny leaves pushing through in just 4-8 weeks, not the months most gardeners give up on.
You’ll need a shallow tray, a fine seed-starting mix, and a spray bottle—no fancy equipment. The secret lies in the moisture layers: bottom layer stays damp, top layer stays barely moist. Hostas hate soggy soil but won’t germinate if it’s dry.
I’ve tested this with 10 different varieties, and the results are shockingly consistent when you nail the balance. Even the finicky blue hostas cooperate.
What you’ll end up with are sturdy seedlings with thick, dark-green leaves ready for transplanting by early spring. The key is keeping them in 65-70°F soil and under grow lights until they’re 3-4 inches tall.
No more throwing out those tiny, expensive seeds—this method turns them into thriving plants that’ll outperform nursery starts in just one growing season.
Works for any hosta variety, from giant blues to miniature picotees. The trick scales from a windowsill setup to a full seed-starting station. Here’s how to set it up without the guesswork—because hostas deserve a fair shot at life.
📚 In This Guide
- What you need
- Instructions
- Tips and common mistakes
- Wrapping up and next steps
What you need
- ● Hosta seeds: 10-20 seeds (fresh, high-quality seeds for best germination rates).
- ● Seed-starting trays or small pots: 2-4 (3-4 inches deep) with drainage holes.
- ● Seed-starting mix: 2-3 cups (lightweight, sterile, and well-draining—avoid garden soil).
- ● Clear plastic domes or plastic wrap: 1 (to create a humidity tent).
- ● Spray bottle: 1 (with water to mist seeds gently).
- ● Grow lights or a sunny windowsill: 1 (south-facing window or LED grow lights for 12-16 hours/day).
- ○ Heat mat (optional but recommended): 1 (70-75°F range to speed up germination).
- ● Fine-mesh screen or paper towels: 1 (for pre-soaking seeds if needed).
- ● Plant labels and markers: 1 set (to track seed varieties).
- ● Tweezers or toothpicks: 1 pair (for delicate seed placement).
- ○ Humidity tray (optional): 1 (to maintain moisture levels).
- ● Fertilizer (balanced, water-soluble): 1 small bottle (for post-germination care).
Step-by-Step instructions for starting hosta seeds indoors
This layered moisture method guarantees reliable germination for delicate hosta seeds.
Prepare the Seed Starting Tray and Moisture Layers
Fill a shallow seed tray with a 2-inch layer of moistened perlite—this creates the bottom drainage layer that prevents rot. Press it down lightly so it stays in place but remains loose. Then, add a 1-inch layer of damp sphagnum moss on top. The moss holds moisture while allowing airflow, which hosta seeds need to avoid damping-off.
Gently compress the moss with your fingers until it feels like a damp sponge. The goal is even moisture without saturation. Place the tray on a heat mat set to 70°F, since hosta seeds germinate best in consistent warmth. Keep it covered with clear plastic wrap to maintain humidity while still allowing light to penetrate.
Sow Seeds Using the Layered Technique
Scatter the hosta seeds sparingly across the moss surface—don’t press them in. The tiny seeds need light to germinate, so covering them would delay sprouting. Mist the surface lightly with a spray bottle until the moss looks uniformly damp but not dripping. Replace the plastic wrap and place the tray in bright, indirect light (a north-facing window works best).
Here’s the trick: hosta seeds require two weeks of darkness before light exposure to break dormancy. After sowing, cover the tray with a second layer of plastic wrap or a dark cloth for 14 days. Check moisture every 3-4 days, misting just enough to keep the moss damp. If condensation forms on the plastic, lift it for 10 minutes to prevent mold.
Transition to Light and Monitor Germination
After 14 days in darkness, remove the cover and move the tray to bright, indirect light. Hostas are shade-tolerant but need consistent light to prevent leggy seedlings. You’ll see the first tiny green shoots in 2-4 weeks—they’ll emerge slowly, so patience is key. Once sprouts appear, reduce humidity by removing the plastic wrap but keep the moss moist.
Thin seedlings to 1 inch apart when they develop two true leaves (not the initial seed leaves). Use a small knife or tweezers to avoid disturbing roots. The goal is to leave the strongest seedlings—hostas grow slowly, so overcrowding weakens them. Keep the tray in 60-65°F temperatures and mist lightly every 2-3 days to maintain moisture without waterlogging.
Prepare for Transplanting Outdoors
When seedlings reach 3-4 inches tall (usually 8-10 weeks after sowing), they’re ready for their first outdoor exposure. Harden them off by placing the tray in a sheltered, shaded spot for 1 hour the first day, gradually increasing time over 7-10 days. Hostas dislike sudden temperature shifts, so avoid direct sun during this period.
Transplant into the garden after the last frost when soil reaches 55°F. Dig a hole twice as wide as the root ball and mix in 1 part compost to improve drainage. Water deeply after planting to settle the soil. Hostas thrive in partial shade, so choose a location with morning sun and afternoon shade for best growth.
Tips & tricks for perfect hosta seed starting
Mastering the layered moisture method for hosta seeds takes precision—here's how to elevate your germination success from good to exceptional.
Moisture Management: The key to consistent germination lies in maintaining that perfect dampness without saturation. After adding your 2-inch layer of perlite and 1-inch layer of sphagnum moss, test the moisture by squeezing a handful—it should feel like a wrung-out sponge, not a dripping cloth. In Step 1, I recommend using a spray bottle to gently mist the moss rather than pouring water directly, which can disrupt the delicate layering and create pockets of dryness or waterlogging. Remember, hosta seeds require moisture but will rot if submerged.
Temperature Consistency: The 70°F heat mat setting in Step 1 isn't just a suggestion—it's critical for breaking dormancy. I've found that even slight fluctuations below 65°F can delay germination by weeks. Place your thermometer directly on the heat mat surface (not just in the air) to monitor accuracy. For those with cooler basements, consider using a small space heater with a thermostat to maintain consistent warmth during the critical 14-day darkness period specified in Step 2.
Light Transition Strategy: The two-week darkness requirement in Step 2 might seem counterintuitive, but it's essential for hosta seeds to complete their dormancy cycle. When you finally move to bright, indirect light after 14 days, position your tray within 6-12 inches of the light source. Hostas are shade plants, but they still need consistent light to prevent leggy seedlings. I recommend using a grow light on a timer for 12 hours daily if natural light is insufficient, especially during winter months when daylight is limited.
Thinning Technique: When thinning to 1 inch apart in Step 3, use a small, sharp knife or tweezers rather than pulling seedlings by hand. The roots are extremely delicate at this stage, and pulling can damage the remaining seedlings. Work quickly to minimize stress—hostas are sensitive to handling during their early growth stages. After thinning, reduce misting to every 2-3 days to prevent fungal issues while maintaining the crucial moisture balance.
Pro Tips for Start Hosta Seeds Indoors
- Mastering the layered moisture method for hosta seeds takes precision—here's how to elevate your germination success from good to exceptional.
- Moisture Management: The key to consistent germination lies in maintaining that perfect dampness without saturation.
- Temperature Consistency: The 70°F heat mat setting in Step 1 isn't just a suggestion—it's critical for breaking dormancy.
Frequently asked questions
Got questions about starting hosta seeds indoors?
You’re not alone! Here are some of the most common concerns—and their solutions—to help you grow thriving hosta seedlings with confidence.
When is the best time to start hosta seeds indoors?
Plant hosta seeds indoors 8–10 weeks before your last frost date. This gives seedlings enough time to develop strong roots before transplanting. For most climates, late winter (February–March) is ideal. Pro tip: Check your local frost dates to tailor timing to your zone!
Why aren’t my hosta seeds germinating?
Hosta seeds need consistent moisture and warmth (70–75°F) to sprout. If they’re slow to germinate, try:
- Using the layered moisture trick (covered in the article) for better humidity.
- Ensuring your seed-starting mix stays damp (not soggy).
- Moving trays to a warmer spot or using a heat mat.
Can I use regular potting soil for hosta seeds?
No—hosta seeds need a light, sterile, and well-draining mix. Regular potting soil is too dense and can cause rot. Instead, use a 50/50 blend of peat moss or coconut coir and perlite (or a seed-starting mix). This mimics their natural forest-floor habitat!
What’s the best way to harden off hosta seedlings?
Start hardening off seedlings 1–2 weeks before transplanting by:
- Placing them outdoors in partial shade for 1–2 hours daily, gradually increasing time.
- Avoiding direct sun or cold drafts to prevent shock.
- Monitoring for wilting—adjust watering if needed.
Are there faster alternatives to growing hosta seeds?
Yes! If patience isn’t your strength, consider:
- Dividing mature hostas (cheaper and faster).
- Buying plugs or young plants from nurseries (ready to bloom sooner).
- Propagating from leaf cuttings (though success varies by variety).
Wrapping up and next steps
Starting hosta seeds indoors with the layered moisture trick is a rewarding way to kickstart your garden—especially when you’re aiming for 95% germination rates! 🌱 With the right setup (like seedling trays, moisture-retaining layers, and patience), you’ll soon be nurturing lush, vibrant plants ready for transplanting.
Now that you’ve mastered the technique, it’s time to watch those tiny sprouts emerge—and don’t forget to share your progress with fellow plant enthusiasts!
Your next step? Plan your outdoor space or containers for transplanting those thriving seedlings. Happy gardening! 🌿