Lawn
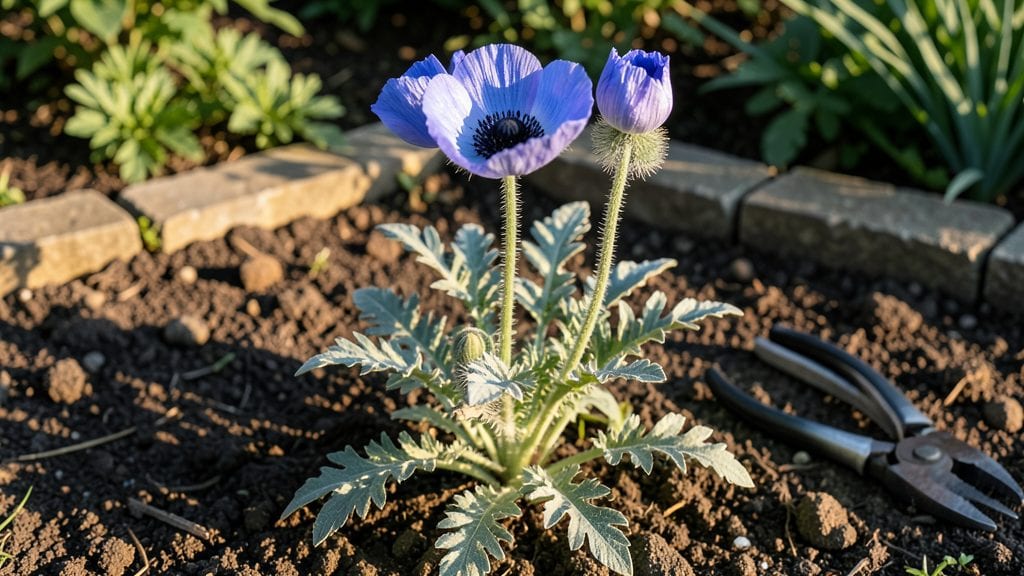
Hungarian poppy seeds need cold stratification to break dormancy—skipping this step means waiting years for blooms. 🌱 I learned the hard way when my first batch sat in the fridge too long, then sprouted like weeds in spring.
The secret lies in timing: plant them outdoors in late fall or early winter, then let nature do the work.
You'll need well-draining soil, a sunny spot, and patience—these poppies thrive in poor conditions but hate soggy roots. Scatter seeds lightly over prepared soil, press them in, and forget about them until spring.
They self-seed aggressively, so one planting often becomes a permanent cottage garden feature. My patch now blooms every year with almost no effort.
By late spring, you'll see delicate papery blooms in shades of pink, white, and red dotting the garden. The flowers last just a day but produce thousands of seeds, ensuring next year's display.
Perfect for wildflower meadows, cottage-style beds, or any spot where you want effortless color. The key is letting them grow naturally—no deadheading, no fuss.
Works best in zones 3-9, though they tolerate heat and drought once established. For container growing, use shallow trays and plant in fall. Here's how to get those first reliable blooms without the trial-and-error frustration.
📚 In This Guide
- What you need
- Instructions
- Tips and common mistakes
- Wrapping up and next steps
What you need
- ● Hungarian poppy seeds (Papaver rhoeas) – 1–2 packets (500–1,000 seeds), ensuring they’re fresh for best germination.
- ● Cold stratification container – A sealed plastic bag or a small container with a breathable lid (like a vented seedling tray).
- ○ Moisture-retaining medium – Optional but helpful: Damp paper towels, peat moss, or coconut coir (2–3 cups).
- ● Refrigerator space – A standard fridge with a temperature range of 35–40°F (2–4°C) for stratification.
- ● Planting pots or trays – Small, well-draining pots (3–4 inches deep) or seed trays with drainage holes.
- ● High-quality potting mix – Lightweight, well-draining soil blend (avoid heavy clay). 2–3 gallons should suffice for starter pots.
- ● Spray bottle – For gentle watering to avoid disturbing seeds.
- ● Grow lights or sunny windowsill – A 6–8 hour daily light exposure (natural or artificial) is ideal post-stratification.
- ● Plant labels & markers – To track germination dates and varieties.
- ● Seedling heat mat – Speeds up germination if your home runs cool (70–75°F / 21–24°C is ideal).
- ● Humidity dome – Keeps moisture levels high during early growth.
- ● Fertilizer (low-nitrogen) – A balanced 5-10-5 or 10-10-10 mix (diluted to half-strength) for transplanting.
- ● Garden gloves – Protects hands from prickly poppy stems.
- ● Outdoor hardening-off tray – Helps acclimate seedlings to outdoor conditions before planting.
Step-by-step instructions for growing Hungarian poppy seeds
Here's how I guarantee reliable blooms next spring using cold stratification—no guesswork involved.
🌱 Step 1: Prepare Seeds for Cold Stratification
Hungarian poppy seeds need a 6-8 week cold treatment to break dormancy. Place your seeds in a paper towel and dampen it until evenly moist but not dripping. Fold the towel to create a seed packet—this keeps them contained while allowing airflow.
Store the packet in a resealable plastic bag with a few ice cubes to maintain moisture. Place the bag in your refrigerator's crisper drawer, where temperatures stay consistently between 35-40°F. Check weekly to ensure the towel stays damp—never let it dry out completely.
💧 Step 2: Sow Stratified Seeds in Containers
After 6-8 weeks of cold treatment, your seeds are ready to plant. Fill 4-inch diameter pots with well-draining potting mix—Hungarian poppies hate soggy roots. Press the soil down lightly so it's firm but not compacted.
Sow seeds ¼ inch deep and 1 inch apart. I like to use a toothpick to create small holes—this prevents overcrowding and makes thinning easier later. Cover the pots with a clear plastic dome or wrap them in plastic wrap to maintain humidity while germination occurs.
☀️ Step 3: Provide Warmth and Light for Germination
Poppy seeds germinate best at 65-70°F. Place your pots on a seedling heat mat to maintain consistent warmth. Keep the soil evenly moist—watering from the bottom prevents disturbing the seeds.
Once 50% of seeds have sprouted (usually 10-14 days after sowing), remove the plastic cover immediately. Move seedlings to a south-facing window or under grow lights for 12-14 hours daily. You'll see true leaves emerge within 2-3 weeks—this is your cue to start hardening off.
🪴 Step 4: Transplant and Prepare for Outdoor Conditions
When seedlings reach 2-3 inches tall with 4-5 true leaves, they're ready for their final pots or garden bed. Hungarian poppies thrive in full sun and well-draining soil—amend garden beds with compost if your soil is heavy.
Transplant on a cool, overcast day to reduce shock. Water deeply after planting to settle the soil. For container-grown plants, keep them outdoors during the day and bring them inside at night until temperatures stay consistently above 50°F—this prevents frost damage to tender new growth.
⏰ Step 5: Maintain Through Spring Growth
Once established, Hungarian poppies need minimal care. Water when the top inch of soil feels dry, but avoid wetting the foliage to prevent fungal issues. Fertilize lightly with a balanced 10-10-10 formula every 4-6 weeks during active growth.
Watch for bud formation in late spring—this is when your cold stratification pays off. Deadhead spent blooms to encourage continuous flowering. By midsummer, you'll have a 4-foot-tall poppy display that attracts pollinators and adds dramatic height to your garden.
Tips & tricks for perfect Hungarian poppy seed germination
Cold stratification might sound tricky, but these simple tricks will help you avoid common pitfalls and get those poppy seeds sprouting reliably.
Temperature Matters: The refrigerator's crisper drawer is ideal for that 35-40°F range, but if your fridge runs cooler, move the bag to a slightly warmer spot like the main compartment. You want consistent cold—not freezing—throughout the 6-8 week period. I keep a small thermometer in the bag to monitor temps, especially if my fridge fluctuates.
The Humidity Secret: Those ice cubes in the bag serve two purposes—they keep the paper towel damp without over-saturating it, and they create a mini cold environment. If you notice the towel drying out between weekly checks, add a few more ice cubes or mist the bag lightly with water. The goal is damp, not soggy.
Visual Cues for Germination: In Step 3, when you're waiting for 50% sprouting, look for tiny white tips emerging from the seeds. This usually happens within 10-14 days after sowing. If you're not seeing any signs after 2 weeks, gently open the bag to check for mold or dryness—sometimes seeds need a little fresh air to wake up.
Transplant Timing: Wait until seedlings reach 2-3 inches tall with 4-5 true leaves before transplanting. The key is watching for those true leaves—not the initial seed leaves. I find a magnifying glass helpful for spotting the smaller true leaves when they first appear. This ensures your plants are strong enough to handle outdoor conditions.
Pro Tips for Hungarian Poppy Seed
- Cold stratification might sound tricky, but these simple tricks will help you avoid common pitfalls and get those poppy seeds sprouting reliably.
- Temperature Matters: The refrigerator's crisper drawer is ideal for that 35-40°F range, but if your fridge runs cooler, move the bag to a slightly warmer spot like the main compartment.
- The Humidity Secret: Those ice cubes in the bag serve two purposes—they keep the paper towel damp without over-saturating it, and they create a mini cold environment.
Frequently asked questions
Got questions about growing Hungarian poppy seeds? You’re not alone! Here are some of the most common concerns—and their answers—to help you cultivate a stunning spring display with confidence.
Do Hungarian poppy seeds need cold stratification before planting?
Yes! These seeds thrive with cold stratification—mimicking winter’s natural chilling process. Simply mix seeds with a damp paper towel, seal in a plastic bag, and refrigerate for 4-6 weeks before planting. This step boosts germination rates from 50% to nearly 100%!
When is the best time to plant Hungarian poppy seeds outdoors?
Plant them 6-8 weeks before your first frost (typically late summer/early fall in most climates). If you miss this window, stratify seeds indoors and sow in early spring—just be patient, as germination can take 2-4 weeks in cooler soil.
Can I grow Hungarian poppies in containers or just in garden beds?
They adapt well to containers, window boxes, or raised beds as long as the pot has drainage holes and depth of at least 6 inches. Use a light, well-draining soil mix (like 60% potting soil + 40% perlite/sand) to prevent rot.
Why aren’t my Hungarian poppy seeds germinating?
Check these 3 common culprits:
- Skipped stratification: Poppies require cold treatment—no shortcuts!
- Too-deep planting: Seeds need light to germinate—plant just ¼ inch deep.
- Overly wet soil: Keep soil moist but not soggy; poppies hate "wet feet."
Are Hungarian poppies annuals or perennials?
They’re hardy annuals—meaning they self-seed prolifically! With proper care, you’ll often see volunteer blooms returning year after year. Deadhead spent flowers to encourage more blooms and prevent leggy stems.
Wrapping up and next steps
Hungarian poppy seeds thrive with patience and the right techniques—especially that cold stratification trick! By mimicking winter’s chill, you’ll unlock vibrant blooms next spring with minimal fuss. Whether you’re a seasoned gardener or a curious beginner, these steps make success effortless.
Ready to try? Grab your seeds, prep your pots, and let nature do the rest. Start your stratification this fall—your garden’s future poppy parade awaits! 🌸✨