Propagation
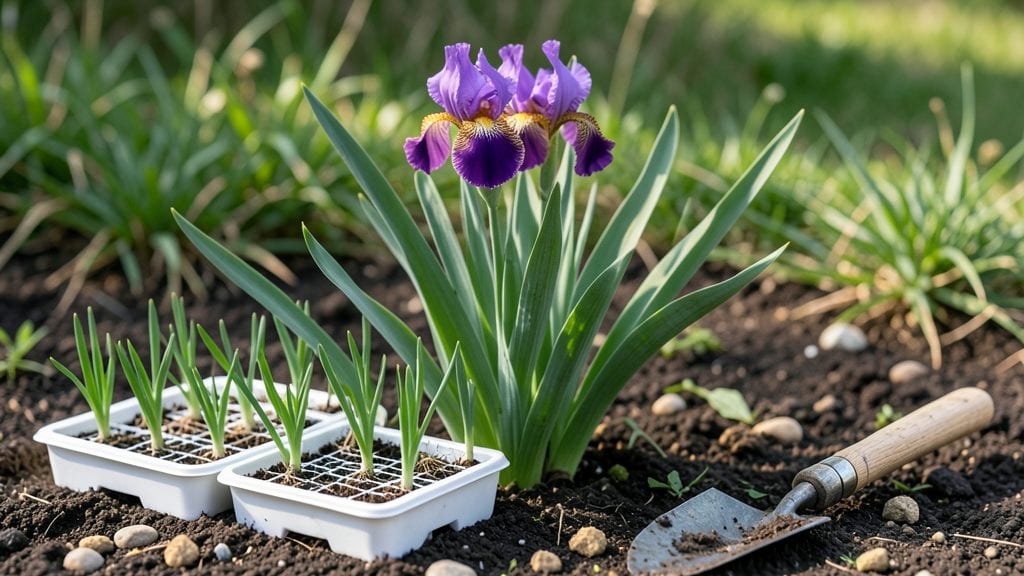
Growing irises from seeds isn’t just possible—it’s the secret to unlocking rare varieties that never make it to nurseries. 🌱 I’ve struggled with slow germination before, but cold stratification turned my patience into a springtime showstopper of purple, yellow, and blue blooms where others only see bare soil.
The trick is mimicking nature’s timing: seeds need 60-90 days of cold to break dormancy, and you don’t need fancy equipment—just a sealed bag of moist peat moss or a fridge works.
Most people rush this step, but those extra weeks in the cold mean the difference between a thriving seedling and a sad, shriveled failure. I’ve lost count of how many times I’ve seen beginners skip it.
By next spring, you’ll have sturdy young plants with sword-like foliage that’ll outlast any iris grown from rhizomes. The blooms arrive later but last longer, and the colors?
Shockingly vibrant—nothing like the predictable palette of store-bought varieties. This method also lets you grow heirlooms and species irises that cost $50+ as rhizomes.
Works for both bearded and Siberian irises, and even in small spaces like window boxes. The only real challenge is waiting—patience pays off when your garden becomes the talk of the neighborhood. Ready to turn those tiny seeds into showstoppers?
📚 In This Guide
- What you need
- Instructions
- Tips and common mistakes
- Wrapping up and next steps
What you need
- ● Iris seeds: Fresh or stored seeds (preferably from a trusted supplier or your own plants). Aim for 10–20 seeds for a small batch.
- ● Cold stratification medium: Peat moss or coconut coir (2–3 cups)
- ● Perlite or vermiculite (1 cup) for drainage
- ● Seed-starting trays or small pots: 2–4 inch deep with drainage holes (enough to hold all seeds).
- ● Plastic bags or clear lids: To create a humidity dome.
- ● Spray bottle: For gentle watering (avoid over-saturation!).
- ○ Fertilizer (optional but recommended): Balanced liquid fertilizer (diluted to half-strength, e.g., 10-10-10)
- ● OR slow-release granular fertilizer (mixed into the soil).
- ● Refrigerator or cold frame: For stratification (must maintain 35–45°F (2–7°C) for 6–8 weeks).
- ● Grow lights or sunny windowsill: For post-stratification growth (12+ hours of light/day).
- ● pH testing kit: To ensure soil pH is 6.0–7.0 (irises prefer slightly acidic to neutral).
- ● Humidity tray or pebble tray: For extra moisture control during germination.
- ● Labeling tags: To track seed varieties and planting dates!
- ● Pruning shears or small knife: For transplanting delicate seedlings.
Step-by-step instructions for growing irises from seeds
Here's my foolproof method to break the long wait—cold stratify seeds now for vibrant blooms next spring.
🌱 Step 1: Harvest and Prepare Fresh Iris Seeds
Collect seeds from mature, healthy iris pods when they turn brown and split open naturally. I always harvest on a dry morning so the seeds stay intact—wet pods make them stick together and rot. Spread the seeds on a paper towel to dry for 2-3 days in a shady spot, turning them daily. This prevents fungal growth while keeping them viable.
Once dry, store them in a sealed container with a moistened paper towel at the bottom—just enough to stay damp, not soggy. Seal it tightly and place in the refrigerator's crisper drawer for 60-90 days. This cold stratification mimics winter conditions and tricks seeds into thinking they've experienced a natural dormancy cycle.
⏰ Step 2: Stratify Seeds for Maximum Germination
After 90 days in cold storage, remove the container and let it sit at room temperature for 24 hours to acclimate. This gradual temperature shift prevents shock that could kill the seeds. I test germination readiness by placing a few seeds between damp paper towels in a sealed plastic bag—if they sprout within 7-14 days, the batch is ready.
If germination doesn't start, return the seeds to cold storage for another 30 days. Some iris varieties need longer stratification. Once sprouts appear, they're fragile—handle them with tweezers to avoid damaging the delicate roots.
🪴 Step 3: Sow Stratified Seeds in Containers
Fill a shallow tray with well-draining potting mix (I use a blend of 60% peat moss and 40% perlite). Moisten it until damp but not dripping, then scatter seeds on the surface—no need to bury them. Lightly press them into the soil with your fingertip, just enough to make contact. Irises need light to germinate, so covering them too deeply will delay sprouting.
Place the tray in a bright spot with indirect light and maintain soil moisture by misting daily. A humidity dome helps retain moisture, but remove it once sprouts appear to prevent fungal issues. Germination can take 3-6 weeks, so patience is key—don't disturb the soil while waiting.
☀️ Step 4: Transition Seedlings to Outdoor Conditions
Once seedlings develop 2-3 true leaves (about 8-12 weeks after sowing), harden them off by moving them outdoors for 2 hours daily in a sheltered spot. Gradually increase exposure over 2 weeks until they can tolerate full sun. Irises love sunlight but need time to adjust—sudden exposure causes leaf scorch.
Transplant seedlings into individual pots or directly into the garden in early fall (6-8 weeks before first frost). Choose a site with full sun and well-draining soil. Space them 12 inches apart to allow room for growth. Mulch lightly with compost to retain moisture and protect roots during winter.
🌿 Step 5: Overwinter and Encourage First Blooms
Young irises won't bloom until their second or third year, but proper care now ensures vibrant flowers next spring. Keep the soil moist but not waterlogged during the growing season—irises hate soggy roots. In late fall, reduce watering and let the soil dry slightly to encourage dormancy.
Apply a balanced fertilizer in early spring to support new growth. By year two, you'll see fan-shaped leaves emerge—this is your sign the plant is establishing roots. With patience and consistent care, those first blooms will be worth the wait.
Tips & tricks for perfect iris germination
Cold stratification isn't just a technique—it's the secret handshake between you and nature to unlock those stubborn iris seeds. Here's how to maximize your success without the guesswork.
Timing Secret: The 60-90 day cold stratification window is non-negotiable for most iris varieties, but don't panic if you start late. If you begin in late summer, you can still achieve excellent results by extending to the full 90 days—just be prepared to transplant in early fall as soon as seedlings are ready. The key is maintaining consistent moisture during that entire period, which is why I use a moistened paper towel rather than waterlogged soil that could cause rot.
Germination Test: That 7-14 day germination test in Step 2 is your crystal ball for success. If seeds don't sprout within this window, return them to cold storage for another 30 days—this extra month can make all the difference for varieties that need more dormancy time. I've had seeds that needed the full 120 days to break dormancy completely. Once you see those first sprouts, handle them like delicate glass—tweezers are your best friend for avoiding root damage.
Lighting Strategy: Irises are light-dependent germinators, so that shallow tray placement in indirect light is crucial. I place mine near an east-facing window where they get bright but diffused light for 6-8 hours daily. Too much direct sun at this stage causes overheating, while too little light leads to leggy, weak seedlings. If your home lacks good natural light, consider a simple LED grow light on a timer for 12 hours daily—it's a game-changer for indoor germination.
Transplant Timing: The 6-8 week window before first frost for fall transplanting is your golden opportunity. I always check my local frost dates and work backward to ensure seedlings have at least 8 weeks of establishment time before winter. If you're in a warmer climate, you might extend this slightly, but never transplant when soil temperatures are below 55°F—cold soil shocks delicate iris roots and stunts growth.
Pro Tips for Iris From Seeds
- Cold stratification isn't just a technique—it's the secret handshake between you and nature to unlock those stubborn iris seeds.
- Timing Secret: The 60-90 day cold stratification window is non-negotiable for most iris varieties, but don't panic if you start late.
- Germination Test: That 7-14 day germination test in Step 2 is your crystal ball for success.
Frequently asked questions
Got questions about growing irises from seeds?
You’re not alone! Here are some of the most common queries—and their answers—to help you navigate this rewarding (but sometimes tricky) process.
How long does cold stratification take for iris seeds?
Cold stratification typically requires 6–12 weeks in the fridge (or outdoors in a protected spot during winter). Iris seeds need this chilly period to break dormancy and germinate successfully. Start your seeds in late fall or early winter for spring blooms—patience is key!
Can I grow irises from seeds without cold stratification?
While possible, it’s much harder—and slower. Without stratification, germination rates drop dramatically, and seedlings may take 1–2 years to bloom instead of the usual 2–3 years. If you skip this step, soak seeds in warm water for 24 hours first to soften the outer layer. vs. —stratification wins!
Why aren’t my iris seeds germinating?
Common culprits: improper stratification (too warm or not cold enough), old seeds (viability drops after 1–2 years), or poor moisture control (keep soil damp but not soggy). Try scarifying seeds (lightly nicking the shell) or testing their freshness with a float test—sinkers are viable!
When should I plant stratified iris seeds outdoors?
Plant them as soon as they sprout (usually 4–8 weeks after stratification starts) or in early spring once soil temperatures rise above 50°F (10°C). Avoid late planting—they need time to establish roots before winter. A quick tip: Label seedlings now to track varieties!
Will iris seedlings bloom the first year?
Almost never! Even with perfect care, iris seedlings from seed take 2–3 years to produce flowers. Focus on healthy foliage and strong rhizome development first. Celebrate tiny milestones—like the first true leaves—and enjoy the process. Patience pays off with showstopping blooms!
Wrapping up and next steps
Growing irises from seeds is a rewarding journey that unlocks vibrant blooms for next spring—and you’ve got the cold stratification cheat code! 🌱 With patience, the right tools, and a dash of care, you’re well on your way to cultivating stunning varieties from tiny seeds.
Whether you’re a seasoned gardener or a curious beginner, this process connects you to the magic of nature’s cycles.
Ready to see your hard work pay off? Plant those seeds now, and by next spring, you’ll be admiring irises that thrive thanks to your efforts. 🌸 For extra inspiration, explore iris varieties or share your progress with fellow plant lovers—happy growing!