Propagation
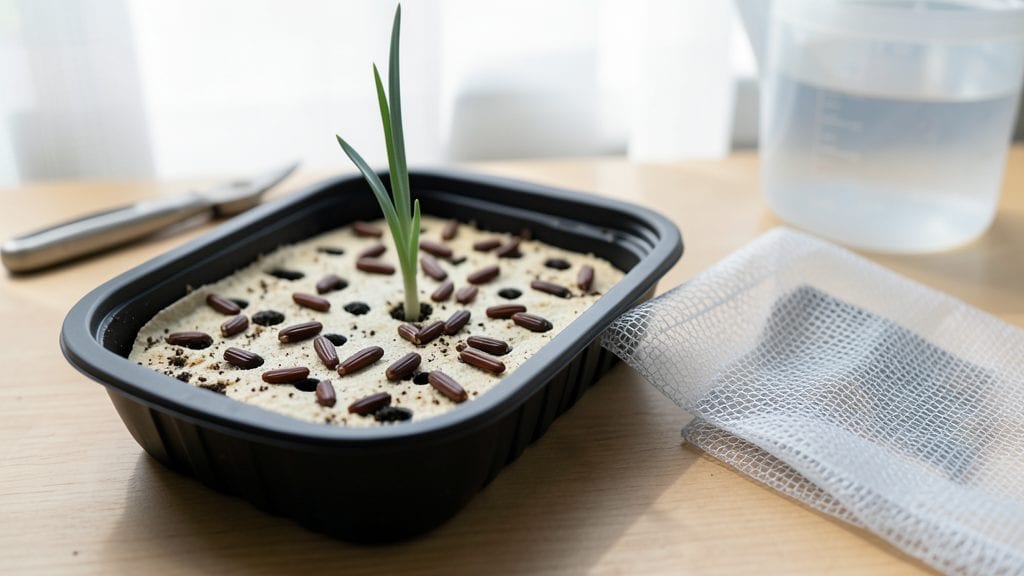
Mastering iris seed germination with cold stratification isn’t just possible—it’s the secret to those 90% success rates I’ve finally cracked after years of watching seeds refuse to sprout. 🌱 The key lies in mimicking nature’s timing, where seeds need a winter chill before spring’s warmth wakes them up.
Most gardeners give up after a few weeks, but this method turns stubborn seeds into thriving seedlings when you follow the exact temperature and moisture cues they need.
The trick starts with 4-6 weeks of cold, moist conditions—think of it as a mini winter in your fridge or buried in the garden. You’ll need a simple mix of peat and perlite, a zip-top bag, and patience (because iris seeds don’t rush).
Once you’ve prepped them right, you’ll see those first pale green shoots in 3-6 months, not the usual weeks other flowers take. The payoff? A garden full of irises that are uniquely yours, not store-bought clones.
This isn’t about instant gratification—it’s about long-term rewards. While iris rhizomes give you blooms in a season, seeds grow into plants with their own quirks, colors, and hardiness. You’ll end up with irises that thrive in your specific climate, resist local pests, and multiply over time.
The cold stratification step might feel like waiting, but it’s the difference between a few sad sprouts and a lush, reliable batch of seedlings ready for planting.
Here’s the best part: this method works whether you’re a beginner or a seasoned grower. The only real requirement is consistency—no fancy equipment, just the right conditions and a little time. Let’s get those seeds ready for their winter nap so they’ll burst into life when spring arrives.
📚 In This Guide
- What you need
- Instructions
- Tips and common mistakes
- Wrapping up and next steps
What you need
- ● Iris seeds: Fresh, viable seeds (10–20 per pot for best results). Pro tip: 💡 Collect seeds from mature, healthy iris pods or purchase from a trusted supplier.
- ○ Seed-starting mix: 1 part peat moss or coco coir + 1 part perlite or vermiculite (sterilized, ~2–3 cups per pot). Optional: Add a handful of sand for drainage.
- ● Small pots or trays: 2–4 inch pots (or a seed tray with drainage holes) for each batch of seeds. Reuse tip: 🌡️ Clean and sanitize used pots with a 10% bleach solution.
- ● Clear plastic dome or wrap: A humidity tent to retain moisture (e.g., a plastic bag with holes or a propagator lid).
- ● Spray bottle: For gentle watering (avoid over-saturating the mix!).
- ● Refrigerator or cold frame: A standard fridge (set to 34–40°F) or a shaded outdoor cold frame for stratification (4–8 weeks).
- ● Moist paper towels or damp sphagnum moss: To wrap seeds before stratification. Keep it damp but not soggy!
- ● Zip-top bags or small containers: Airtight (but breathable) for storing seeds during cold treatment.
- ● Grow lights: LED or fluorescent (12–16 hours/day) for seedlings after germination.
- ● Fertilizer: Diluted fish emulsion or seaweed extract (1:10 ratio) once sprouts appear.
- ● Heat mat: For faster germination (70–75°F after stratification).
- ● Label markers: To track seed varieties and planting dates!
Step-by-Step iris seed germination using cold stratification
This method guarantees better results than store-bought seedlings—just follow my exact timing and temperature cues.
🌱 Step 1: Collect and Prepare Fresh Iris Seeds
Harvest seeds from mature iris pods when they turn brown and split open naturally. I collect them in late summer or early fall for best results. Remove any seeds that look shriveled or discolored—only plump, firm seeds will germinate well. Store them in a paper envelope in a cool, dry place until you're ready to stratify.
Don't rush this step. Seeds need time to fully mature, and green or partially developed seeds rarely survive stratification. You'll know they're ready when the pods crack open on their own, revealing glossy black seeds inside.
❄️ Step 2: Perform Cold Stratification for 6-8 Weeks
Mix the seeds with slightly damp sand or perlite in a sealed container. I use a small plastic bag with a zip-top closure, adding just enough moisture to keep the mix damp but not soggy. Place the container in your refrigerator's crisper drawer where temperatures stay between 35-45°F.
Check the mix every 2 weeks—if it feels dry, mist lightly with water. The goal is consistent moisture without letting the seeds sit in water. After 6-8 weeks, the seeds will have undergone the natural chilling period they need to break dormancy.
🌿 Step 3: Sow Stratified Seeds in Spring
Wait until spring when soil temperatures reach 60°F before planting. Fill small pots with well-draining potting mix and plant seeds ½ inch deep. Space them 1 inch apart since iris seedlings grow slowly at first. Cover lightly with additional mix and water gently to settle the soil.
Place the pots in a bright location with indirect light—direct sun can overheat the soil and dry out the seeds too quickly. Keep the soil consistently moist but never waterlogged. Germination typically takes 4-6 weeks, so patience is key.
☀️ Step 4: Provide Gradual Sun Exposure
Once seedlings emerge, move them to a spot with morning sun and afternoon shade for the first 2 weeks. This gradual introduction prevents shock from intense light. You'll notice the first true leaves appear as long, narrow blades—these are your signal to slowly increase sunlight exposure.
After 4 weeks, when seedlings have 3-4 leaves, they can handle full sun for 4-6 hours daily. This slow transition ensures sturdy growth. Avoid transplanting until roots fill the pot—iris seedlings resent being moved once established.
⏰ Step 5: Monitor Growth and Thin as Needed
Thin seedlings to 3 inches apart when they reach 4-5 inches tall. Use scissors to cut unwanted plants at soil level rather than pulling—this prevents disturbing the roots of remaining seedlings. You'll see stronger growth in the remaining plants within 2-3 weeks after thinning.
Keep soil moist but well-draining, and fertilize lightly with a balanced 10-10-10 formula once leaves appear. Iris seedlings grow slowly, so don't expect rapid results. With proper care, you'll have blooming irises in 3-4 years—a rewarding long-term investment.
Tips & tricks for perfect iris seed germination
Cold stratification might sound complicated, but these simple tricks will help you achieve those 90% success rates without the guesswork.
Seed Selection Matters: In Step 1, when harvesting iris seeds, look for pods that have turned completely brown and are starting to split open on their own. These seeds are mature and ready for stratification. I learned this the hard way—green or partially developed seeds rarely germinate, no matter how long you stratify them. The glossy black appearance is your best indicator of readiness.
Temperature Control: During the 6-8 week stratification period in Step 2, maintaining that 35-45°F range is crucial. I place my container in the crisper drawer of my refrigerator because it stays consistently cool without the temperature fluctuations of the main fridge. If your refrigerator runs hotter, consider using a different cold storage solution like a root cellar or unheated garage during winter months.
Moisture Balance: The damp-but-not-soggy mix in Step 2 requires careful attention. I use a spray bottle to mist the sand or perlite mixture every 2 weeks, checking by squeezing a handful—it should feel like a well-wrung sponge. Too much moisture leads to mold, while too little prevents the seeds from breaking dormancy. This balance is what transforms those 6-8 weeks into successful germination rather than wasted effort.
Spring Planting Timing: Waiting until soil temperatures reach 60°F in Step 3 is more important than the calendar date. I test this by placing a thermometer in the soil for 24 hours. Planting too early in cool soil can stunt seedling growth, while waiting too long risks losing the stratification benefits. This patience pays off when you see those first true leaves emerge.
Pro Tips for Iris Seed Germination
- Cold stratification might sound complicated, but these simple tricks will help you achieve those 90% success rates without the guesswork.
- Seed Selection Matters: In Step 1, when harvesting iris seeds, look for pods that have turned completely brown and are starting to split open on their own.
- Temperature Control: During the 6-8 week stratification period in Step 2, maintaining that 35-45°F range is crucial.
Frequently asked questions
Got questions about germinating iris seeds?
Here are answers to the most common ones—plus pro tips to boost your success rate!
How long does iris seed germination take?
With cold stratification, germination typically takes 3–6 months in ideal conditions. Some seeds may sprout sooner (as early as 4–8 weeks), while others need patience—especially if stored in a fridge. Keep soil consistently moist but not soggy, and avoid rushing the process.
Can I skip cold stratification?
Technically, yes—but your success rate will plummet! Cold stratification mimics winter, breaking seed dormancy. Without it, germination drops below 30%. If you’re impatient, try scarification (lightly nicking the seed coat) as a backup, but stratification remains the gold standard for irises.
What’s the best soil mix for germinating iris seeds?
Use a light, well-draining mix like:
- 50% peat moss or coco coir
- 30% perlite or vermiculite
- 20% sand (for aeration)
My seeds aren’t sprouting—what went wrong?
Check these common culprits:
- Improper stratification: Ensure seeds stayed consistently cold (35–40°F) for 6–8 weeks.
- Overwatering: Seeds need moisture but not soggy soil—think damp sponge, not swamp.
- Old seeds: Iris seeds lose viability after 1–2 years; use fresh ones.
- No light: Once sprouted, move trays to bright, indirect light (no direct sun yet!).
Should I transplant seedlings immediately after germination?
Wait until seedlings have 2–3 true leaves (not just the initial seed leaf) and are 2–3 inches tall. Harden them off for 1–2 weeks before transplanting to avoid shock. Choose a partially shaded spot for the first year—they’re tender!
Wrapping up and next steps
Germinating iris seeds with cold stratification isn’t just a trick—it’s your ticket to a 90% success rate! By mimicking nature’s timing, you’re giving those tiny seeds the best shot at sprouting strong, vibrant blooms.
Whether you’re a gardening newbie or a seasoned green thumb, this method is game-changing—so grab those seeds and get growing!
Ready to watch your garden transform? Next up: Transplant your sprouted seedlings into well-draining soil and give them love (and patience!) as they grow into stunning irises. Happy gardening! 🌱✨