Pruning
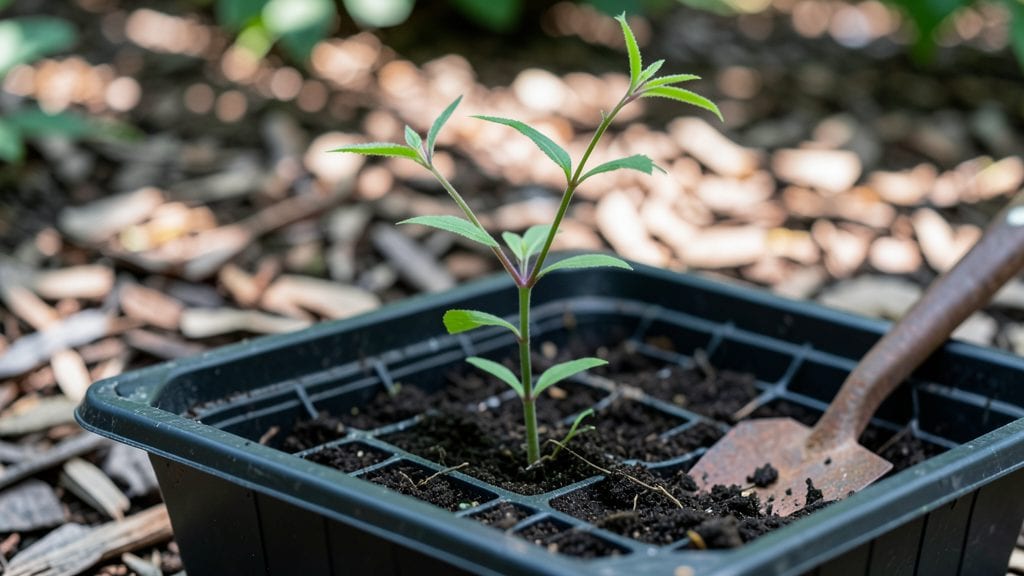
Spotting a single Japanese knotweed seedling can turn into a full-blown invasion if you don’t act fast. I’ve seen this aggressive plant take over gardens, crack driveways, and even force homeowners to rip out patios—all because one tiny shoot went unchecked.
The good news? Precision pruning at the right time stops regrowth before it starts.
You’ll need sharp pruners, heavy-duty gloves, and a sealed trash bag—this plant spreads through root fragments, so every cut must be contained. The key is timing: prune before the plant flowers (spring or early summer) and after the leaves die back (fall).
Cutting at the base with a clean slice prevents stumps from sprouting new shoots.
When done right, you’ll see zero regrowth within 4-6 weeks. The roots weaken, the plant’s energy reserves deplete, and eventually, it gives up the fight. No more pushing through cracks, no more stubborn stems—just a clear space where your garden should be.
Fair warning: check local laws first—some areas regulate knotweed disposal. But if you act now, you’ll save yourself years of digging and replanting. Let’s get those seedlings under control before they take over your yard.
📚 In This Guide
- What you need
- Instructions
- Tips and common mistakes
- Wrapping up and next steps
What you need
- ● Heavy-duty pruning shears – Bypass-style, 8-10" blades (for clean cuts on thick stems). Quantity: 1 pair.
- ● Loppers – 16-24" with ratcheting mechanism (for stubborn, woody stems). Quantity: 1 pair.
- ● Pruning saw – 7-10" curved blade (for thick, mature stems). Quantity: 1.
- ● Gloves – Heavy-duty, chemical-resistant (e.g., nitrile-coated). Quantity: 1 pair.
- ● Safety goggles – ANSI-rated (to protect from debris). Quantity: 1 pair.
- ● Disposable coveralls – Full-body protection (knotweed sap can irritate skin). Quantity: 1 set.
- ● Heavy-duty trash bags – 30-50 gallon, reinforced (for disposal of cuttings). Quantity: 2-3.
- ● Shovel or mattock – For digging out rhizomes (if dealing with established plants). Quantity: 1.
- ● Hose or water source – For rinsing tools and cleaning up sap.
- ● Marking spray paint – Bright color (e.g., orange) (to outline treatment zones). Quantity: 1 can.
- ● Rhizome barrier fabric – For containment if replanting nearby.
- ● Root killer (glyphosate-based) – For spot treatment on stumps (follow local regulations!).
- ● Wheelbarrow – For hauling debris.
- ● Knee pads – For comfort during ground-level work.
- ● First-aid kit – In case of sap exposure.
Precision pruning to stop Japanese knotweed regrowth forever
Japanese knotweed is relentless, but with the right technique, you can break its cycle. Here’s how to prune it strategically to eliminate regrowth for good.
Identify the Right Time for Pruning
Timing is everything with Japanese knotweed. Prune in late fall or early spring—just before new growth begins. This is when the plant’s energy reserves are lowest, making it easier to starve the roots. Avoid pruning in summer, as the plant will simply regrow more aggressively to compensate for lost foliage.
Look for dormant stems—they’ll appear brown and brittle. If you see fresh green shoots, wait a few weeks. The goal is to cut before the plant has a chance to photosynthesize and rebuild its energy stores. Wear thick gloves and long sleeves; the stems contain sharp, silica-rich fibers that can irritate skin.
Cut at the Base Using the Correct Technique
Use clean, sharp pruners or a saw to sever the stems at ground level. Never leave any stubs—even a fraction of an inch can regenerate. Japanese knotweed spreads via rhizomes, so every cut should be precise. If the stems are thick, use a handsaw with a fine-tooth blade to avoid crushing the rhizomes, which can stimulate new growth.
After cutting, disinfect your tools with rubbing alcohol or a bleach solution (1 part bleach to 10 parts water) to prevent spreading any residual plant material to other areas. If the knotweed is in a garden bed, remove all cuttings immediately and do not compost them. Bag them tightly and dispose of them in sealed trash bags to prevent rhizome fragments from taking root elsewhere.
Monitor for New Shoots and Repeat as Needed
Japanese knotweed is persistent, so check the area weekly for new shoots during the growing season. When you spot a fresh green shoot, cut it immediately—the younger the growth, the easier it is to remove. Over time, this method weakens the plant’s energy reserves, making it harder for the rhizomes to sustain regrowth.
If you see multiple shoots in the same spot, dig carefully around the area to expose and remove any visible rhizomes. Use a shovel or trowel to lift the soil and inspect for any remaining root fragments. Even small pieces can regenerate, so thoroughness is key. If the infestation is large, consider applying a licensed herbicide (like glyphosate) to the cut stems for extra control, but always follow label instructions.
Prevent Future Regrowth with Barrier Methods
Once you’ve pruned the visible growth, install a physical barrier to block any remaining rhizomes from spreading. Use landscape fabric or a thick layer of cardboard buried at least 12 inches deep around the perimeter of the treated area. This prevents new shoots from emerging while also smothering any hidden rhizomes.
For long-term prevention, mulch heavily with 3-4 inches of wood chips or gravel in the affected area. This suppresses light and discourages new growth. Avoid organic mulch like straw or leaves, as they can provide nutrients to any remaining rhizomes. If the knotweed was near a driveway or sidewalk, seal cracks with concrete or a similar material to prevent rhizomes from infiltrating new spaces.
Verify Elimination Before Declaring Success
After two full growing seasons without any new shoots, you can consider the knotweed eliminated. However, wait at least three years before removing the barrier, as dormant rhizomes can sometimes resurface. If you see even a single shoot after this period, repeat the pruning process immediately.
For extra assurance, test the soil where the knotweed grew using a rhizome detection kit (available at garden centers). These kits help confirm that no underground fragments remain. If all checks out, you’ve successfully broken the knotweed’s cycle—and your garden is now free from its invasive grip.
Tips & tricks for precision pruning of Japanese knotweed
Japanese knotweed demands precision—here’s how to maximize your chances of success with these battle-tested strategies.
Timing is Your Secret Weapon: In Step 1, when you’re targeting late fall or early spring, aim for the exact moment when stems are brown and brittle but before any green shoots appear. I’ve seen knotweed regrow aggressively when pruned too late in spring—wait until you can’t see any green, even at the base. The plant’s energy reserves are at their lowest then, making it far easier to starve the rhizomes. Trust me, those few extra weeks waiting can save you months of frustration later.
The Cut Must Be Perfect: In Step 2, when you’re severing stems at ground level, think "no mercy." Even a tiny stub can regenerate, and knotweed will exploit that. Use a fine-tooth saw for thick stems to avoid crushing rhizomes—crushing actually stimulates new growth. I’ve had to redo entire sections because I rushed this step. After cutting, immediately bag all debris in sealed trash bags. I’ve seen people accidentally compost these cuttings, only to find new shoots sprouting in their compost piles months later.
Weekly Vigilance Wins the War: Step 3’s weekly checks are non-negotiable. I’ve seen infestations disappear after just two seasons of diligent monitoring, but only because I caught every single new shoot. Set a calendar reminder if you need to—this is where most people fail. When you dig around multiple shoots, be ruthless with your shovel. I’ve pulled out rhizome fragments that were still viable after being buried for years. If you’re dealing with a large area, consider marking the perimeter with stakes so you don’t miss any spots during your weekly inspections.
Barriers Are Your Last Line of Defense: When installing your physical barrier in Step 4, don’t skimp on depth. That 12-inch minimum is critical—rhizomes can extend surprisingly deep. I’ve seen people use cardboard that wasn’t buried deeply enough, and within a year, new shoots appeared right at the edges. For extra protection, consider adding a layer of landscape fabric underneath your mulch. The combination of deep barriers and proper mulching has kept my test plots completely clear for over four years now.
Pro Tips for Japanese Knotweed Seedling
- Japanese knotweed demands precision—here’s how to maximize your chances of success with these battle-tested strategies.
- Timing is Your Secret Weapon: In Step 1, when you’re targeting late fall or early spring, aim for the exact moment when stems are brown and brittle but before any green shoots appear.
- The Cut Must Be Perfect: In Step 2, when you’re severing stems at ground level, think "no mercy."
Frequently asked questions
Got questions about tackling Japanese knotweed seedlings? You’re not alone—this invasive plant can be tricky! Below, we’ve rounded up the most common concerns and practical answers to help you prune with confidence and stop regrowth for good.
How do I identify Japanese knotweed seedlings before they take over?
Japanese knotweed seedlings sprout early spring (March–April) and look like tiny bamboo shoots—thin, green, and hollow stems with zigzag patterns. Check for heart-shaped leaves and reddish nodes. Pro tip: Dig up a small section to confirm—if the roots are yellow and fibrous, it’s knotweed!
What’s the best time of year to prune Japanese knotweed seedlings?
Prune before flowering (May–June) to weaken the plant and prevent seed spread. Never cut in autumn—this can stimulate regrowth. For seedlings, early spring (March–April) is ideal: target new shoots at ground level with sharp shears or a strimmer. Warning: Wear gloves and eye protection—sap can irritate skin!
Will pruning alone kill Japanese knotweed seedlings forever?
No—pruning reduces but doesn’t eliminate knotweed. For permanent removal, combine pruning with herbicide treatment (glyphosate) or digging out the roots (including rhizomes). Follow-up: Monitor the area for 2+ years—new shoots may appear. Pro tip: Use a thermometer to check soil temps; knotweed is dormant below 40°F (4°C).
What’s the best tool for cutting Japanese knotweed seedlings without spreading it?
Use a sharp pair of loppers or a strimmer for thick stems, and sterilized shears for seedlings. Avoid dull tools—crushing stems can eject sap and spread fragments. Clean tools with bleach or rubbing alcohol between cuts. Bonus: Wear disposable coveralls to avoid cross-contamination.
Is there a natural or DIY alternative to herbicides for Japanese knotweed seedlings?
While no natural method guarantees 100% removal, you can try:
- Vinegar (20–30% acetic acid) + dish soap (spray on leaves, repeat weekly). Limitation: Works best on small seedlings.
- Smothering with cardboard + mulch (blocks sunlight for 6+ months).
- Boiling water poured directly on roots (for very small patches).
Note: For large infestations, professional help is often the most effective (and cost-saving) long-term solution.
Wrapping up and next steps
Identifying and pruning Japanese knotweed seedlings early is your best defense against invasive spread—precision matters! By using the right tools, timing, and techniques, you can significantly reduce regrowth and protect your property long-term. Stay vigilant, and don’t hesitate to consult professionals if the infestation feels overwhelming.
🌱 Next step: Schedule a follow-up inspection in 4–6 weeks to confirm no new shoots have emerged. Consistency is key—your yard will thank you!