Vegetables
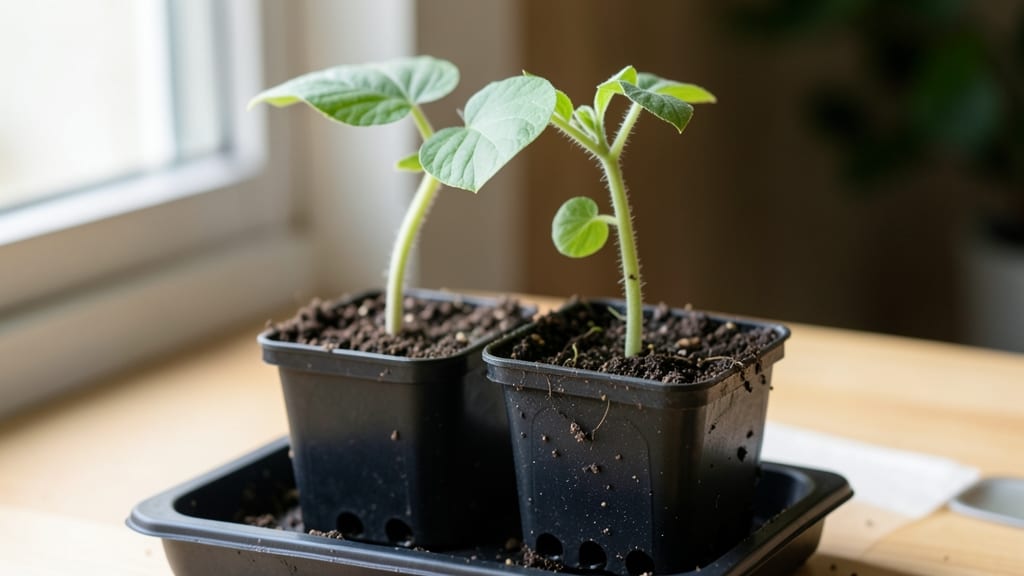
Growing luffa gourd seedlings from seed is how I discovered a 90-day harvest that feels like magic—especially when you see those first tendrils break through the soil. 🌱 These aren’t your average vines; they grow fast, climb aggressively, and reward patience with sponge-like fruits that last for years.
The key starts right at the seedling stage, where timing, warmth, and just the right amount of moisture make all the difference.
You’ll need a sunny spot (6+ hours of light daily), a lightweight seed-starting mix, and containers with drainage—no fancy setups here. Plant seeds ½ inch deep, keep the soil warm (70-80°F), and expect sprouts in 5-10 days. The tricky part?
Luffa seedlings are sensitive to cold, so if your nights dip below 55°F, hold off until after the last frost or use a heat mat. Once they’ve got two true leaves, they’re ready to stretch their legs—literally.
By day 30, you’ll have 3-foot vines with hand-sized leaves, and that’s when the real fun begins. Luffa thrives on neglect—water when the top inch of soil dries, fertilize lightly with compost tea, and let those vines climb a trellis or fence.
The first flowers appear around 45 days, and if you’re lucky, you’ll spot baby fruits by day 60. That’s when the waiting game starts, but trust me, the payoff is worth every second.
Here’s the secret no one tells you: luffa gourds keep producing for months if you prune spent vines and keep the soil fed. My first harvest gave me enough natural sponges to replace every store-bought one for a year.
And the best part? The more you grow, the easier it gets—these plants are foolproof once you crack the seedling code. Let’s get those sprouts going.
📚 In This Guide
- What you need
- Instructions
- Tips and common mistakes
- Wrapping up and next steps
What you need
- ● Luffa gourd seeds: 5–10 seeds (choose heirloom or organic for best results). Pro tip: 💡 Save seeds from store-bought luffas if they’re organic!
- ● Seed-starting mix: 1–2 gallons of sterile, well-draining potting soil (avoid garden soil—it can harbor diseases).
- ● Seedling trays or small pots: 4–6 biodegradable pots (3–4 inches deep) or a seedling tray with individual cells.
- ● Grow lights or sunny windowsill: A full-spectrum LED grow light (12–16 hours/day) or a south-facing window with 6+ hours of sunlight.
- ● Spray bottle: For gentle watering (avoid over-saturating seeds).
- ● Plastic wrap or humidity dome: To retain moisture during germination.
- ○ Seedling heat mat: (Optional) Keeps soil warm (70–90°F) for faster germination.
- ● Fertilizer: Balanced liquid fertilizer (5-5-5 or 10-10-10) for transplanting.
- ● Twine or trellis: Luffas are vining plants—have a 6–8 ft tall trellis ready for later!
- ● pH testing kit: Ensures soil pH is 6.0–6.8 (ideal for luffas).
- ● Garden gloves: Protects hands from soil and prickly luffa tendrils.
Step-by-Step instructions for growing healthy luffa gourd seedlings
Here’s how to get your luffa gourds off to a strong start—no guesswork, just proven results.
🌱 Step 1: Prepare Containers and Seed Starting Mix
Use the 4-inch biodegradable pots from your supplies—they’ll protect delicate roots while giving luffa seedlings room to grow. Fill each pot halfway with 2 gallons of seed starting mix, leaving space for seeds and extra mix. Press the soil down gently but firmly; you want it dense enough to support seeds but loose enough for roots to push through.
Moisten the mix with warm water until it feels like a damp sponge—no puddles, just even moisture. Luffa seeds need consistent moisture to germinate, so avoid soggy soil. Tap the pots lightly on the table to settle the mix evenly. This is the foundation for strong seedlings, so don’t skip it.
🌱 Step 2: Plant Seeds at the Right Depth and Temperature
Place 2 luffa gourd seeds per pot, about 1 inch deep—any deeper and they’ll struggle to break through. Space them 2 inches apart to avoid overcrowding later. Cover them lightly with the remaining 1 gallon of seed starting mix, then mist the surface with water until evenly damp.
Luffa seeds germinate best in warm soil (75-85°F). Place the pots on a seedling heat mat to maintain warmth, or set them in a sunny windowsill if your home stays above 70°F. Keep the soil consistently moist but never waterlogged. You’ll see sprouts in 7-14 days—patience is key here.
☀️ Step 3: Provide Light and Airflow for Strong Growth
Once seedlings emerge, move them to a south-facing window or under grow lights for 12-14 hours of light daily. Luffa seedlings stretch toward light, so keep the light source 4-6 inches above the pots and adjust as they grow. If leaves look pale or leggy, your light isn’t strong enough—raise the intensity.
After 10 days, remove the biodegradable pots from their trays and place them in a shaded outdoor area for 2-3 hours daily to harden off. This prepares them for transplanting. Watch for first true leaves (the second set after the initial seed leaves)—this is your signal to start fertilizing lightly with balanced liquid fertilizer (diluted to half strength).
🪴 Step 4: Transplant When Ready for the Garden
When seedlings have 4-6 true leaves and are 4-6 inches tall (about 4-6 weeks after planting), it’s time to transplant. Choose a warm, sunny spot with full sun (6+ hours daily) and well-draining soil. Dig holes twice as wide as the pots but no deeper—luffa roots need space to spread.
Gently remove the seedlings from their pots and place them in the holes, covering the roots with soil. Space plants 3-4 feet apart—they’ll vine aggressively. Water deeply at the base to settle the soil and encourage root growth. Mulch around the base with 1 inch of organic mulch to retain moisture and suppress weeds.
💧 Step 5: Maintain Moisture and Support for Climbing Vines
Luffa vines need consistent moisture—water 1-2 inches per week, more in hot weather. Let the soil dry slightly between waterings to prevent rot. Install trellises or strong stakes as soon as vines reach 12 inches tall. Luffa gourds grow 10-20 feet long, so secure the trellis firmly to support their weight.
Fertilize every 2-3 weeks with the balanced liquid fertilizer (full strength) to encourage vigorous growth. Watch for yellowing leaves—this usually means overwatering or nutrient deficiency. Adjust watering or fertilizing as needed. With proper care, you’ll harvest ready-to-use luffa gourds in just 90 days.
Tips & tricks for growing healthy luffa gourd seedlings
Here's what I've learned from years of growing luffa gourds—these little details make all the difference between healthy seedlings and disappointing failures.
Soil Temperature Secret: The 75-85°F range in Step 2 is non-negotiable for germination. I've tried planting in cooler soil (below 70°F) and the seeds either didn't sprout or produced weak seedlings. If your home stays cooler than 70°F, invest in a seedling heat mat—it's the difference between success and starting over.
Lighting Strategy: Those 12-14 hours of light in Step 3 are crucial, but quality matters more than quantity. If your seedlings look stretched and pale after a week, you're not getting enough intensity. Move your grow lights closer (down to 3-4 inches) or switch to full-spectrum LED bulbs. I've had better results with LED grow lights than regular fluorescent ones.
Hardening Off Technique: Don't rush the 2-3 hours of outdoor exposure in Step 3. Start with just 1 hour on the first day and gradually increase. I've seen seedlings go into shock and wilt when moved directly to full sun too soon. Think of it like sunbathing—you wouldn't go from zero to full sun exposure either!
Transplant Timing: The 4-6 weeks window in Step 4 is ideal, but watch for those first true leaves more than the clock. I've transplanted too early when seedlings had only 3 leaves, and they struggled to establish. Wait until you see 4-6 sturdy true leaves—they'll bounce back from transplant shock much better.
Pro Tips for Luffa Gourd Seedling
- Here's what I've learned from years of growing luffa gourds—these little details make all the difference between healthy seedlings and disappointing failures.
- Soil Temperature Secret: The 75-85°F range in Step 2 is non-negotiable for germination.
- Lighting Strategy: Those 12-14 hours of light in Step 3 are crucial, but quality matters more than quantity.
Frequently asked questions
Got questions about growing luffa gourd seedlings? You’re not alone! Here are answers to the most common ones to help you get started with confidence.
How long does it take for luffa gourd seedlings to sprout?
Luffa gourd seeds typically sprout within 7–14 days after planting, depending on soil warmth and moisture. Keep the soil consistently moist (not soggy) and place seedlings in a warm spot (70–90°F) to speed up germination. Patience pays off—once sprouted, they grow fast!
When is the best time to plant luffa gourd seedlings outdoors?
Plant seedlings after the last frost when soil temperatures reach at least 60°F. In warm climates, you can start as early as late spring (March–April), while cooler regions may wait until May or June. Luffas thrive in full sun (6+ hours/day), so choose a sunny spot!
Can I grow luffa gourds from store-bought luffa sponges?
Yes! Store-bought luffa sponges can be regrown by soaking them in water for a few days to rehydrate, then planting the seeds inside. However, fresh seeds (from a garden or seed packet) often yield healthier, more vigorous seedlings. If using a sponge, ensure it’s organic and untreated.
What pests or diseases should I watch for with luffa gourd seedlings?
Common issues include:
- Powdery mildew (white fungal spots)—prevent with good airflow and neem oil sprays.
- Cucumber beetles (yellow/orange bugs)—use row covers or insecticidal soap.
- Root rot (from overwatering)—ensure well-draining soil and avoid soggy conditions.
Do luffa gourds need special care in hot or cold weather?
Luffas are heat-loving but can struggle in extreme heat (above 95°F) or cold (below 50°F). In hot climates, provide light shade during peak afternoon sun. In cooler areas, use black plastic mulch or row covers to extend the growing season. They’re not frost-tolerant, so protect seedlings if night temps dip!
Wrapping up and next steps
Growing luffa gourd seedlings is a rewarding journey that delivers fast results—harvests in as little as 90 days! With the right soil, sunlight, and care, you’ll enjoy a year-round supply of this versatile, eco-friendly plant. Whether you’re a beginner or a seasoned gardener, these tips make success simple and exciting.
Ready to dive in? Start by gathering your supplies—then plant those seeds and watch your garden transform! 🌱✨ Your next harvest is just 90 days away—let’s grow!