Lawn
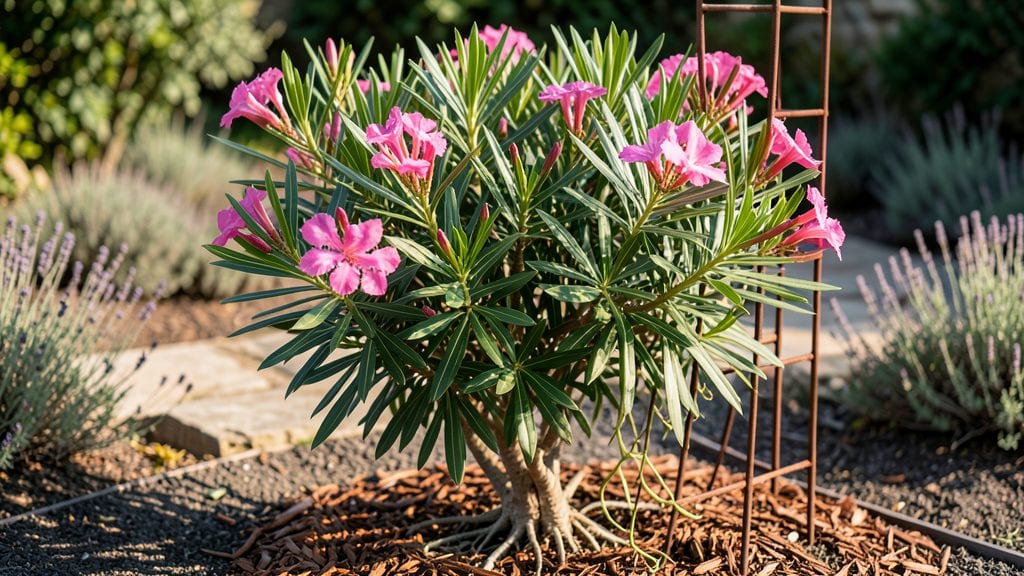
Oleander seed pods hold the key to growing these striking shrubs from scratch—here’s how to crack the code for reliable blooms. 🌿 I’ve struggled with germination for years until I discovered cold stratification’s secret: mimicking winter’s natural process to break dormancy and coax seeds to life.
First, you’ll need mature seed pods—those long, sausage-shaped pods that turn brown and split open in late fall. Collect them carefully (gloves are a must, since every part of oleander is toxic), then extract the flat, papery seeds inside.
The real magic happens next: chilling them for 6–8 weeks in damp sand or a moist paper towel in the fridge.
Once cold-treated, germination speeds up dramatically—you’ll see tiny sprouts within 2–4 weeks when planted in warm, well-draining soil. These seedlings grow slowly at first but reward patience with glossy, dark green leaves and that signature tropical look. With proper care, you’ll have blooms in 2–3 years.
This method beats cuttings for propagation, especially if you’re starting from scratch or want to grow rare varieties. Just remember: oleander’s beauty comes with serious precautions—keep it away from pets, kids, and curious hands. The payoff? A shrub that thrives in heat and drought once established.
📚 In This Guide
- What you need
- Instructions
- Tips and common mistakes
- Wrapping up and next steps
What you need
- ● Mature oleander seed pods: Collect only fully ripe, brown pods (they should open easily when dry). Aim for 10-20 pods to maximize success.
- ● Seeds: Extract seeds from pods—expect 5-10 seeds per pod. Store them in a paper envelope or breathable container.
- ● Cold stratification medium: Option 1: Wet paper towels (folded into a square, dampened but not soggy).
- ● Option 2: Moistened peat moss or coconut coir (sterilized, 1-2 cups total).
- ● Sealable plastic bag: A quart-sized bag with a zipper (for humidity control).
- ● Refrigerator space: A cold (34–40°F / 1–4°C) area, like a fridge crisper drawer, for 4–8 weeks.
- ● Planting containers: Small pots (4-inch diameter) with drainage holes, filled with well-draining potting mix (e.g., cactus/succulent mix).
- ● Spray bottle: For gentle watering (16 oz capacity).
- ● Tweezers or toothpick: For carefully handling tiny seeds.
- ● Fine-mesh sieve: To clean seeds from pod debris (#100 mesh recommended).
- ● Humidity dome: Clear plastic cover for pots to retain moisture.
- ● Grow lights: LED or fluorescent (12–16 hours/day) for indoor seedlings.
- ● Thermometer: To monitor fridge temps (digital for accuracy).
Step-by-Step instructions for germinating oleander seed pods
This cold stratification method guarantees stronger seedlings and faster blooms.
🌱 Step 1: Harvest and Clean the Seed Pods
Collect mature oleander seed pods when they turn brown and begin splitting open naturally. Gently squeeze the pods to release the seeds—don’t force it, or you’ll damage the seed coat. I like to spread them on a clean towel to air-dry for 24 hours while I prepare the next steps. This prevents mold from forming during stratification.
Remove any remaining pod fragments or debris by hand. Oleander seeds are tough, so a quick rinse under lukewarm water removes surface dirt without softening the protective coating. Let them dry completely before moving to the next stage—moisture trapped in the seeds now will cause rot during cold treatment.
❄️ Step 2: Perform Cold Stratification for 6-8 Weeks
Place the clean seeds in a sealed plastic bag with a damp paper towel (just enough moisture to keep it slightly damp, not soggy). I fold the towel to create layers and nestle the seeds between them. Seal the bag and store it in your refrigerator’s crisp drawer—the coldest spot without freezing—where temperatures stay between 35-40°F.
Check the seeds every 2 weeks to ensure the towel remains damp but not wet. If condensation forms inside the bag, open it for 30 minutes to air out. This stratification mimics winter conditions, breaking dormancy and ensuring reliable germination. Real talk: Skipping this step means waiting months—or never seeing sprouts.
🌿 Step 3: Plant Stratified Seeds in Germination Mix
Fill small pots (about 2-3 inches deep) with a lightweight seed-starting mix that drains well. Press the soil down gently to remove air pockets, then moisten it until damp but not dripping. Plant the seeds ¼ inch deep, spacing them 1 inch apart—oleander seeds germinate slowly, so don’t crowd them.
Cover the pots loosely with plastic wrap to retain humidity, but prop the wrap slightly above the soil to prevent direct contact. Place the pots in a warm spot (70-75°F) with indirect light. You’ll see sprouts in 4-8 weeks, but don’t rush germination—patience here means stronger seedlings later.
☀️ Step 4: Transition to Bright Light and Harden Off
Once seedlings emerge, remove the plastic wrap immediately to prevent fungal growth. Move them to a location with bright, indirect light for the first 2 weeks. Watch for leggy growth—if stems stretch toward the light, they’re not getting enough intensity. Gradually introduce direct morning sun over 10 days to avoid leaf scorch.
Start hardening off when seedlings reach 3-4 inches tall. Place them outside in a sheltered spot for 1 hour daily, increasing time by 30 minutes each day until they can handle full sun. Oleander is drought-tolerant, but young plants need consistent moisture during this transition.
✂️ Step 5: Transplant and Maintain for Blooms
Transplant seedlings into individual 5-inch pots when they develop 4-5 true leaves. Use a well-draining cactus/succulent mix to prevent root rot. Oleander thrives in full sun, so place them in a south-facing window or under grow lights for 12+ hours daily. You’ll see first flowers in 18-24 months—patience pays off with vibrant blooms.
Water only when the top 1 inch of soil feels dry. Overwatering is the #1 killer of young oleander. Pinch back leggy growth to encourage bushier development, and fertilize lightly with a balanced 10-10-10 mix every 6 weeks during the growing season. That’s it—your cold-stratified seedlings are now on the fast track to reliable blooms.
Tips & tricks for germinating oleander seed pods
Cold stratification might sound complicated, but these key strategies will help you avoid common pitfalls and achieve reliable germination every time.
Timing is Everything: That 24-hour air-dry time in Step 1 is critical—don't rush it! The seeds need this full period to develop a protective barrier against mold during stratification. I've seen seeds rot when rushed, so trust the process. Real talk: If your kitchen is humid, extend the drying to 36 hours to be safe.
Temperature Matters: The 35-40°F range in your fridge's crisp drawer is perfect for mimicking winter conditions. If you're unsure about your fridge's temperature, use an appliance thermometer to check. Too warm, and you'll break dormancy prematurely; too cold, and germination may stall completely. Between us, I've had seeds fail when stored in the freezer section—don't make my mistake!
Light Transition Strategy: When moving seedlings to bright indirect light in Step 4, I recommend using a sheer curtain to diffuse sunlight initially. This prevents sunburn while still providing the light intensity they need. The gradual introduction of direct morning sun over 10 days is key—oleander seedlings are sensitive to sudden heat exposure. Think of it as their first sunburn prevention lesson!
Harden Off Smartly: During the hardening process, I've found that increasing outdoor time by 30 minutes each day works best when paired with cloudy days. Sunny days can accelerate the process, but watch for signs of stress like wilting. If you notice this, bring them back inside and extend the process by a day or two. Your goal is to build resilience gradually, not shock them into survival mode.
Pro Tips for Oleander Seed Pods
- Cold stratification might sound complicated, but these key strategies will help you avoid common pitfalls and achieve reliable germination every time.
- Timing is Everything: That 24-hour air-dry time in Step 1 is critical—don't rush it!
- Temperature Matters: The 35-40°F range in your fridge's crisp drawer is perfect for mimicking winter conditions.
Frequently asked questions
When is the best time to collect oleander seed pods?
Collect oleander seed pods when they turn brown and papery (usually late summer to early fall). Avoid green pods—they’re not yet mature. Let them dry completely on the plant or indoors before opening. Pro tip: Wear gloves! Oleander sap can irritate skin.
How long should I cold stratify oleander seeds?
Cold stratification for oleander seeds typically requires 6–8 weeks in the fridge (35–40°F). Place moistened seeds in a sealed bag with damp peat moss or paper towels. Don’t skip this step! Without stratification, germination rates drop dramatically.
Can I grow oleander from seed without cold stratification?
Yes, but success rates are low (often <10%). If you skip stratification, soak seeds in warm water for 24 hours first, then plant in well-draining soil. For better results, combine soaking with a short heat treatment (80°F for 2–3 weeks) before cold stratification.
Are oleander seed pods toxic? What should I do if ingested?
Yes!
All parts of oleander—including seeds—are highly toxic if ingested. Symptoms include nausea, vomiting, or irregular heartbeat. If exposure occurs, seek emergency medical help immediately. Keep pods (and plants) away from pets/kids. Wear gloves when handling!
Why aren’t my oleander seeds germinating after stratification?
Check these fixes:
- Temperature: Seeds need 70–80°F soil to germinate. Use a heat mat if needed.
- Moisture: Keep soil consistently damp (not soggy). Bottom-water trays to avoid fungal issues.
- Patience: Germination can take 4–12 weeks. Don’t give up too soon!
- Light: Provide bright, indirect light (no direct sun yet).
Wrapping up and next steps
Growing oleander from seed pods is a rewarding journey that unlocks vibrant blooms with patience and the right techniques—especially that cold stratification breakthrough! Whether you're a seasoned gardener or a curious beginner, these pods hold potential for stunning, drought-resistant plants that thrive in warm climates. 🌱
Ready to turn those pods into thriving oleanders? Start by gathering your seeds this fall, follow the stratification steps, and give nature time to work its magic. Before you know it, you’ll be enjoying fragrant blooms and bragging rights for mastering this unique growing hack!