Transplanting
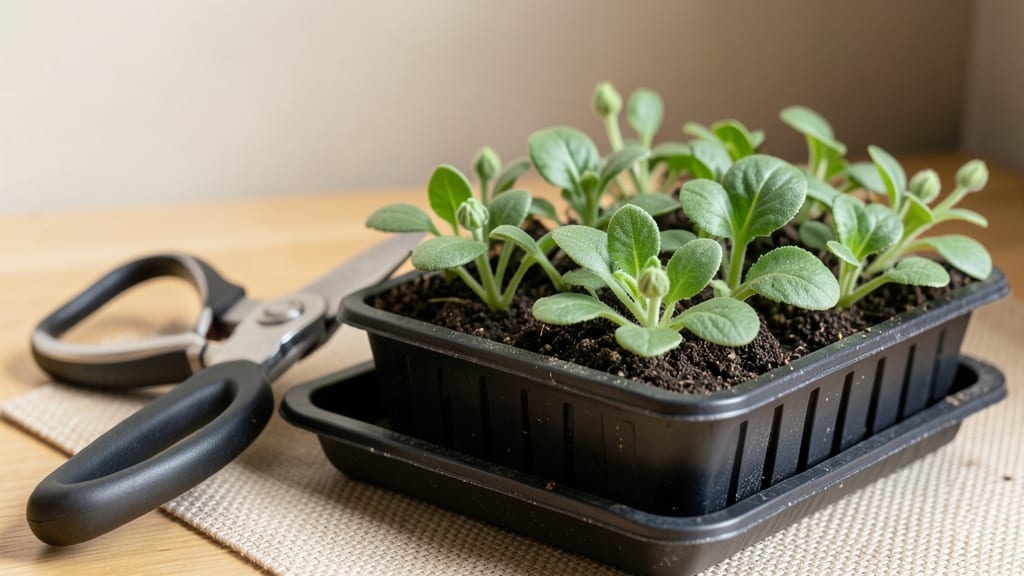
Pinching petunia seedlings is the secret weapon behind those lush, bushy plants you see at garden centers—except you can do it yourself for half the cost. ✂️ I learned the hard way that skipping this step leads to leggy, sparse blooms, but mastering it transforms weak seedlings into vibrant, productive plants.
The key is timing: wait until the seedlings have their first set of true leaves, then snip just above a leaf node with clean scissors.
You’ll need sharp scissors or fingernails, a bright workspace, and patience—this isn’t a one-time task. After your first pinch, new side shoots will sprout within 7-10 days, and you’ll repeat the process 2-3 times total.
The goal is to encourage branching, not stunt growth. Think of it like training a vine to climb: you guide it, don’t cut it back too hard.
What you’ll end up with is a petunia plant that’s twice as bushy and three times more productive than unpinched seedlings. The blooms arrive thicker and last longer, too.
The trade-off? A slightly slower start, but the payoff in summer color is worth every pinch. Ready to turn those skinny stems into showstoppers?
This technique works for all petunia varieties—whether you’re growing trailing types in hanging baskets or mounding varieties in garden beds. The only difference is how aggressively you pinch: trailing types need more frequent pinching to keep them compact. Let’s get those scissors ready!
📚 In This Guide
- What you need
- Instructions
- Tips and common mistakes
- Wrapping up and next steps
What you need
- ● Healthy petunia seedlings: 4–8 weeks old, with at least 4–6 true leaves (avoid pinching before this stage!).
- ● Clean, sharp scissors or pruning shears: Small, precision tools (e.g., Felco F2 or Gingher brand) to avoid crushing stems.
- ○ Gloves (optional but recommended): Lightweight gardening gloves to protect hands from thorns or rough stems.
- ● Disinfectant (70% isopropyl alcohol or diluted bleach): To sterilize tools between cuts and prevent disease.
- ● Magnifying glass: For close-up inspection of stem nodes (especially for tiny seedlings).
- ● Garden twine or labels: To mark pinched seedlings if you’re experimenting with different techniques.
- ○ Growth regulator (optional): A pinch-resistant fertilizer like Fish Emulsion 5-1-1 to support recovery (apply 2–3 days post-pinching).
- ● Humidity dome or plastic bag: To create a mini greenhouse for seedlings if your climate is dry.
Step-by-step instructions for pinching petunia seedlings
Here's how to transform leggy seedlings into full, bushy plants with vibrant blooms.
🌱 Step 1: Identify the Right Time to Pinch
Wait until your seedlings have 4-6 true leaves—those are the second set of leaves that appear after the initial pair. You'll know they're ready when the stems are about 3-4 inches tall and the leaves are spaced evenly along the stem. Pinching too early stunts growth, while waiting too long means you'll have to remove more growth later.
I always check the undersides of the leaves for tiny buds forming at the leaf joints. If you see those, it's time to pinch—this ensures you're not cutting off potential flower buds. Use a clean pair of scissors or your fingers to avoid damaging the plant.
✂️ Step 2: Pinch Just Above a Leaf Node
Locate the top set of leaves on the main stem and pinch just above the fourth or fifth leaf from the bottom. This is where new side shoots will emerge. Use your thumb and forefinger to gently squeeze the stem just above the node—no need for scissors unless the stem is too thick. You want to remove about 1/4 to 1/3 of the plant's height.
If you're unsure where to pinch, look for the small bump where leaves attach to the stem—that's your leaf node. Pinching above it encourages the plant to grow new branches from that point. Avoid cutting too close to the leaf itself, as this can leave a wound that may not heal properly.
🌿 Step 3: Encourage New Growth with Proper Care
After pinching, place your seedlings in a spot with bright, indirect light for 3-5 days to recover. Too much direct sun right after pinching can stress the plant. You'll notice new side shoots emerging from the nodes within 7-10 days. These will eventually become the bushy framework of your petunia.
Water the seedlings gently at the base to keep the soil moist but not soggy. Overwatering after pinching can lead to rot or fungal issues, especially in crowded trays. If you see yellowing leaves, reduce watering slightly and ensure the pot has good drainage.
☀️ Step 4: Monitor and Repeat for Fullness
Once your seedlings have developed 4-6 new side shoots and are about 6 inches tall, it's time to pinch again. Focus on the tallest stems first, pinching just above a leaf node to encourage even growth. This second pinch will help create a denser, fuller plant.
Keep an eye out for leggy growth between pinches—this is a sign your seedlings need more light. If stems stretch toward the light source, move them closer to your grow light or a sunny window. You'll know you're on the right track when your petunias start looking like little bushes instead of tall, skinny sticks.
⏰ Step 5: Transition to Outdoor Conditions
After your final pinch, wait 2-3 weeks before transplanting outdoors. During this time, gradually introduce your seedlings to outdoor conditions by placing them outside for 1-2 hours daily, increasing the time each day. This process, called hardening off, helps them adjust to wind, sun, and temperature changes.
Once hardened off, plant your bushy petunias in well-draining soil with full sun exposure. They'll reward you with vibrant blooms all season long. Remember, the more you pinch early, the fuller and more productive your petunias will be.
Tips & tricks for perfect pinching petunia seedlings
Here's what I learned after transforming leggy seedlings into lush, blooming bushes—these tricks make all the difference.
Leaf Count Matters: Don't rush to pinch just because your seedlings are tall. The 4-6 true leaves rule is non-negotiable—this is when the plant has enough energy to regenerate new branches. I've seen gardeners pinch too early and end up with stunted plants that never recover. Wait until those leaves are fully unfurled and spaced evenly along the stem, and you'll get the best results.
Node Placement is Everything: When pinching above the fourth or fifth leaf in Step 2, think of it like creating a fork in the road for your plant. That leaf node is where new shoots will emerge, so pinching just above it gives them room to grow. Use your fingernail to gently test the stem's thickness—if it's too thick for your fingers, grab those clean scissors. And remember, you're aiming to remove about 1/3 of the plant's height, not more.
Recovery Period Can't Be Skipped: Those 3-5 days of bright, indirect light after pinching are crucial for your seedlings' recovery. Too much direct sun right away can shock the plant, while insufficient light means weak new growth. I've seen seedlings stressed by direct sun after pinching—leaves turn yellow, and growth stalls. If you don't have ideal light conditions, consider using a grow light for 12-14 hours daily during this recovery period.
Watering Wisdom: After pinching, water gently at the base—never overhead—and always check soil moisture before watering. Overwatering leads to rot, especially in crowded trays where airflow is limited. I've learned this the hard way: yellowing leaves after pinching often mean too much water. Let the top inch of soil dry out between waterings, and your seedlings will thank you with strong, healthy growth.
Pro Tips for Pinching Petunia Seedlings
- Here's what I learned after transforming leggy seedlings into lush, blooming bushes—these tricks make all the difference.
- Leaf Count Matters: Don't rush to pinch just because your seedlings are tall.
- Node Placement is Everything: When pinching above the fourth or fifth leaf in Step 2, think of it like creating a fork in the road for your plant.
Frequently asked questions
Got questions about pinching petunia seedlings? You’re not alone! Here are answers to the most common concerns—so you can grow bushier, healthier plants with confidence.
When is the best time to pinch petunia seedlings?
Pinch petunia seedlings when they’ve developed 4-6 sets of true leaves (not the tiny seed leaves). This usually happens 4-6 weeks after germination, depending on light and temperature. Avoid pinching too early—you want sturdy stems to support new growth!
How many leaves should I leave after pinching?
Leave 2-3 sets of leaves above the pinch point. This ensures the plant has enough energy to branch out while avoiding stress. Think of it like a haircut—too short, and it struggles; just right, and it thrives!
What if my seedlings are leggy before pinching?
Leggy seedlings need extra light (14-16 hours/day) to compact before pinching. If they’re already stretched, pinch above the lowest leaves to encourage bushier growth. Pair this with fertilizer low in nitrogen (like 5-10-10) to promote stems over leaves.
Can I use scissors or should I pinch by hand?
Both work! Hand-pinching is gentler and reduces stress, but clean sterilized scissors work in a pinch (pun intended). Just avoid crushing stems—aim for a clean cut just above a leaf node.
What if my petunias don’t branch after pinching?
Check for these issues:
- Not enough light? Move seedlings to a brighter spot.
- Overwatering? Let soil dry slightly between waterings.
- Cold stress? Keep temps above 50°F (10°C).
Wrapping up and next steps
Pinching petunia seedlings is a simple yet powerful way to unlock fuller, bushier plants and stunning blooms all season long! By mastering this technique—using clean tools, timing your cuts right, and providing proper aftercare—you’ll transform delicate starts into vibrant, thriving petunias that steal the show in any garden. 🌸
Ready to take the next step? Start pinching early (when plants are 4-6 inches tall) and keep an eye on growth—soon, you’ll be rewarded with a lush, blooming masterpiece! Grab your shears and get growing!