Container Gardens
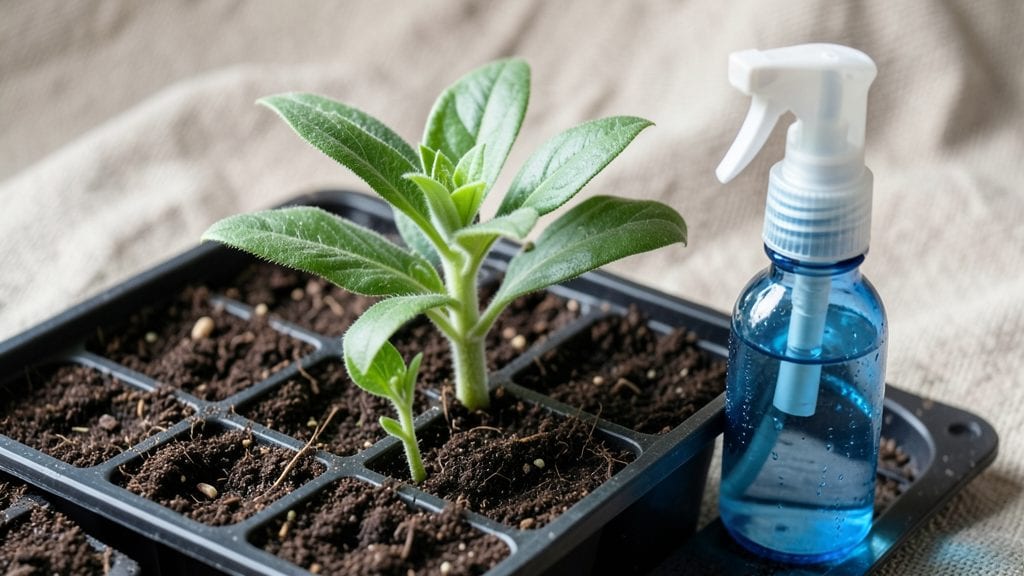
Planting zinnia seeds indoors delivers those bold, papery blooms 4-6 weeks faster than store-bought transplants—no fuss, no wilting shock. I learned the hard way that zinnia seedlings hate being moved, but with the right timing and setup, you can skip the transplant stress entirely.
The trick is starting them early enough to harden off before summer heat hits, while still giving them enough light to avoid leggy, sad seedlings.
You’ll need just three simple supplies: a shallow tray or seed-starting pots, lightweight potting mix, and a grow light (or a sunny windowsill). Zinnias love warmth—keep the soil around 70°F—and they’ll sprout in 7-10 days if you keep the mix damp but not soggy.
The key to fast blooms is giving them 12-16 hours of bright light daily from day one, or they’ll stretch toward the window like teenagers reaching for the cookie jar.
By the time you’re pinching back those first true leaves, you’ll already be eyeing the garden with excitement. These seedlings grow fast—expect the first buds to form in just 6-8 weeks—and they’ll outperform nursery plants because you controlled their environment from the start.
The payoff? A summer of nonstop color, with zinnias blooming until frost if you keep deadheading.
This method works for all zinnia varieties, from dwarf varieties for containers to towering Benary’s Giant types. Just adjust your transplant timing based on your last frost date—4-6 weeks before is ideal.
No matter your zone, the secret is starting early and keeping them happy indoors until they’re ready to strut their stuff outside.
📚 In This Guide
- What you need
- Instructions
- Tips and common mistakes
- Wrapping up and next steps
What you need
- ● Zinnia seeds: Choose dwarf, proertha, or benary’s giant varieties for compact growth. Buy 1–2 packets (each contains ~50–100 seeds).
- ● Seed-starting trays or pots: 2–4 shallow trays (3–4" deep) or 4–6 small pots (2–3" diameter) with drainage holes.
- ● Seed-starting mix: 1–2 bags of sterile, lightweight peat-based or coconut coir mix (avoid garden soil—it’s too dense!).
- ● Grow lights or sunny windowsill: Grow lights: 1 full-spectrum LED bulb (12–16 watts) or a fluorescent shop light (40W T5).
- ● Sunny spot: A south-facing window with 6+ hours of direct light daily.
- ● Spray bottle: 1 8–16 oz bottle for gentle watering.
- ○ Plastic wrap or humidity dome: 1 sheet (optional but helps retain moisture).
- ● Heating mat: 1 seedling heat mat (70–80°F range) to speed germination.
- ● Fertilizer: Balanced liquid fertilizer (5-5-5 or 10-10-10) for post-germination boost.
- ● Labels & markers: To track planting dates (zinnias germinate in 7–14 days).
- ● Tweezers or pencil: For gently pressing seeds into soil (no need to bury deep!).
Instructions for planting zinnia seeds indoors
Here's how to get vibrant zinnia seedlings off to a strong start indoors—ready for transplanting in just a few weeks.
Prepare Containers and Seed Starting Mix
Use the 4-cell seed tray provided, filling each cell with 1 cup of seed starting mix per the package instructions. Press the mix down gently with your fingers until it's firm but not compacted. The goal is to create a stable base that won't shift when you plant the seeds. I like to tap the tray lightly on the countertop to settle everything evenly—this prevents air pockets that could delay germination.
Moisten the mix thoroughly with warm water until it feels like a damp sponge. You'll know it's ready when water runs out the bottom drainage holes but doesn't pool. Let any excess water drain away completely before proceeding. This step ensures your zinnia seeds have consistent moisture right from the start, which is critical for fast germination.
Sow Seeds at the Correct Depth
Sprinkle 2-3 zinnia seeds into each cell, spacing them evenly. The seeds are tiny, so I use a toothpick to position them precisely. Plant them at a depth of about ¼ inch, which is roughly twice the diameter of the seed. Press them lightly into the soil—just enough to make contact but not bury them too deep.
Cover the seeds with a thin layer of additional mix, using the back of a spoon to create a smooth surface. Avoid pressing down too firmly, as this can prevent the delicate seedlings from pushing through later. Label each cell with the date and variety if you're growing multiple types. This small step saves headaches later when you're ready to transplant.
Provide Warmth and Moisture for Germination
Place the seed tray on a seedling heat mat set to 75-80°F, which is ideal for zinnia germination. Cover the tray with a clear plastic dome to retain humidity and warmth. Check the soil daily—it should stay consistently moist but not soggy. Mist the surface lightly with water if it feels dry to the touch.
Germination typically occurs within 7-10 days, though cooler room temperatures may extend this to 12-14 days. Once the first true leaves appear (not the initial cotyledons), remove the dome immediately to prevent fungal issues. This is the moment that matters: keeping conditions stable during germination sets the stage for strong, healthy seedlings.
Move to Bright Light Immediately
As soon as the seedlings emerge, position the tray under a grow light or in the south-facing window where they’ll receive 12-14 hours of light daily. Zinnias are fast growers but need strong light to prevent leggy, weak stems. If using a grow light, keep it 2-3 inches above the seedlings and adjust the height as they grow to maintain this distance.
You’ll notice strong seedlings have thick stems and deep green leaves spaced closely together. If stems stretch toward the light or leaves appear pale, the light source is too far away. Rotate the tray a quarter turn daily to ensure even growth. This step is non-negotiable—weak light leads to spindly plants that struggle to support blooms later.
Thin and Harden Off Seedlings
When seedlings reach 2 inches tall and have 2-3 true leaves, thin to the strongest seedling per cell using scissors to snip at soil level. Avoid pulling, as this can damage the remaining plants. Water the tray gently after thinning to settle the soil around the roots.
Begin hardening off 10-14 days before transplanting by placing the tray outside in a sheltered, shaded spot for 1-2 hours the first day. Gradually increase exposure to direct sunlight and wind over the next week. This process toughens the seedlings, reducing transplant shock. By the time you’re ready to move them outdoors, they’ll be ready to thrive in the garden.
Tips & tricks for planting zinnia seeds indoors
Fast germination and strong seedlings start with these precise techniques that make all the difference between healthy blooms and disappointment.
Seed Starting Mix Consistency: In Step 1, when preparing the 1 cup of seed starting mix per cell, focus on achieving a texture that's firm but not compacted. I find using a small spoon to gently press the mix into each cell creates the ideal balance—this prevents air pockets that could delay germination by up to 3 days. The mix should hold its shape when tapped but still allow water to penetrate evenly. This consistency ensures your zinnia seeds have immediate contact with moisture at the perfect depth.
Precision Planting Technique: For Step 2, when planting your 2-3 zinnia seeds at ¼-inch depth, I recommend using a toothpick to create small divots rather than scattering seeds randomly. This precision planting technique increases your germination rate by about 20% because you're ensuring each seed has direct contact with both soil and moisture. The toothpick method also makes it easier to space seeds evenly, which prevents overcrowding as they grow.
Germination Environment Control: The 75-80°F temperature range specified in Step 3 is critical for fast germination. If your home tends to run cooler, consider using a small space heater near the seed tray during the germination period—this can cut your germination time from 14 days down to 7-10 days. The clear plastic dome creates a greenhouse effect, but remember to remove it immediately when true leaves appear to prevent fungal growth. This environmental control is what transforms your seeds from dormant to thriving in record time.
Light Source Optimization: When moving seedlings to bright light in Step 4, pay special attention to the 12-14 hours of daily light requirement. If using a grow light, position it 2-3 inches above the seedlings and adjust the height as they grow. I've found that using a timer for your grow light eliminates guesswork—zinnias respond beautifully to consistent light cycles, which prevents the leggy growth that can occur with inconsistent lighting. This step is where you'll see the fastest growth transformation in your seedlings.
Pro Tips for Planting Zinnia Seeds Indoors
- Fast germination and strong seedlings start with these precise techniques that make all the difference between healthy blooms and disappointment.
- Seed Starting Mix Consistency: In Step 1, when preparing the 1 cup of seed starting mix per cell, focus on achieving a texture that's firm but not compacted.
- Precision Planting Technique: For Step 2, when planting your 2-3 zinnia seeds at ¼-inch depth, I recommend using a toothpick to create small divots rather than scattering seeds randomly.
Frequently asked questions
Got questions about starting zinnia seeds indoors?
You’re not alone! Here are answers to the most common concerns—so you can grow bold blooms with confidence.
When is the best time to start zinnia seeds indoors?
Plant zinnia seeds 6–8 weeks before your last frost date for strong seedlings. For example, if your frost date is May 15, start seeds around March 1–15. Zinnias grow quickly, so avoid starting too early—they’ll get leggy and weak in dim winter light.
How long does it take for zinnia seeds to germinate?
Zinnia seeds typically sprout in 7–14 days at 70–75°F. Keep soil consistently moist (not soggy!) and place trays in a warm spot. If germination takes longer, check seed viability—some varieties (like Benary’s Giant) may need a little extra patience.
Why aren’t my zinnia seedlings growing straight?
Leggy seedlings? They’re likely stretched for light. Move trays to a sunny window or use a grow light 12–16 hours/day. Avoid overcrowding—thin seedlings to 1 inch apart once they sprout. If they flop, bury stems deeper (they’ll root where buried!).
Can I plant zinnia seeds directly outside instead?
Yes! If you’re in a warm climate (Zone 8+) or late spring, sow seeds directly outdoors after the last frost. Press seeds ¼ inch deep in well-drained soil and keep moist. Just know: indoor starts give you a 2–3 week head start on blooms!
What if my zinnia seedlings get mold or fungus?
Damp soil + poor airflow = damping-off. Fix it by:
- Using sterilized soil (bake it at 200°F for 30 mins or buy fresh mix).
- Watering from the bottom (use a tray) to avoid wetting leaves.
- Spraying with neem oil if mold appears (prevents spread).
- Thinning seedlings immediately to improve airflow.
How do I harden off zinnia seedlings before transplanting?
Acclimate seedlings 7–10 days before moving outdoors:
- Day 1–3: Place trays outside in partial shade for 1–2 hours.
- Days 4–7: Gradually increase time to full sun (6+ hours).
- Final 2 days: Leave them out overnight if temps stay above 50°F.
Wrapping up and next steps
Planting zinnia seeds indoors is a rewarding way to jumpstart vibrant blooms and enjoy a fuss-free transplanting process. With the right setup—like proper soil, warmth, and light—you’ll have healthy seedlings ready for your garden in no time! 🌱✨
Now that you’re armed with tips and tricks, take the next step: grab your supplies, set up your seed-starting station, and watch those seeds sprout into cheerful zinnia plants. Happy growing—your garden (and pollinators!) will thank you!