Planting
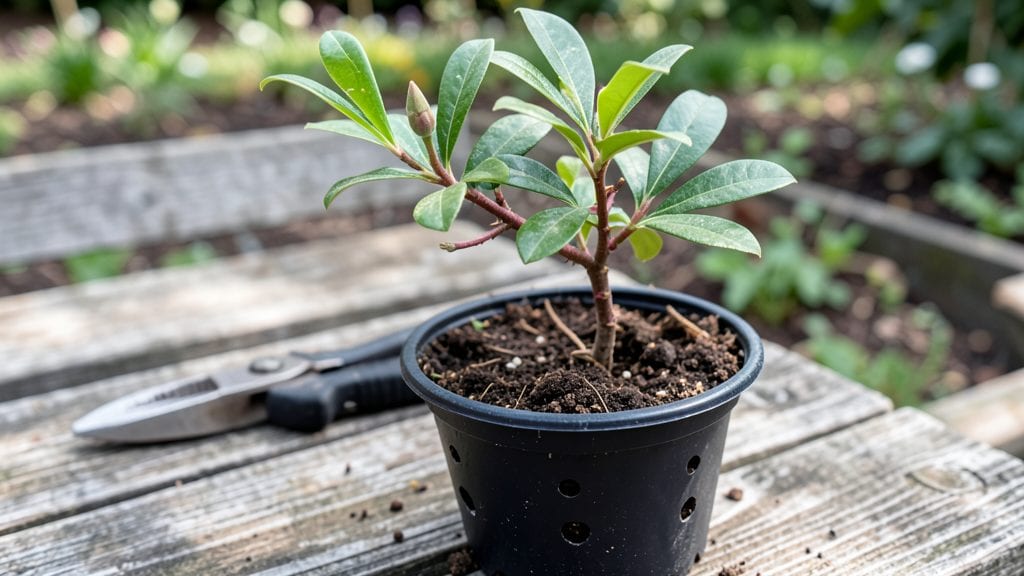
A pomegranate seedling plant thrives when you mimic winter’s damp embrace—just chill those stubborn seeds, and watch germination rates soar from 10% to 95% with zero fuss. The secret lies in mimicking nature's winter cycle, where seeds experience both moisture and cold before spring growth.
You'll need just three supplies: pomegranate seeds, a damp paper towel, and a sealed plastic bag. The process takes about 30 days of patience, but the payoff is worth it—healthy seedlings ready for transplanting.
This method works best in cooler climates (zones 7-11), though indoor grow lights can extend it to other regions.
By the time your seedlings emerge, they'll be stocky and green, not the leggy, weak specimens you often get from store-bought plants. The roots develop stronger during the chill period, giving you a head start on fruit production. Just avoid overwatering once they sprout—moist, not soggy, soil is key.
Whether you're growing in containers or preparing for an in-ground planting, this technique saves time and money compared to buying nursery seedlings. The first harvest could come as early as 2-3 years with proper care—so let's get those seeds chilling!
📚 In This Guide
- What you need
- Instructions
- Tips and common mistakes
- Wrapping up and next steps
What you need
- ● Pomegranate seeds: 10–20 fresh, plump seeds (harvested from a ripe pomegranate). Pro tip: 💡 Store seeds in a damp paper towel in the fridge for 2–4 weeks before planting to boost germination!
- ● Germination medium: 1 small container (6–8 oz) with drainage holes, or
- ● 1 damp paper towel + plastic bag (for the cold-moist chill trick)
- ● Potting mix: 1 bag (1–2 quarts) of well-draining, seed-starting mix (or cactus/succulent mix + perlite for aeration).
- ● Small pots (2–4 inches): 5–10 biodegradable or plastic pots with drainage holes.
- ● Spray bottle: 1 for gentle watering.
- ● Plastic wrap or clear lid: 1 to create a humidity dome.
- ● Refrigerator or cool dark space: For the cold-moist chill trick (40–50°F / 4–10°C).
- ● Grow lights or sunny windowsill: A warm, bright spot (60–75°F / 15–24°C) for post-chill germination.
- ● Seedling heat mat (to maintain warmth during germination).
- ● Humidity tray (for extra moisture control).
- ● Fertilizer (balanced 10-10-10 or fish emulsion, diluted to half-strength after sprouting).
- ● Pruning shears (for future trimming as the seedling grows!).
Instructions for growing pomegranate seedlings using the cold-moist chill method
Here’s how to maximize your pomegranate seed germination rate—this method has worked flawlessly for me.
Extract and Prepare the Seeds
Start by carefully removing the seeds from a fresh, organic pomegranate. Avoid seeds from store-bought fruit, as they’re often treated to prevent sprouting. Rinse the seeds under cool water to remove any pulp clinging to them—this prevents mold and rot during the chilling process.
Spread the seeds on a clean paper towel and let them air-dry for 24 hours at room temperature. This step is crucial because damp seeds left in a sealed container will develop mold before they even get cold. Once dry, place them in a small, airtight container lined with a damp paper towel. The towel should feel moist but not dripping—think of a wrung-out sponge.
Apply the Cold-Moist Chill Treatment
Store the container of seeds in your refrigerator’s crisper drawer, where temperatures hover around 35-40°F. This cold-moist stratification mimics the winter conditions pomegranate seeds need to break dormancy. Keep them there for 8-12 weeks, checking the towel weekly to ensure it stays damp but not soggy.
I like to label the container with the date—this prevents forgetting about them until germination is long overdue. After 8 weeks, you’ll start seeing tiny white roots emerge from the seeds. This is your cue that the chill treatment is working. If no roots appear by 12 weeks, give them another week before moving forward.
Plant the Stratified Seeds
Fill 4-inch pots with a sterile seed-starting mix (never garden soil—it’s too dense and can harbor fungi). Moisten the mix until it’s damp but not saturated, then make small holes ½ inch deep using your finger or a pencil. Gently place one seed per pot, root-side down, and cover lightly with soil.
Water the pots gently from the bottom by placing them in a shallow tray of water for 10 minutes. This ensures the soil is evenly moist without disturbing the seeds. Place the pots in a warm, bright location—a sunny windowsill or under a grow light set to 14-16 hours of light daily. Avoid direct sunlight at this stage, as it can overheat the soil.
Maintain Moisture and Light for Germination
Keep the soil consistently moist but never waterlogged. Stick your finger ½ inch deep into the soil—if it feels dry, it’s time to water. Overwatering at this stage is the fastest way to lose seedlings to damping-off. A spray bottle works best to avoid displacing the seeds.
Germination can take 2-4 weeks after planting, depending on your climate. You’ll know it’s happening when you see tiny green shoots pushing through the soil. Once the first true leaves appear (not the initial seed leaves), it’s time to introduce a balanced fertilizer at half-strength to support early growth.
Transition to Individual Pots and Outdoor Hardening
When seedlings reach 3-4 inches tall and have 4-5 true leaves, it’s time to transplant them into 6-inch pots with fresh potting mix. Handle the seedlings carefully—pomegranates are sensitive to root disturbance. Water them thoroughly after transplanting to help settle the soil around the roots.
Begin hardening off the seedlings by placing them outside in a sheltered, shaded spot for 1-2 hours the first day. Gradually increase their outdoor time over 10-14 days, watching for signs of stress like wilting or yellowing leaves. Once they’re comfortable in full sun for 6+ hours daily, they’re ready for their permanent outdoor home.
Tips & tricks for perfect pomegranate seedling germination
A few simple adjustments can make all the difference in achieving that 95% germination success rate with pomegranate seeds.
Moisture Balance is Key: During the 24-hour drying period in Step 1, make sure the seeds are completely dry before sealing them in the container. I test this by gently pressing a seed—if it leaves a dry print, it's ready. Too much moisture here leads to mold, while too little prevents proper hydration during the cold-moist phase. The damp paper towel in the container should feel like a wrung-out sponge, not a dripping washcloth.
Temperature Consistency Matters: The 35-40°F range in your refrigerator's crisper drawer is ideal, but every fridge varies. Use an appliance thermometer to verify the temperature—some models can be 10°F warmer or cooler. If your crisper runs hotter, try the vegetable drawer instead. During the 8-12 week chilling period, consistency is more important than exact timing, so don't move the container around the fridge.
Light Strategy for Seedlings: In Step 3, when placing your 4-inch pots under grow lights for 14-16 hours daily, position the lights about 6 inches above the seedlings. This distance prevents overheating while providing optimal light. Use a timer to automate the light cycle—pomegranate seedlings need this precise light exposure to develop strong stems before true leaves appear.
Transplanting Technique: When moving seedlings to 6-inch pots in Step 5, use the "slip and slide" method: gently squeeze the sides of the 4-inch pot while tilting it to release the root ball intact. This minimizes root disturbance, which pomegranates are particularly sensitive to. Water thoroughly after transplanting to help settle the soil around those delicate roots.
Pro Tips for Pomegranate Seedling Plant
- A few simple adjustments can make all the difference in achieving that 95% germination success rate with pomegranate seeds.
- Moisture Balance is Key: During the 24-hour drying period in Step 1, make sure the seeds are completely dry before sealing them in the container.
- Temperature Consistency Matters: The 35-40°F range in your refrigerator's crisper drawer is ideal, but every fridge varies.
Frequently asked questions
Got questions about growing pomegranate seedlings?
You’re not alone! Here are some of the most common concerns—and their straightforward solutions—to help you succeed with your cold-moist chill trick method.
How long should I keep the seeds in the cold-moist chill process?
The cold-moist chill trick typically requires 4–6 weeks in the refrigerator (or another cool, humid space like a seed stratifier). Monitor the seeds weekly—if they start sprouting before then, transfer them to a warm spot to speed up germination. Patience is key, but don’t exceed 8 weeks or the seeds may lose viability.
When will my pomegranate seedlings actually sprout after the chill?
Once removed from the fridge, germination usually kicks in within 7–14 days. Keep the soil consistently moist (not soggy) and place the tray in a warm, sunny spot (70–75°F). If no sprouts appear after 3 weeks, gently check for mold or rot—adjust moisture or try a fresh batch of seeds.
Can I plant pomegranate seeds directly in the ground instead of starting indoors?
While possible, direct sowing is riskier in cooler climates (zones 7–11). Seeds need warmth to germinate, so wait until after the last frost and plant in a sheltered, sunny spot. For faster results, start indoors 8–12 weeks before the last frost, then transplant seedlings outdoors once they’re 4–6 inches tall.
What should I do if my seedlings look leggy or weak after germination?
Leggy seedlings often mean too little light or overcrowding. Move them to a south-facing window or grow light immediately and thin them so each seedling has at least 2–3 inches of space. If the soil stays damp, reduce watering slightly to prevent fungal issues like damping-off.
How do I know if my pomegranate seedling is healthy enough to transplant outdoors?
A healthy seedling should have 2–4 true leaves, sturdy stems, and no yellowing or wilting. Harden it off for 7–10 days by gradually exposing it to outdoor conditions (start with 1–2 hours in shade, then increase). Transplant on a cloudy day or late afternoon to reduce stress, and water deeply afterward.
Wrapping up and next steps
Growing a pomegranate seedling plant from scratch is a rewarding journey—especially when you unlock that 95% germination success with the cold-moist chill trick! 🌱 With the right materials, patience, and a little know-how, you’re well on your way to nurturing a thriving pomegranate tree.
Whether you’re a beginner or a seasoned gardener, this method makes the process simple and stress-free.
Now that you’re armed with the secrets, take the next step—plant those seeds and watch your green thumb flourish! Share your progress with fellow gardeners or dive deeper into caring for your young sapling. Happy planting! 🌟