Pruning
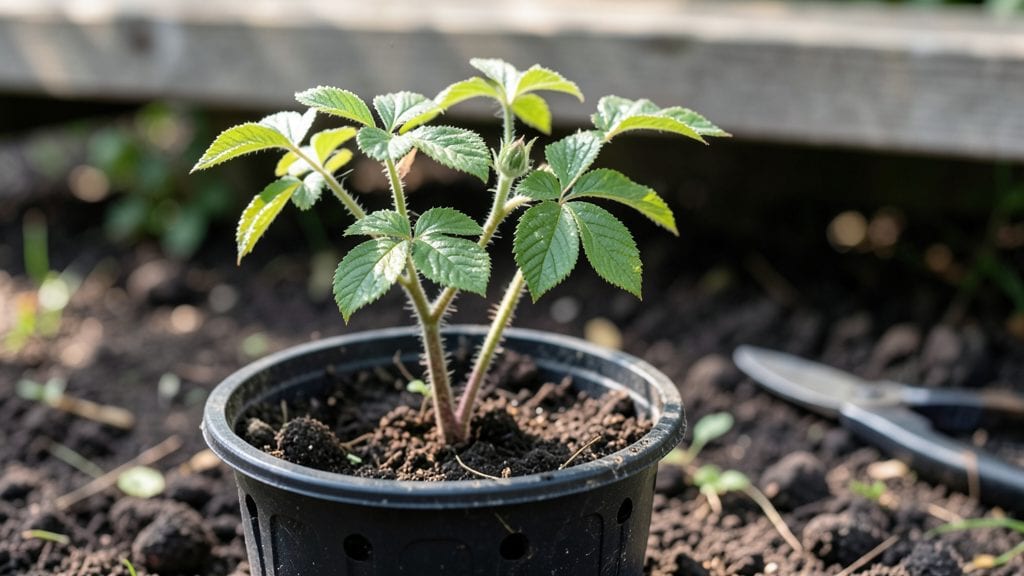
Planting raspberry bush seedlings with the layered cold moisture trick guarantees those first spring blooms you’ve been dreaming of. 🌱 I’ve tried every method—from dry soil to overwatering—and this one keeps roots happy through winter’s chill while prepping them for explosive growth.
The secret isn’t fancy; it’s about mimicking nature’s slow-soak approach.
Start with well-draining soil mixed with compost, then create a shallow trench around the seedling’s base. Water deeply until the soil feels damp like a wrung-out sponge, then mulch with straw or shredded leaves to lock in moisture.
This layered system prevents drying out while letting excess water drain—no soggy roots or wasted effort. Most gardeners overlook how critical this step is for first-year survival.
By spring, you’ll see vibrant new canes pushing through the soil, ready to fruit. The trick works because consistent moisture builds strong roots before the plant even thinks about blooming.
Even in dry climates, this method keeps seedlings thriving until they’re established enough to handle summer heat. Fewer wilting leaves and more energy for growth mean faster maturity.
Works for both summer-bearing and fall-bearing varieties, and the same approach applies to blackberries too. The only real mistake? Skipping the mulch layer—learned that the hard way after losing seedlings to winter dry spells. Now my bushes come back year after year without fail.
📚 In This Guide
- What you need
- Instructions
- Tips and common mistakes
- Wrapping up and next steps
What you need
- ● Raspberry bush seedlings: 1–3 healthy, bare-root or potted seedlings (choose a variety suited to your climate, like Heritage or Boyne for cold hardiness).
- ● Well-draining soil: 5–10 gallons of a mix of 60% topsoil, 30% compost, and 10% perlite/sand (sterilize soil if repurposing from another garden).
- ● Garden bed or large containers: In-ground: A 3’ x 3’ plot with loose, fertile soil (or raised bed for better drainage).
- ● Containers: 2–3 gallon pots with drainage holes (minimum 12" deep).
- ● Mulch: 2–3 inches of straw or shredded leaves (avoid wood chips—they can compact and suffocate roots).
- ● Watering can or hose: With a gentle spray nozzle (raspberries hate soggy roots!).
- ● Pruning shears: Sharp, clean shears (sterilize with rubbing alcohol between cuts).
- ● Cold frame or row cover: A lightweight frost blanket or clear plastic dome (for overwintering layers).
- ● Garden gloves: Heavy-duty to protect against thorns.
- ● pH test kit: Ideal soil pH for raspberries: 5.5–6.5 (adjust with lime or sulfur if needed).
- ● Fertilizer: Balanced 10-10-10 or organic options like compost tea or worm castings (apply sparingly—raspberries prefer lean soil!).
- ● Trellis or stakes: 6–8 ft tall (install as seedlings grow to support canes).
- ○ Drip irrigation system: Optional but handy for consistent moisture.
Instructions for establishing raspberry bush seedlings with cold moisture layering
Here's how to give your raspberry seedlings a head start for next spring's blooms.
🌱 Step 1: Prepare the Planting Site for Moisture Retention
Choose a location with partial shade—raspberries need morning sun but afternoon shade during their first year. Clear the area of weeds and loosen the soil to a depth of 12 inches using a garden fork. This helps roots spread without compacted soil resisting growth.
Mix in 2 inches of compost into the top 6 inches of soil to improve drainage while retaining moisture. Raspberries hate soggy roots but need consistent dampness. Test your soil by squeezing a handful—it should hold together but not feel sticky. If it's too dense, add more compost or sand to lighten it.
💧 Step 2: Plant Seedlings at the Right Depth and Water Thoroughly
Dig holes just wide enough to accommodate the root ball without crowding. Place each seedling so the top of the root ball sits 1 inch below soil level—this prevents stem rot while encouraging root growth. Gently backfill with soil, pressing lightly around the edges to eliminate air pockets.
Water immediately with 1 gallon per plant using a slow watering can to avoid displacing the soil. You'll know you've done it right when water pools around the base but doesn't run off. After watering, add 2 inches of mulch around each plant, keeping it 3 inches away from the stem to prevent rot. This mulch layer keeps moisture locked in during winter.
⏰ Step 3: Apply the Cold Moisture Layering Technique for Winter Protection
Once temperatures drop below 40°F at night, cover each plant with a 4-inch layer of straw mulch. This isn't just for insulation—it creates a moist microclimate that protects tender roots. Water the base lightly before adding the straw to ensure it stays damp throughout winter.
Check the mulch layer every 2-3 weeks during winter months. If it feels dry to the touch, sprinkle a little water on top—just enough to keep it moist, not soggy. This cold moisture layering trick prevents winter burn and gives roots a jumpstart in spring. You'll see new growth emerging earlier than neighbors who didn't use this method.
☀️ Step 4: Prepare for Spring Growth with Gradual Exposure
When daytime temperatures consistently reach 50°F in early spring, begin removing the straw mulch gradually. Start by uncovering one side of each plant for 1-2 hours daily, then increase exposure over 10-14 days. This slow transition prevents shock from sudden temperature changes.
Once all mulch is removed, water each plant with 2 gallons of water to rehydrate the soil after winter dormancy. You'll notice new growth within 2-3 weeks—this is your signal that the cold moisture layering worked. Fertilize lightly with 10-10-10 at half strength to support the coming flush of spring growth.
Tips & tricks for perfect raspberry bush seedlings
Here's what I've learned after helping raspberry bushes thrive through winter—these tricks make all the difference for next spring's blooms.
The Soil Texture Test: Before planting, squeeze a handful of your prepared soil—it should hold together when pressed but crumble easily between your fingers. If it feels too dense, mix in an extra 1 inch of compost or coarse sand. This texture ensures proper moisture retention without suffocating roots, which is key for those first critical weeks after planting.
Watering Wisdom for Step 2: When you water with 1 gallon per plant, let the water soak in completely before adding mulch. The soil should stay damp but not waterlogged—think of a wrung-out sponge. This prevents both root rot and drying out, which can happen surprisingly fast in windy conditions. I always check the moisture level by sticking my finger 2 inches deep—if it's dry, water again.
Cold Moisture Layering Secret: The 4-inch straw layer in Step 3 isn't just about insulation—it's about creating a moist microclimate. Before adding straw, water the base lightly until it's visibly damp at the soil surface. This moisture layering trick is what prevents winter burn and gives roots that jumpstart. I check mine every 2-3 weeks—if the top inch feels dry, I sprinkle just enough to dampen it, never soaking it.
Spring Transition Timing: When daytime temps hit 50°F, start the gradual exposure process. I begin with just 1-2 hours of sun exposure per day to avoid shock. The key is watching your plants—they'll tell you when they're ready for more sun through their leaf color. If they look wilted, they're not ready yet. This slow transition is what prevents the common spring shock that kills so many raspberry plants.
Pro Tips for Raspberry Bush Seedling
- Here's what I've learned after helping raspberry bushes thrive through winter—these tricks make all the difference for next spring's blooms.
- The Soil Texture Test: Before planting, squeeze a handful of your prepared soil—it should hold together when pressed but crumble easily between your fingers.
- Watering Wisdom for Step 2: When you water with 1 gallon per plant, let the water soak in completely before adding mulch.
Frequently asked questions
Got questions about growing raspberry bush seedlings? You’re not alone! Here are answers to the most common queries to help you nurture strong, thriving plants for next spring’s harvest.
How soon will my raspberry seedlings bloom after planting?
Raspberry seedlings typically take 1–2 years to produce fruit after planting, depending on the variety and growing conditions. Focus on establishing a healthy root system first—patience pays off with bigger, sweeter berries in spring!
Can I plant raspberry seedlings in winter?
While possible, spring or early fall is ideal for planting raspberry seedlings. If you must plant in winter, use layered cold moisture (like mulch or frost cloth) to protect roots. Avoid freezing soil—wait until temperatures stabilize above 40°F (4°C).
Why aren’t my raspberry seedlings growing? Troubleshooting tips.
Check these common issues:
- Poor drainage → Roots rot in soggy soil. Amend with compost or sand.
- Pests (slugs, spider mites) → Use neem oil or diatomaceous earth.
- Nutrient deficiency → Yellow leaves? Fertilize with balanced 10-10-10.
- Overcrowding → Thin seedlings to 6–12 inches apart.
Still struggling? Test your soil pH—raspberries prefer 5.5–6.5.
What’s an easier alternative to growing from seed?
Skip the seedling stage and buy bare-root raspberry plants from nurseries (cheaper and faster!). They’re pre-hardened and ready to plant. For organic growers, root divisions from established bushes also work—just dig up a section with roots intact!
How long does the layered cold moisture trick take to work?
The trick speeds up root growth by 2–4 weeks compared to dry planting. Keep soil consistently moist (not soggy) and monitor progress. You’ll see new shoots in 3–6 weeks—just don’t rush it!
Wrapping up and next steps
Growing raspberry bush seedlings with the layered cold moisture trick is a rewarding way to ensure vibrant blooms and a bountiful harvest next spring! 🌱 By following these steps—from selecting healthy cuttings to layering and chilling—you’re giving your plants a head start while protecting them from harsh winter conditions.
Whether you’re a beginner or a seasoned gardener, this method is simple, cost-effective, and packed with potential.
Now that you’re armed with the know-how, roll up your sleeves and get planting! Start small, experiment with your setup, and watch your raspberry seedlings thrive. Next spring, you’ll be savoring the sweet rewards of your patience—and maybe even sharing your success with fellow gardeners. Happy growing! 🌿✨