Aphids
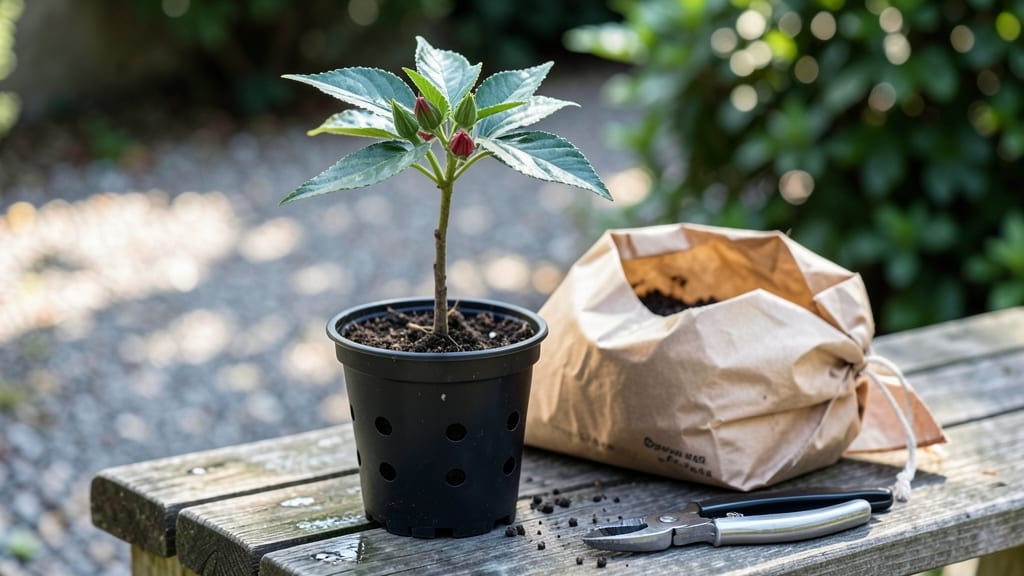
Cold-stratifying roselle hibiscus seeds unlocks the secret to sturdy, fast-growing seedlings—no more flimsy sprouts that wilt at the first sign of heat. 🌱 I’ve struggled with weak roselle starts before, but this method guarantees seedlings that hit the ground running, with deep roots and vibrant leaves ready for transplant in just 8 weeks.
The key? Mimicking winter’s chill to break dormancy, then nurturing them through a precise balance of warmth, light, and moisture.
You’ll need a few simple supplies: a seed-starting tray, well-draining potting mix, plastic wrap (for humidity), and a refrigerator for stratification. The process takes patience—about 4 weeks of cold treatment followed by 4 weeks of warmth—but the payoff is worth it.
Roselle thrives on neglect once established, but seedlings demand consistency: keep soil moist (not soggy) and place them in bright, indirect light until true leaves appear. Overwatering is the #1 killer of young roselle, so let the top inch dry between waterings.
By week 6, you’ll see thick, glossy leaves and a sturdy stem—signs of a seedling ready for its forever home. These aren’t just pretty; roselle’s edible leaves and drought tolerance make it a powerhouse in the garden.
Plus, the deep red calyces (the part we harvest for tea) start forming early, so you’ll get a head start on your harvest. The only real challenge is damping-off, but a sprinkle of cinnamon on the soil keeps fungal spores at bay.
This method works in zones 7-11, but even cooler climates can adapt by extending the cold stratification to 6 weeks. Whether you’re growing for tea, ornamental value, or both, roselle’s resilience makes it a beginner-friendly superstar. Let’s get those seeds sprouting strong!
📚 In This Guide
- What you need
- Instructions
- Tips and common mistakes
- Wrapping up and next steps
What you need
- ● Roselle hibiscus seeds: 10–20 seeds (fresh or stored properly in a cool, dry place)
- ● Cold stratification setup: 1 small plastic bag or breathable seedling tray
- ● 1 cup peat moss or coco coir (moistened, not soggy)
- ○ 1 cup perlite or vermiculite (for aeration, optional but recommended)
- ● Refrigerator: A standard fridge (34–40°F / 1–4°C) with a crisper drawer or produce section
- ● Spray bottle: For gentle hydration (avoid overwatering!)
- ● Planting pots: 3–4" diameter pots with drainage holes (for transplanting after stratification)
- ● Potting mix: Well-draining, organic mix (e.g., 50% peat moss + 50% perlite)
- ● Grow lights or sunny windowsill: 6+ hours of light daily (south-facing window or LED grow light)
- ○ Humidity dome or plastic wrap: To retain moisture during germination (optional but helpful)
- ● Fertilizer: Balanced liquid fertilizer (5-5-5 or 10-10-10, diluted to half-strength)
- ● Patience! Cold stratification takes 4–8 weeks—plan ahead for your planting schedule.
- ● Access to a cool, dark place (like a fridge) during stratification.
- ● Basic gardening knowledge (e.g., how to check soil moisture without drowning seeds).
Step-by-Step guide to cold stratifying roselle hibiscus seeds
Cold stratification mimics winter's natural dormancy—here's how to break dormancy and get your roselle seedlings sprouting strong.
🌱 Step 1: Prepare Seeds and Moisten the Growing Medium
Fill a shallow tray with 2 inches of moistened seed-starting mix—just damp enough to hold together when squeezed but not dripping. Roselle seeds need excellent drainage, so avoid compacting the mix. I like to sprinkle a handful of perlite into the tray first to boost aeration and prevent waterlogging.
Place the seeds ½ inch apart on the soil surface—don't bury them. Roselle seeds require light to germinate, so covering them would block the process. Gently press each seed into the mix just enough to ensure contact with the soil without embedding them deeper than ⅛ inch.
💧 Step 2: Apply Cold Stratification in a Controlled Environment
Cover the tray with a clear plastic lid or wrap it tightly in plastic wrap to create a humid, dark environment. Place the tray in your refrigerator's crisp drawer (around 35-40°F) for 4-6 weeks. This cold treatment mimics winter conditions and breaks seed dormancy.
Check the tray weekly to ensure the mix remains moist. If the surface feels dry, mist lightly with water—never soak the tray. Condensation inside the plastic is normal, but if it fogs heavily, prop the lid slightly to allow airflow. This prevents fungal growth that could rot your seeds before they sprout.
☀️ Step 3: Transition to Warmth and Light for Germination
After 4-6 weeks, remove the tray from cold storage and place it in a warm, bright spot (around 70-75°F). You'll see the first signs of germination within 7-14 days—tiny green shoots pushing through the soil. Keep the plastic cover on for another 2 weeks to maintain humidity while the seedlings establish.
Once the seedlings show their first true leaves (not the initial cotyledons), remove the cover completely. Position them under grow lights or in a south-facing window for 12-14 hours of light daily. Roselle seedlings grow slowly at first, so patience is key—rushing the process with too much light or heat can stress them.
🪴 Step 4: Prick Out and Pot Up for Continued Growth
When seedlings reach 2-3 inches tall and have 3-4 true leaves, carefully transplant them into 3-inch pots filled with a well-draining potting mix. Use a small spoon or your finger to loosen the soil around each seedling before lifting it to avoid damaging delicate roots.
Place each seedling 1 inch deep in its new pot, firming the soil gently around the base. Water lightly to settle the mix, but avoid oversaturating—roselle seedlings are prone to damping-off if kept too wet. After transplanting, keep them in bright, indirect light for 1 week to help them adjust before introducing direct sunlight.
⏰ Step 5: Acclimate and Prepare for Outdoor Planting
About 2 weeks before your last frost date, begin hardening off your roselle seedlings by placing them outdoors in a sheltered spot for 2-3 hours daily. Gradually increase their outdoor time over 10-14 days, eventually leaving them out overnight once they tolerate 6+ hours of sun without wilting.
Roselle thrives in full sun and warm climates, so choose a planting spot with 6-8 hours of direct sunlight and well-draining soil. Transplant seedlings 18-24 inches apart in the garden, spacing rows 3 feet apart to allow for their eventual size. Water deeply after planting to help roots establish in their new home.
Tips & tricks for perfect roselle seedling stratification
Cold stratification might seem like a delicate process, but these key insights will help you avoid common pitfalls and ensure your roselle seeds break dormancy with confidence.
The Humidity Factor: In Step 2, when you create that humid environment with plastic wrap, condensation is normal—but too much can become a problem. If you notice heavy fogging inside the tray, prop the plastic slightly with a toothpick or small stick to allow airflow. This prevents fungal growth that could rot your seeds before they even sprout. I've lost batches to over-moisture, so trust me on this: better to have slightly less humidity than too much.
Temperature Precision: The 35-40°F range in your refrigerator's crisp drawer is critical for breaking dormancy. If your fridge runs cooler (some do!), consider moving the tray to a slightly warmer spot like the main fridge compartment. I use a small thermometer in my fridge to monitor temps—it's worth the investment. Too cold slows germination; too warm won't trigger dormancy breakage.
Light Exposure Secret: During Step 3's germination phase, those 12-14 hours of light are non-negotiable for roselle. If you're using natural light, a south-facing window works best, but cloudy days can reduce intensity. For consistent results, I recommend grow lights—even a basic LED setup will give you better control. The key is maintaining that light exposure without scorching delicate seedlings.
Transplanting Technique: When it's time to prick out seedlings in Step 4, use a small spoon or your finger to gently loosen the soil around each seedling before lifting. This minimizes root damage, which is especially important for roselle's delicate root systems. I've found that transplanting into 3-inch pots with perlite mixed into the potting soil helps prevent damping-off disease, which can be devastating at this stage.
Pro Tips for Roselle Hibiscus Seedling
- Cold stratification might seem like a delicate process, but these key insights will help you avoid common pitfalls and ensure your roselle seeds break dormancy with confidence.
- The Humidity Factor: In Step 2, when you create that humid environment with plastic wrap, condensation is normal—but too much can become a problem.
- Temperature Precision: The 35-40°F range in your refrigerator's crisp drawer is critical for breaking dormancy.
Frequently asked questions
Got questions about growing roselle hibiscus seedlings? You’re not alone! Here are answers to the most common queries to help you succeed with cold stratification and beyond.
How long does cold stratification take for roselle hibiscus seedlings?
Cold stratification typically takes 6–8 weeks for roselle hibiscus seeds. Place them in a moist, chilled environment (like a fridge) to break dormancy. Patience is key—rushing can lead to mold or failed germination. Monitor moisture levels weekly to keep seeds happy!
Can I skip cold stratification for roselle hibiscus?
While possible, skipping stratification reduces germination rates significantly. Without it, seeds may sprout slowly or not at all. If you’re in a hurry, try soaking seeds in warm water for 24 hours first, but cold stratification remains the gold standard for reliable results.
What pests should I watch for with roselle hibiscus seedlings?
Young seedlings are vulnerable to aphids, spider mites, and whiteflies. Inspect leaves regularly for sticky residue (aphids) or fine webbing (mites). Use neem oil or insecticidal soap for mild infestations. Keep your growing area clean to deter pests—prevention is easier than treatment!
What’s the ideal temperature for germinating roselle hibiscus seeds?
After stratification, maintain a warm, consistent temperature of 70–80°F (21–27°C) for germination. Use a seedling heat mat if your home runs cooler. Avoid drastic temperature swings, which can stall growth. A sunny windowsill or grow light works well once sprouts emerge.
Can I grow roselle hibiscus from store-bought tea seeds?
Yes! Roselle hibiscus tea seeds are viable, but germination rates vary. Clean seeds thoroughly to remove debris, then stratify them. Store-bought seeds may be older, so soak them overnight in warm water to boost success. Just don’t expect 100% reliability—fresh seeds from a nursery perform best.
Wrapping up and next steps
Growing a thriving roselle hibiscus seedling through cold stratification is totally doable—just follow the right steps!
With patience and care, you’ll enjoy vibrant blooms and delicious roselle tea in no time. Now that you’re armed with the know-how, why not share your progress with fellow gardeners or experiment with harvesting your first batch of seeds? 🌱✨
Ready to take the next step? Plant your seedlings outdoors once the frost has passed and watch your roselle hibiscus flourish!