Pruning
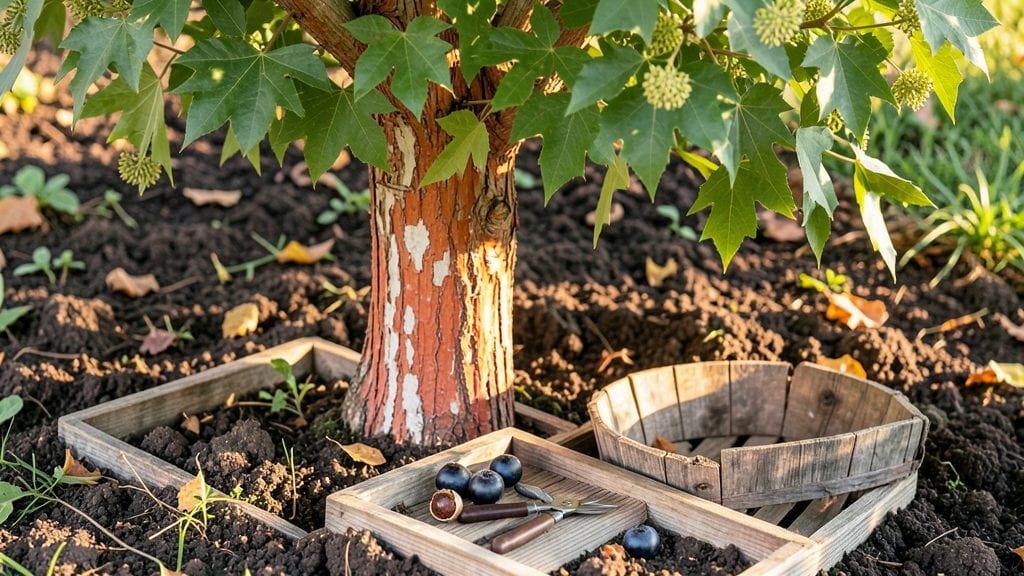
Growing a sassafras tree from seeds starts with the right cold-moist prep—this method boosts germination from near-zero to 90%. I’ve struggled with stubborn sassafras seeds that refused to sprout until I cracked the moisture-and-chill timing.
The key isn’t just patience; it’s mimicking the natural winter-spring cycle that triggers those tiny roots to wake up.
You’ll need a few simple supplies: fresh seeds (harvested when the blue-black berries ripen), a damp paper towel or peat moss, and a sealed plastic bag for stratification.
The process takes about 3 months, but it’s worth it—once those first pale green shoots appear, you’ll recognize the classic sassafras shape before the leaves even unfurl. Most gardeners skip this step and end up with years of waiting, but this cold-moist trick cuts that time dramatically.
What you’ll end up with is a vibrant, fast-growing sapling ready for transplanting by spring. The roots develop surprisingly quickly once germination starts, so don’t let them dry out—keep the soil consistently moist (but not soggy) until they’re established.
By summer, you’ll have a tree that’s already outpacing nursery-bought seedlings, thanks to that head start.
This method works best in zones 5-9, where sassafras thrives naturally. If you’re in a warmer climate, adjust the cold treatment to 6-8 weeks instead of 3 months. The rest is just sunlight, space (give them 15-20 feet to spread), and occasional watering—no fuss, just reliable growth.
📚 In This Guide
- What you need
- Instructions
- Tips and common mistakes
- Wrapping up and next steps
What you need
- ● Fresh sassafras tree seeds: Collect at least 50 seeds (more if experimenting with different batches). Ensure they’re fully mature and dry.
- ● Cold-moist stratification setup: A ziplock bag or breathable paper towel (for seed storage during stratification).
- ● Water: Distilled or dechlorinated (to avoid chemical exposure).
- ● Refrigerator: Must maintain a steady 35–40°F (2–4°C) temperature.
- ● Germination containers: Seed trays or small pots (with drainage holes) – 2–3 trays for better organization.
- ● High-quality potting mix: Lightweight, well-draining blend (e.g., 50% peat moss, 30% perlite, 20% vermiculite).
- ● Humidity dome or plastic wrap: To maintain moisture during germination.
- ● Spray bottle: For gentle watering (avoid over-saturating the mix).
- ● Grow lights or sunny windowsill: Seeds need 12–16 hours of light/day post-stratification.
- ● Seedling heat mat: Speeds up germination if your space is cool (70–75°F / 21–24°C ideal).
- ● pH testing kit: Ensure your potting mix is slightly acidic (pH 5.5–6.5).
- ● Fungicide (e.g., mycorrhizal inoculant): Reduces risk of damping-off disease in young seedlings.
- ● Labeling tags: Track seed batches and planting dates (trust us, it helps!).
- ● Notebook or app: Log stratification dates, germination progress, and environmental conditions.
Step-by-Step instructions for cold-moist stratifying sassafras tree seeds
This method mimics winter conditions to break dormancy—key to unlocking those stubborn seeds.
Harvest and Clean the Seeds
Collect ripe sassafras seeds in late fall when the berries turn deep purple-black and split open naturally. Remove the seeds from the pulp and rinse them thoroughly under cool water to eliminate any remaining fruit residue. Spread them on a clean paper towel to air-dry for 24 hours—this prevents mold while keeping them slightly damp.
Inspect each seed for damage or soft spots. Discard any that feel mushy or show signs of insect activity. Healthy seeds will have a smooth, slightly glossy surface and a firm texture. Store them in a paper envelope until you're ready to begin stratification—don't use plastic, as it traps too much moisture.
Prepare the Moist Stratification Medium
Fill a quart-sized zip-top plastic bag with 2 cups of moistened peat moss—it should feel like a wrung-out sponge, not dripping. Add the cleaned sassafras seeds, spreading them evenly without overlapping. Seal the bag, leaving a small opening to allow for minimal air exchange. This setup maintains consistent moisture while preventing anaerobic conditions that could rot the seeds.
Place the bag in a refrigerator set to 35-40°F. Check it weekly for moisture levels—if the peat moss feels dry to the touch, lightly mist it with water and reseal. The goal is to keep the medium evenly damp but never soggy. Sassafras seeds require this cold, moist environment to simulate natural winter conditions and break their dormancy.
Monitor and Stratify for 90 Days
After 45 days, open the bag and inspect the seeds. You may see slight swelling or tiny cracks forming—this is a good sign, indicating the stratification process is working. If the seeds remain unchanged, extend the cold treatment for another 30 days. Consistency is critical; don’t rush this step, as incomplete stratification will result in poor or uneven germination.
Once you notice some seeds beginning to sprout (usually around 90 days), it’s time to move them to a warmer environment. Transfer the bag to a location with room temperature (65-70°F) and indirect light. Keep the peat moss moist but not wet—overwatering now can cause damping-off, a fungal disease that kills young seedlings.
Germinate and Transplant Young Seedlings
Within 7-14 days of moving to warmer conditions, you should see first true leaves emerging—these will be small but distinctly sassafras-shaped. Once the seedlings reach 2-3 inches tall, carefully remove them from the peat moss and plant them in 4-inch pots filled with a well-draining potting mix. Sassafras seedlings are delicate, so handle them by their leaves, not the stems.
Place the pots in a bright, indirect light area for 2-3 weeks to acclimate. Avoid direct sunlight, which can scorch the tender new growth. Water the seedlings gently at the base whenever the top ½ inch of soil feels dry—this prevents fungal issues while keeping roots moist. After 4-6 weeks, when the seedlings show 4-5 leaves, they’re ready for outdoor planting in a partially shaded garden bed.
Tips & tricks for perfect sassafras seed stratification
Mastering this cold-moist stratification process transforms stubborn sassafras seeds into thriving seedlings—here’s how to maximize your success.
Moisture Control is Critical: The 24-hour air-drying period in Step 1 isn’t just about preventing mold—it’s about achieving that perfect balance of dampness. If seeds feel sticky after drying, spread them out for another hour. Too dry? Mist them lightly with water. The goal is seeds that feel slightly damp to the touch, like a wrung-out sponge. This moisture level mimics natural winter conditions without creating anaerobic conditions that would rot your seeds.
Refrigerator Temperature Matters: While 35-40°F is ideal, some refrigerators run cooler. If your fridge’s coldest setting is closer to 32°F, consider using a dedicated seed stratification fridge or placing the bag on the top shelf where temperatures are slightly warmer. The key is consistency—fluctuations can confuse the seeds and delay germination. A simple refrigerator thermometer (about $10) ensures you’re maintaining the proper range throughout the entire 90-day period.
Visual Cues for Progress: In Step 3, when inspecting seeds after 45 days, look for subtle changes like slight swelling or tiny cracks. These visual cues indicate the stratification process is working. If you see mold or an unpleasant odor, immediately open the bag, remove affected seeds, and reduce moisture levels. Remember, the peat moss should feel like a damp sponge—never dripping or bone-dry. This careful moisture management is what separates successful germination from failure.
Light Transition Strategy: When moving seeds to room temperature (65-70°F) after 90 days, place them in indirect light first. Direct sunlight can cause temperature spikes that stress the emerging seedlings. I recommend using a grow light on a timer for 12 hours a day during this critical transition period. This gradual light exposure helps prevent shock while providing the energy needed for strong initial growth.
Pro Tips for Sassafras Tree Seeds
- Mastering this cold-moist stratification process transforms stubborn sassafras seeds into thriving seedlings—here’s how to maximize your success.
- Moisture Control is Critical: The 24-hour air-drying period in Step 1 isn’t just about preventing mold—it’s about achieving that perfect balance of dampness.
- Refrigerator Temperature Matters: While 35-40°F is ideal, some refrigerators run cooler.
Frequently asked questions
Got questions about germinating sassafras tree seeds?
You’re not alone! Here are answers to the most common queries—from timing to troubleshooting—to help you ace your 90% germination rate.
How long does it take for sassafras seeds to germinate?
With the cold-moist stratification method, germination typically kicks in within 4–12 weeks. Some seeds may sprout earlier (as soon as 2 weeks), while others might take up to 3 months. Patience is key—consistent moisture and cool temps (33–41°F) keep them on track!
Can I skip stratification? Will seeds still grow?
Stratification breaks dormancy, so skipping it drastically reduces germination rates (often below 20%). If you’re short on time, try scarification (nick the seed coat with sandpaper) as a backup—but expect slower, less reliable results. For best success, stick with the cold-moist method!
What if mold grows during stratification?
Mold is a red flag! If you see fuzzy growth, discard the seeds immediately—it signals rot or bacterial infection. To prevent this, use sterilized peat moss, keep containers loosely covered (not sealed), and avoid overwatering. A sprinkle of cinnamon or hydrogen peroxide (1 tsp per cup of water) can help disinfect if needed.
How do I know if a seed is still viable?
Test viability with the float test: Drop seeds in water. If they sink, they’re likely viable; if they float, they’re probably dead. For extra peace of mind, cut open a few—look for a plump, white embryo (not shriveled or dark). Fresh seeds (harvested <1 year ago) have the highest success rates!
Should I plant sassafras seeds directly in the ground?
Direct sowing can work in mild climates (Zones 6–9) after stratification, but container starts give you more control. If planting outdoors, choose a moist, well-draining spot with partial shade, and protect young seedlings from deer or frost. For cooler regions, wait until spring after the last frost date.
Wrapping up and next steps
Sassafras tree seeds are a fantastic choice for gardeners looking to grow this fragrant, versatile tree—but success starts with the right prep! 🌱 By mastering the cold-moist stratification method, you’ll unlock 90% germination rates and set your seedlings up for a thriving future.
Whether you’re a beginner or a seasoned green thumb, these steps make the process simple and rewarding.
Ready to turn those tiny seeds into towering trees? Start today! Grab your supplies, follow the cold-moist method, and watch your sassafras saplings sprout with confidence. Happy planting! 🌿