Lawn
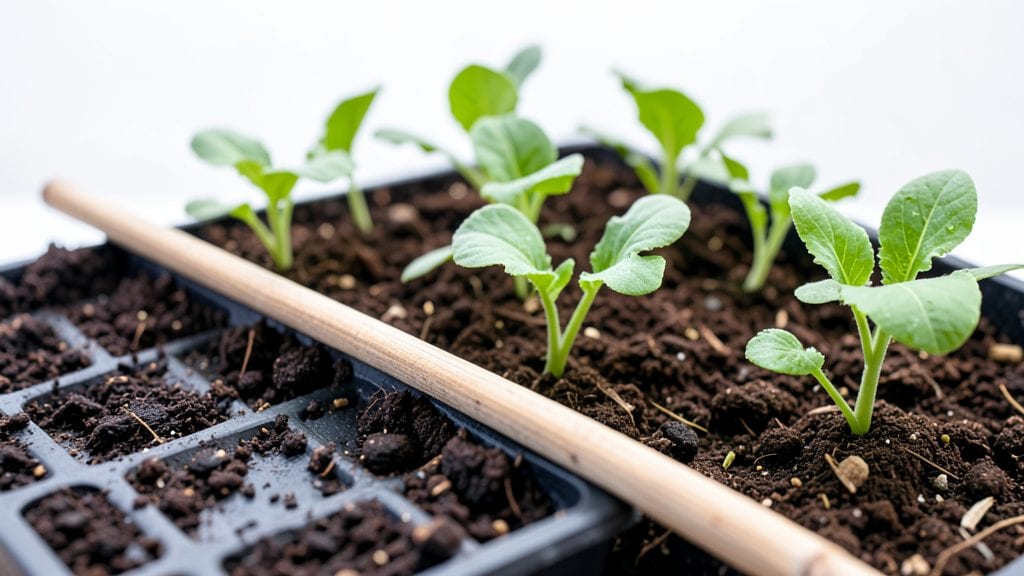
My seed dibber tool transformed my seed-starting game from messy guesswork to perfectly spaced rows that actually grow. 🌱 Before I had one, I’d eyeball planting, leading to overcrowded seedlings and wasted space—now my seedlings emerge in neat lines, with no thinning needed.
The right dibber makes all the difference, especially for small seeds like carrots or lettuce where spacing matters more than you’d think.
You’ll need just three things: a dibber (wooden or metal works), a flat tray or seedbed, and your chosen seeds. The dibber’s simple design—just a pointed stick with depth markers—lets you create uniform holes at the exact depth each seed type needs.
For beginners, start with a basic wooden dibber; they’re cheap, durable, and perfect for learning the technique without overcomplicating things.
Here’s how it works: press the dibber into the soil to your seed’s recommended depth, drop in 1-3 seeds per hole (depending on the plant), then gently cover with soil.
The result? Seedlings that emerge evenly spaced, reducing competition for nutrients and making harvests easier. No more guessing—just consistent, foolproof planting that even my black thumb can master.
Pair your dibber with a small rake for smoothing soil and a spray bottle for watering, and you’ve got a seed-starting setup that’s both simple and shockingly effective.
Whether you’re sowing a full garden bed or just a few herbs, this tool saves time, reduces waste, and guarantees better germination rates. Let’s get those seeds in the ground right!
📚 In This Guide
- What you need
- Instructions
- Tips and common mistakes
- Wrapping up and next steps
What you need
- ○ Seed dibber tool: 1 x Adjustable or fixed-length dibber (6–12 inches long, with a pointed tip for easy soil penetration). Optional: Wooden or plastic handles for comfort (if not already included).
- ● Seeds: Your chosen seed variety (check spacing guidelines on the packet—most veggies need 1–3 inches apart).
- ● Garden soil: Well-draining, loose soil (amend with compost if compacted).
- ● Watering can or hose: With a gentle spray nozzle to avoid disturbing seeds.
- ● Measuring tape or ruler: For marking planting rows (if not using a dibber with built-in guides).
- ● Garden twine or string + stakes to create guidelines for straight rows.
- ● Knee pad or small stool for comfort during long planting sessions.
- ● Seedling markers or popsicle sticks to label rows (especially for herbs/veggies).
- ● Gloves to keep hands clean (and protect from thorns or rough soil).
- ● Sunhat or umbrella for shade on sunny days.
How to use a seed dibber for flawless planting spacing
Here's the method I rely on to eliminate guesswork and create uniform rows—no more crowded seedlings or wasted space.
🪴 Step 1: Prepare Your Planting Area
Clear the soil of debris and loosen it to a depth of 6 inches with a garden fork or tiller. This ensures roots can penetrate easily without resistance. I like to rake the surface smooth afterward—uneven soil leads to uneven planting depth, which throws off spacing consistency.
Mark your rows with a straight piece of wood or string stretched between stakes. For vegetables like carrots or beets, aim for 12-18 inches between rows to allow proper airflow. The dibber will make your rows perfectly straight, but only if you start with a level baseline.
🌱 Step 2: Calibrate the Dibber to Your Desired Spacing
Most seed dibbers have adjustable depth stops, but the spacing comes from how you position your feet. For seeds like beans or peas, I plant them 3-4 inches apart—this means I take 3-4 steps between each dibber hole. Mark your steps with small flags or chalk dots to maintain rhythm.
Press the dibber straight down to create a hole just deep enough to cover your seed (usually 1-2 times the seed's diameter). For tiny seeds like lettuce, I make the hole ¼ inch deep—any deeper and they won't germinate. Tap the dibber gently to avoid compacting the soil around the hole.
💧 Step 3: Plant Seeds with Precision
Drop 1-2 seeds per hole (depending on seed size) and cover lightly with soil using the dibber's side or a small rake. Press down gently to ensure good seed-to-soil contact—this prevents air pockets that could delay germination. I always plant two seeds in each hole for reliability, then thin later.
Move systematically along the row, maintaining even steps between each dibber hole. You'll see the rhythm develop after a few rows—this is where the dibber shines. For larger seeds like corn, I use the dibber to mark the hole, then place the seed by hand at the correct depth.
✂️ Step 4: Water and Monitor for Even Germination
Water gently with a fine spray nozzle to avoid dislodging seeds. The soil should feel moist but not soggy—you want it damp enough for seeds to absorb water but not so wet that it washes them away. I like to water in the morning so any excess moisture evaporates by evening.
Watch for first true leaves to appear (not the initial seed leaves). This is your cue to thin seedlings if you planted multiple per hole. Use small scissors to snip excess plants at soil level—never pull, as this disturbs roots and can uproot the desired seedling.
⏰ Step 5: Maintain Spacing as Plants Grow
As seedlings emerge, use the dibber to mark where to thin them. For example, if you planted beans 3 inches apart but they're now 6 inches tall, you'll need to thin to 6-8 inches apart for proper maturation. The dibber helps visualize the new spacing without measuring each time.
This tool also works for transplanting. Press it into the soil to create holes the exact size of your seedlings' root balls. The dibber's precision ensures you don't crowd plants or leave gaps that weeds will fill. I've found that using it for both planting and thinning keeps my garden uniformly spaced from day one.
Tips & tricks for perfect seed dibber planting
Precision planting starts with the right technique—here's how to maximize your seed dibber's potential for flawless garden organization.
Soil Preparation Secret: After loosening the soil to 6 inches, press down firmly with your dibber at the start of each row. This creates a firm baseline that prevents the dibber from wandering as you work. I've found that adding a thin layer of sand to the row before planting helps the dibber glide smoothly without dragging, especially in heavier clay soils. This small step eliminates the need for constant readjustment and keeps your rows perfectly straight from the first hole to the last.
Spacing Rhythm Technique: The 3-4 inch spacing for beans and peas becomes second nature once you establish your footing. I recommend practicing your stride first on a flat surface—take deliberate steps while counting aloud. For beginners, I suggest using a small chalk marker to dot the ground at each step location before planting. This visual guide helps maintain consistent spacing even when your stride isn't perfectly calibrated yet. The dibber's precision comes alive when you combine it with this rhythmic approach.
Depth Control Pro Tip: When creating holes for tiny seeds like lettuce at ¼ inch depth, I've discovered a simple trick: use the dibber's side to scrape away excess soil after making the initial hole. This ensures you're not burying seeds too deep while maintaining the perfect planting depth. For larger seeds, I recommend using the dibber to create a small mound of soil first, then placing the seed in the center before pressing the dibber down to cover it—this prevents over-deepening that can delay germination.
Transplanting Hack: Your seed dibber isn't just for planting—it's a transplanting game-changer. Before removing seedlings from their nursery pots, use the dibber to create holes slightly larger than the root ball. The dibber's adjustable depth stop helps you gauge the perfect planting depth for each seedling type. For example, I plant tomatoes at the same depth they grew in their pots, while herbs get buried slightly deeper. This precision eliminates the guesswork that often leads to uneven growth patterns in transplanted seedlings.
Pro Tips for Seed Dibber Tool
- Precision planting starts with the right technique—here's how to maximize your seed dibber's potential for flawless garden organization.
- Soil Preparation Secret: After loosening the soil to 6 inches, press down firmly with your dibber at the start of each row.
- Spacing Rhythm Technique: The 3-4 inch spacing for beans and peas becomes second nature once you establish your footing.
Frequently asked questions
Got questions about using a seed dibber tool? You’re in the right place! Whether you’re a gardening pro or just starting out, these answers will help you plant with confidence. Let’s dig in!
What’s the best time of year to use a seed dibber?
A seed dibber works year-round, but timing depends on your plants. For cool-season veggies (like lettuce or spinach), plant in early spring or fall when soil temps are 50–70°F. Warm-season crops (tomatoes, peppers) thrive when soil is at least 60°F. Always check seed packets for specific guidelines!
Can I make a seed dibber at home without buying one?
DIY options include:
- A wooden dowel (½-inch diameter) sharpened at one end
- A plastic straw or skewer with a notch cut near the tip
- A pencil with the tip removed and replaced with a nail
Why are my seeds unevenly spaced after using a dibber?
Uneven spacing often happens if:
- The dibber isn’t inserted straight into the soil (try a slight angle for better grip)
- Soil is too loose or compacted (lightly firm before planting)
- You’re pressing too hard (gentle pressure = cleaner holes)
How deep should I plant seeds with a dibber?
Depth varies by seed size:
- Small seeds (carrots, lettuce): ¼-inch deep
- Medium seeds (beans, peas): ½-inch deep
- Large seeds (corn, beans): 1–2 inches deep
What’s the difference between a dibber and a hand trowel?
A dibber is designed for precision—it creates small, consistent holes for seeds, while a hand trowel is broader and better for digging, weeding, or mixing soil. Use a dibber for direct sowing and a trowel for transplanting or amending soil.
Wrapping up and next steps
Mastering the art of precision planting with a seed dibber tool is your ticket to a thriving, uniform lawn or garden—no guesswork required! 🌱 Whether you're a seasoned gardener or just starting out, the right spacing and depth make all the difference in healthy growth and minimal maintenance.
Armed with your newfound knowledge, it’s time to grab that dibber and transform your outdoor space into a lush, organized masterpiece.
Ready to dive in? Start small—pick a sunny patch of your yard or a container garden—and practice your dibbing technique today! Happy planting! 🌿