Vegetables
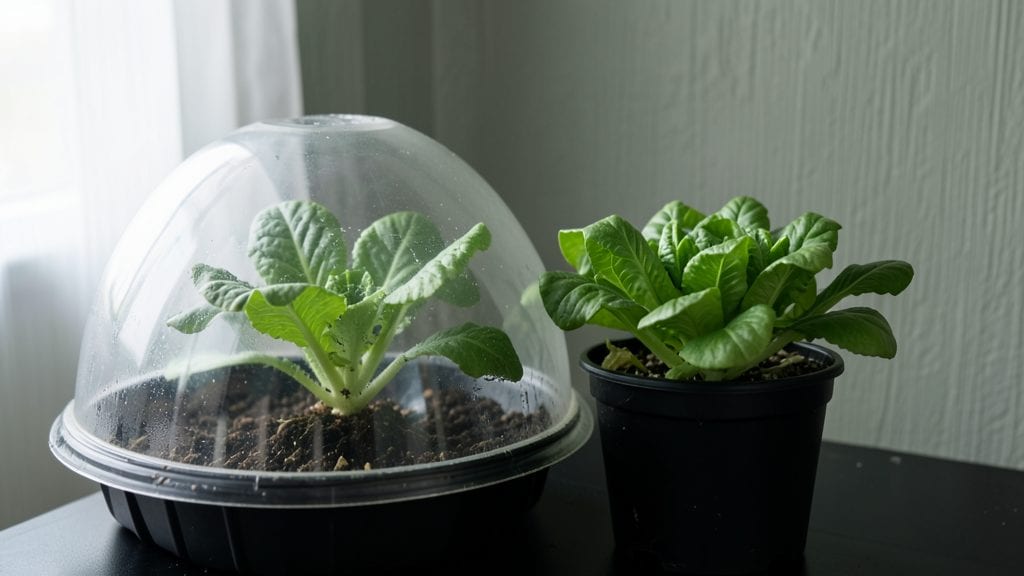
Seeding vegetables indoors lets you get a head start on the growing season and snag rare heirloom varieties before they sell out—here’s how I’ve mastered the art with tomatoes, peppers, and more. ✨ happy until they’re ready for the garden.
You’ll need just a few basics: seed-starting trays or small pots, sterile seed-starting mix, a heat mat or warm spot, and a grow light or sunny windowsill.
The real magic happens when you match each vegetable to its ideal germination temperature—some like it warm, others prefer cool, and getting this right means faster, stronger seedlings.
By the time you transplant, you’ll have stocky, dark-green seedlings with true leaves ready to outpace anything from a big-box store. The best part? You’ll harvest weeks earlier than neighbors who wait for store-bought plants, and you get to pick exactly the varieties you love.
Works for tomatoes, peppers, lettuce, and even broccoli—just adjust timing based on your last frost date. Let’s get those seeds going!
📚 In This Guide
- What you need
- Instructions
- Tips and common mistakes
- Wrapping up and next steps
What you need
- ● Seed starting trays or pots: 1-2 trays (1020-cell or 72-cell) or 4-6" pots (biodegradable preferred).
- ● Seed starting mix: 1-2 bags (sterile, peat-based or coco coir blend). No garden soil!
- ● Seeds: Choose fast-growing varieties (e.g., lettuce, basil, tomatoes). Check seed packets for indoor-starting dates.
- ● Grow lights or sunny window: LED grow lights (12-16 hrs/day) or a south-facing window (6+ hrs sunlight).
- ● Spray bottle: 1 (for gentle watering).
- ○ Heat mat (optional but helpful): 1 (for cold climates or slow-germinating seeds).
- ● Humidity dome: 1 (keeps moisture in for germination).
- ● pH testing kit: 1 (ensure mix is 5.8-6.2).
- ● Fertilizer (diluted): 1 (balanced 10-10-10 or fish emulsion).
- ● Thermometer/hygrometer: 1 (tracks temp/humidity).
- ● Label markers: 1 (track seed varieties!).
Step-by-Step instructions for seeding vegetables indoors
Here’s how to get your vegetable seedlings off to a strong start—no guesswork, just reliable results.
🌱 Step 1: Prepare Containers and Seed Starting Mix
Fill your 4-inch deep seed trays with the 2 gallons of seed starting mix—this is lighter than garden soil and drains perfectly. I like to press the mix down gently with my fingers until it’s firm but not compacted. This ensures roots can spread easily without air pockets. Moisten the mix with warm water until it feels like a damp sponge, but not dripping wet. Overwatering now will only lead to mold later.
I always tap the tray lightly on the table to settle everything evenly. This prevents uneven germination where some seeds might dry out before others sprout. If you’re using biodegradable pots, fill them just to ½ inch below the rim—this gives room for soil to settle after watering.
🌱 Step 2: Sow Seeds at the Right Depth and Spacing
Check the seed packet for depth—most vegetables need ¼ to ½ inch of coverage, depending on the type. I use the tip of a pencil to make small holes in the soil, then drop 1-2 seeds per cell (since germination isn’t always perfect). Cover them lightly with more mix, then mist the surface with water until it’s evenly damp. Too much force will bury seeds too deep, delaying sprouts.
Label each tray immediately with the variety and date—after a week, identical-looking seedlings will all blur together. I use toothpicks and masking tape for labels because they’re sturdy and easy to read. Place the trays in a warm spot (70-75°F) to encourage quick germination. A seedling heat mat helps if your home runs cooler.
💧 Step 3: Provide Warmth and Moisture for Germination
Cover the trays with a clear plastic dome or wrap them in plastic wrap to trap warmth and humidity. Most vegetable seeds sprout in 5-14 days, depending on the type. Check daily for condensation—if the dome fogs up, lift it for 10 minutes to air out. Too much moisture here invites damping-off, a fungal disease that collapses seedlings overnight.
Once 50% of seeds have sprouted, remove the dome completely. This hardens off the new shoots and prevents mold. Keep the soil consistently moist but never soggy—water from the bottom by placing trays in a shallow tray of water for 10-15 minutes to avoid disturbing the seedlings.
☀️ Step 4: Move to Bright Light Immediately After Sprouting
The moment seedlings break through the soil, move them under grow lights or to a south-facing window. Without enough light, they’ll stretch leggy and weak. I use a full-spectrum LED grow light kept 2-3 inches above the plants for 14-16 hours daily. Raise the light as they grow to maintain that distance.
Leggy seedlings have thin stems and leaves spaced far apart. If you see this, your light is too far away or not strong enough. Strong seedlings have thick stems, deep green leaves, and compact spacing between nodes. Rotate trays ¼ turn daily so they grow straight, not lopsided toward the light.
✂️ Step 5: Thin and Harden Off Before Transplanting
When seedlings have 2-3 true leaves, thin to the strongest one per cell by snipping the weaker stems at the base with scissors. This avoids disturbing roots. After 2-3 weeks of strong growth, start hardening off by placing them outside in partial shade for 1 hour the first day, gradually increasing time and sun exposure over 7-10 days. This prepares them for the garden without shock.
Transplant on a cool, overcast afternoon to reduce stress. Water deeply at the base to settle the soil. You’ll know they’re thriving when new leaves appear within a week—that’s your signal everything’s working.
Tips & tricks for perfect indoor vegetable seedlings
Here's what I've learned after years of growing seedlings that actually thrive—not just survive.
Soil Settling Secret: In Step 1, when you tap the trays to settle the 2 gallons of seed starting mix, do it gently but firmly. Too light and you'll have air pockets that prevent roots from spreading. Too hard and you'll compact the soil, making it difficult for roots to penetrate later. Think "firm but fluffy"—like pressing down a pillow just enough to shape it. This ensures your seedlings have room to grow without fighting for space.
Germination Warmth Strategy: The 70-75°F warm spot in Step 2 is critical, but here's the trick: if your home runs cooler, place the trays on top of your refrigerator (not inside) for that extra warmth. I've also used a heating pad set to low under the trays—just monitor closely to avoid overheating. Most seed packets list ideal temperatures, so check yours for specifics. If you don't have a warm spot, a sunny windowsill with a clear plastic bag (not dome) can work in a pinch.
Lighting Technique: For Step 4, when using grow lights for 14-16 hours daily, position them just 2-3 inches above the seedlings—but here's the game-changer: use a timer. Most grow lights come with built-in timers, or you can use a simple outlet timer. This consistency is what prevents leggy seedlings. I also adjust the height every few days as they grow, keeping that 2-3 inch distance. If you notice seedlings stretching toward the light, they're telling you they need more intensity or you need to lower the light.
Hardening Off Hack: When you start the 1-hour partial shade session in Step 5, begin with just 30 minutes the first day. This gradual approach prevents shock. I also like to place the seedlings in the shade of a bush or tree rather than direct sun—this mimics natural conditions better. Over the 7-10 days, increase by 30 minutes each day until they can handle full sun. This slow transition is what makes the difference between resilient plants and ones that wilt at the first sign of stress.
Pro Tips for Seeding Vegetables Indoors
- Here's what I've learned after years of growing seedlings that actually thrive—not just survive.
- Soil Settling Secret: In Step 1, when you tap the trays to settle the 2 gallons of seed starting mix, do it gently but firmly.
- Germination Warmth Strategy: The 70-75°F warm spot in Step 2 is critical, but here's the trick: if your home runs cooler, place the trays on top of your refrigerator (not inside) for that extra warmth.
Frequently asked questions
Got questions about seeding vegetables indoors?
You’re not alone! Here are answers to the most common ones—so you can start growing with confidence.
When is the best time to start seeding indoors?
Timing depends on your plants! For cool-season crops like lettuce or spinach, start 6–8 weeks before the last frost. Warm-season veggies (tomatoes, peppers) need 8–12 weeks indoors. Check seed packets for specifics—your local frost date is your guide!
What if my seedlings look leggy or weak?
Leggy seedlings mean they’re stretching for light. Move them closer to a bright window (south-facing is best) or use a grow light 12–16 hours daily. Thin crowded seedlings to avoid competition, and ensure pots have drainage—root stress slows growth.
Can I reuse containers or soil from last year?
Reusing containers is fine if sterilized (boil or bake at 200°F for 30 mins), but never reuse soil. Old soil harbors pests/diseases. Opt for fresh, sterile potting mix to prevent damping-off (a fungal killjoy). Seed-starting blends are lightweight and ideal!
Do I need a heat mat for all seeds?
Heat mats (70–75°F) speed up germination for slow starters like peppers or tomatoes, but aren’t critical for fast germinators (radishes, beans). Place trays on a warm spot (like the fridge’s top) if you lack a mat. Just keep humidity high with a plastic dome or spray bottle!
What’s the easiest first vegetable to seed indoors?
Start with basil, lettuce, or radishes—they germinate fast (3–7 days) and forgive beginner mistakes. Avoid fussy plants like parsley or carrots until you’re comfortable. Herbs like basil also double as kitchen staples, so you’ll stay motivated!
Wrapping up and next steps
Starting your vegetable garden indoors with seeds is a rewarding way to skip the wait and enjoy a head start on the growing season!
With the right setup—whether it’s a sunny windowsill, grow lights, or a cozy seedling tray—you’ll give your plants the perfect foundation for a bountiful harvest. 🌱
Now that you’re armed with tips and answers, take the plunge! Grab your supplies, follow your favorite varieties, and watch your tiny seeds transform into thriving seedlings.
Ready for the next step? Check out our transplanting guide to learn how to safely move your seedlings outdoors once the weather warms up!