Container Gardens
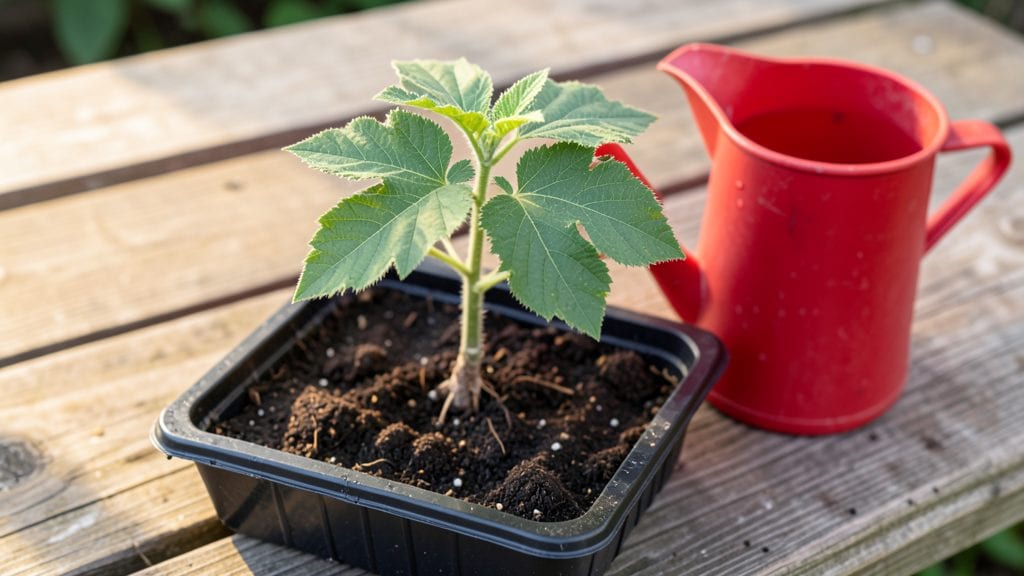
Those plump seedling okra sprouts pop up in just 7 days—no waiting months like other vegetables. 🌱 I’ve grown okra from seed for years, and the secret to speedy starts lies in warmth, moisture, and patience.
The first true leaves emerge faster than you’d expect, but only if you avoid the common mistakes that stall growth.
You’ll need a warm spot (70-85°F), moist seed-starting mix, and a shallow tray or small pots. Okra seeds are large and easy to handle, but they demand consistent moisture—too dry, and they won’t sprout; too wet, and they rot.
The key is keeping the soil damp, not soggy, while maintaining warmth.
By day 7, you’ll see bold, dark-green seedlings with thick stems, ready for transplanting. They grow fast once started, but watch for damping off—a fungal issue that turns stems mushy. A sprinkle of cinnamon or sand helps prevent it, and good airflow keeps them strong.
Works in containers, raised beds, or even direct-sown in warm climates. Once they’re a few inches tall, they’ll shoot up 2 feet in weeks—just don’t rush transplanting. Here’s how to get them growing without a hitch.
📚 In This Guide
- What you need
- Instructions
- Tips and common mistakes
- Wrapping up and next steps
What you need
- ● Okra seeds: 1–2 tablespoons (about 15–30 seeds). Choose organic, non-GMO seeds for best results.
- ● Growing container: A shallow tray (8x12 inches or larger), colander, or mesh sprouting lid with drainage holes.
- ● Water: Filtered or distilled water (avoid chlorinated water).
- ○ Cheesecloth, paper towels, or sprouting lid: For covering the container (optional but helpful for drainage).
- ○ Spray bottle: For gentle misting (optional but ideal for humidity control).
- ● Fine-mesh strainer: For rinsing sprouts (if not using a colander).
- ● Small fan or ventilation source: To prevent mold (especially in humid climates).
- ● Food dehydrator or paper towels: For drying sprouts before storage.
- ● Glass jar (quart-sized) with sprouting lid: Alternative container for vertical sprouting.
- ○ pH strips (optional): To test water acidity (ideal pH: 6.5–7.0).
Step-by-step instructions for growing okra seedlings in 7 days
Here's how to get fast, vigorous okra sprouts ready for transplanting in just a week.
🌱 Step 1: Prepare Containers and Planting Medium
Fill your 4-inch diameter containers with sterile seed-starting mix—never garden soil, as it can harbor fungal diseases that okra seedlings hate. I like to use a mix that's about 70% peat moss and 30% perlite for perfect drainage. Moisten the mix until it holds together when squeezed but doesn't drip water—think of a damp sponge, not a dripping one.
Leave about ½ inch of space between the soil surface and the container rim. This prevents soil from spilling when you water and gives young roots room to stretch without hitting the sides. Tap the container gently on the table to settle the soil evenly—this removes air pockets that could block root growth.
🌱 Step 2: Plant Seeds at the Right Depth and Temperature
Okra seeds are large and need to be planted 1 inch deep—burying them too shallowly delays germination, while planting too deep makes them struggle to reach the surface. I use my finger to make a small hole, drop in 1-2 seeds per container, and cover them with soil. Press lightly but don't compact the soil around them.
Here's the thing—okra loves warmth. Place your containers in a spot where the soil stays between 80-90°F. A seedling heat mat set to 85°F works wonders if your home runs cooler. You'll see sprouts in just 3-5 days—sometimes even faster if conditions are perfect. Keep the soil consistently moist but never soggy during this time.
☀️ Step 3: Provide Bright, Indirect Light Immediately
Once those first green shoots appear, move the containers to a spot with bright, indirect light. A south-facing window works well, but avoid direct midday sun, which can scorch tender seedlings. If your light is weak, supplement with a grow light placed 6 inches above the seedlings for 12-14 hours daily.
You'll notice the seedlings reaching for the light within a few days—that's normal. If they start to lean dramatically, it's time to adjust their position. Strong okra seedlings will have thick stems and deep green leaves. If they look pale or leggy, they need more light or a shorter distance to the grow light.
💧 Step 4: Water and Fertilize for Fast Growth
Water the seedlings when the top inch of soil feels dry. Okra is drought-tolerant once established, but seedlings need consistent moisture. I use a spray bottle to avoid disturbing the soil, and I water gently around the edges of the container. Overwatering is the biggest mistake—it causes damping-off, a fungal disease that rots stems at the soil line.
After the first true leaves appear (those are the second set of leaves, after the initial seed leaves), feed them with a diluted liquid fertilizer mixed at half-strength. This gives them a gentle nutrient boost without burning tender roots. You'll see faster, stronger growth within a week of fertilizing—watch those stems thicken and leaves darken.
⏰ Step 5: Harden Off and Transplant in 7 Days
By day 7, your okra seedlings should be 4-6 inches tall with 4-6 true leaves. It's time to harden them off! Start by placing them outside in a sheltered spot for 1-2 hours the first day, gradually increasing their time outdoors over 3-4 days. This prepares them for the heat and wind they'll face in the garden.
Transplant on a cloudy day or in the late afternoon to reduce stress. Dig a hole slightly larger than the container, place the seedling in, and firm the soil around it. Water deeply at the base to help roots establish. With this fast method, you'll have strong, ready-to-grow okra seedlings in just a week—perfect for a quick harvest!
Tips & tricks for fast-germinating okra seedlings
These little tricks will help you grow strong, healthy okra sprouts in just 7 days—no waiting months for germination!
Soil Temperature is Everything: Okra seeds need warmth to sprout quickly, and that 80-90°F range is non-negotiable. If your home runs cooler, invest in a seedling heat mat set to 85°F—it's a game-changer. I've seen seeds sprout in just 3 days with perfect warmth, while cold soil can delay germination by a week. Place your containers on top of the heat mat (not under) to maintain even warmth without overheating.
Light Placement Matters More Than You Think: Once those first green shoots appear, move them to bright, indirect light immediately. I place mine under my south-facing window during the day and supplement with a grow light for 12-14 hours daily if natural light is weak. The key is positioning the grow light just 6 inches above the seedlings—any closer and you'll burn those tender leaves. Watch for seedlings leaning toward the light; if they start stretching dramatically, it's time to rotate them or adjust the light position.
Watering Wisdom for Healthy Roots: The top inch of soil should feel dry before watering, but never let it get bone-dry. I use a spray bottle to mist gently around the edges of the containers—this keeps the soil surface moist without disturbing the delicate seedlings. Overwatering is the silent killer here; it causes damping-off, a fungal disease that rots stems at the soil line. If you notice blackened stems at the base, you've watered too much. Let the soil dry slightly between waterings once the seedlings are established.
Fertilizer Timing is Critical: Wait until after the first true leaves appear (those are the second set of leaves) before fertilizing. I use a diluted liquid fertilizer mixed at half-strength to avoid burning tender roots. This gentle boost gives your seedlings the nutrients they need for rapid growth. You'll notice the difference within days—thicker stems and darker green leaves. Don't fertilize before this stage; young seedlings can't handle the concentration.
Pro Tips for Seedling Okra Sprouts
- These little tricks will help you grow strong, healthy okra sprouts in just 7 days—no waiting months for germination!
- Soil Temperature is Everything: Okra seeds need warmth to sprout quickly, and that 80-90°F range is non-negotiable.
- Light Placement Matters More Than You Think: Once those first green shoots appear, move them to bright, indirect light immediately.
Frequently asked questions
How long does it take for okra sprouts to grow into edible seedlings?
Okra sprouts are typically ready to harvest in 7–10 days from planting, but they’re edible as microgreens as early as 5–7 days. For full-sized okra pods, wait 60–70 days—but sprouts are perfect for quick, nutrient-packed greens!
Can I grow okra sprouts indoors without sunlight?
Yes! Use a grow light (12–16 hours/day) or place them near a sunny window. Okra sprouts need warmth (70–80°F) and moisture—a humidity dome helps. Avoid cold drafts, or germination slows dramatically.
What if my okra sprouts turn yellow or moldy?
Yellowing? Likely overwatering or poor drainage—let soil dry slightly between waterings. Mold or slimy sprouts? Reduce moisture and improve airflow (space seedlings 1–2 inches apart). Discard affected sprouts and sanitize trays.
Are there fast-growing alternatives to okra sprouts?
Try these quick-sprouting greens:
- Radish sprouts (3–5 days)
- Broccoli microgreens (7–10 days)
- Sunflower sprouts (5–7 days)
- Pea shoots (10–14 days)
Do okra sprouts need soil, or can I grow them hydroponically?
Both work! For soilless growth, use a hydroponic mat or jar method with water and a mesh screen. Rinse sprouts 2x daily to prevent bacteria. Soil-grown sprouts (like in a tray) need well-draining mix—avoid compost-heavy blends to reduce mold risk.
Wrapping up and next steps
Growing okra sprouts from seed is a rewarding and efficient way to enjoy fresh, nutrient-packed greens in just 7 days! With minimal space and effort, you can transform tiny seeds into vibrant seedlings ready for harvesting—perfect for container gardens, urban farms, or even kitchen countertops. 🌱
Now that you’re equipped with the how-to and answers to common questions, it’s time to get sprouting! Start with a handful of seeds, a cozy growing space, and a little patience.
Soon, you’ll be savoring the crisp, tangy flavor of homegrown okra sprouts—one seed at a time. Happy growing! 🌟