Vegetables
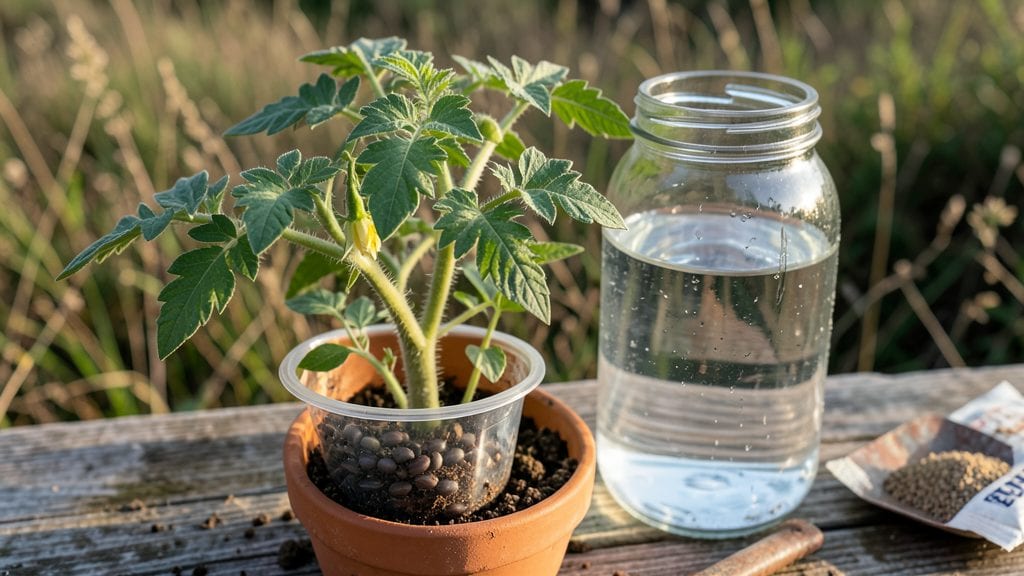
Soaking tomato seeds before planting cuts germination time from weeks to days—honestly, this simple moisture trick transformed my seed-starting failures into reliable, fast-growing seedlings. That first green shoot breaking through soil after just three days still gives me the same thrill as my first harvest.
The secret isn’t complicated: water activates dormant enzymes, softens tough seed coats, and gives tiny roots a head start before they even meet soil.
You’ll need just three things: clean water, a small container, and your seeds. Fill a jar with room-temperature water (never hot or chlorinated tap water—let it sit out overnight if unsure), then add seeds and let them soak for 24-72 hours.
Watch for tiny white roots—when they’re ¼-inch long, they’re ready to plant. This works for heirlooms, hybrids, and even those stubborn cherry tomato varieties that usually take forever to sprout.
The payoff is immediate: seeds germinate 2-3 days faster, and weak seedlings become strong ones before they even hit the soil. You’ll see thicker stems, deeper green leaves, and plants that outpace store-bought seedlings by weeks.
The best part? It costs pennies and takes almost no effort—just patience for those three days while nature does the heavy lifting.
Fair warning: don’t skip the drying step after soaking. Pat seeds gently with a paper towel before planting, or they’ll rot in damp soil. And if you’re in a hurry, 48 hours is the sweet spot—longer doesn’t speed things up, but shorter might not break the seed coat enough.
Now go give those seeds the head start they deserve!
📚 In This Guide
- What you need
- Instructions
- Tips and common mistakes
- Wrapping up and next steps
What you need
- ● Tomato seeds: Fresh, high-quality seeds (check the packet for variety—heirloom or hybrid).
- ● Water: Room-temperature, filtered, or distilled water (avoid tap water with chlorine if possible).
- ● Containers: Small glass jars (like baby food jars) or sealable plastic bags.
- ○ Optional: Seedling trays or paper towels for alternative soaking methods.
- ● Paper towels or coffee filters: 1-2 sheets per container (for moisture absorption).
- ● Plastic wrap or lid: To create a humid environment (if using jars).
- ● Labeling supplies: Masking tape and a marker (to track seed varieties and soak dates).
- ○ Spray bottle (optional): For gentle misting if seeds dry out during the process.
- ● Seed viability: Test a few seeds in water—if they sink, they’re likely viable! 🌟
- ● Clean workspace: Disinfect surfaces and tools to prevent mold or contamination.
- ● Patience: Soaking takes 3 days, but consistency is key for best results!
- ○ Warmth: A sunny windowsill or seedling heat mat (optional but helpful for faster germination).
Instructions for soaking tomato seeds before planting
Here's the precise method I use to jumpstart germination without overcomplicating the process.
Prepare the Seeds for Soaking
Start by selecting healthy, firm tomato seeds—avoid any that appear shriveled or cracked, as they won't germinate well. Place them in a small bowl or container, ensuring they're spread out evenly so they don't clump together during soaking. I like to use a fine-mesh strainer for this step because it prevents seeds from sinking to the bottom and makes rinsing easier later.
The key here is to avoid damaging the seed coats, which can inhibit germination. Handle them gently, and if they're particularly dusty or coated, you can lightly rub them between your fingers to remove any excess residue. This ensures the seed's natural moisture barrier isn't compromised before soaking.
Soak Seeds in Lukewarm Water
Fill a clean container with lukewarm water—around 80°F—just enough to fully submerge the seeds. I use a small glass jar or a shallow dish for this because it allows me to monitor the seeds easily. Let them soak for 24 hours, but don't exceed this time, as prolonged soaking can lead to mold or rot.
After 24 hours, you'll notice the seeds have swollen slightly—this is a good sign they're absorbing moisture. If any seeds float to the surface, they may be nonviable, so you can safely discard them. Drain the water completely and rinse the seeds gently with fresh water to remove any residual soaking liquid.
Repeat Soaking for Two More Days
For the next two days, repeat the soaking process, but this time, soak the seeds for 12 hours each day. After each soaking session, drain and rinse them thoroughly to prevent bacterial growth. The goal is to keep the seeds consistently moist without letting them sit in stagnant water.
By the end of the third day, your seeds should feel plump and firm to the touch. If they still feel dry or haven't swollen noticeably, extend the soaking by an additional 4-6 hours—but don't go beyond 48 hours total, as this can weaken the seeds. Once they're properly hydrated, they're ready for planting.
Plant the Soaked Seeds Immediately
After soaking, plant the seeds within 1-2 hours to maximize their moisture content. Use the seed-starting mix (not garden soil) and follow the packet's depth guidelines—typically ¼ inch deep. The pre-soaked seeds will germinate faster, often within 5-7 days, compared to 10-14 days for dry seeds.
Keep the soil consistently moist but not soggy—you'll know it's right when the surface feels damp but not glistening. Place the container in a warm, bright spot, and avoid covering the seeds with plastic or a dome, as they need airflow to prevent mold. Watch for the first signs of sprouting, which look like tiny green shoots breaking through the soil.
Tips & tricks for soaking tomato seeds before planting
A few key strategies will help you maximize germination rates while avoiding common pitfalls that can turn your seeds into a science experiment gone wrong.
Seed Selection Matters: In Step 1, when selecting seeds, focus on those that sink immediately in water—these are your best candidates. Floaters are often nonviable, but even among the sinkers, choose the largest, plumpest ones. I've found that seeds from fully ripe tomatoes (not green ones) have higher germination rates due to their natural maturity and moisture content.
Temperature Consistency: Maintaining that 80°F lukewarm water temperature in Step 2 is crucial for consistent results. Too cold (65°F) slows germination, while water above 90°F can damage the seeds' delicate enzymes. If your tap water runs hot, let it cool completely before using. For extra precision, I use a kitchen thermometer to verify the temperature before adding seeds.
Soaking Schedule Precision: The 24-hour initial soak and subsequent 12-hour sessions in Step 3 create the perfect balance between hydration and seed integrity. If you're short on time, you can extend the final soaking session by 4-6 hours (but never exceed 48 hours total), as this gives seeds an extra moisture boost without compromising viability. The key is consistent moisture—not saturation.
Plant Immediately After Soaking: The 1-2 hour window in Step 4 is non-negotiable for maintaining moisture levels. Seeds begin drying out almost immediately after removal from water. I keep my seed-starting mix and planting tools ready before draining the final rinse water, so I can transfer seeds straight from the strainer to the soil without delay. This quick transition preserves the hydration you've worked so hard to achieve.
Pro Tips for Soaking Tomato Seeds Before Planting
- A few key strategies will help you maximize germination rates while avoiding common pitfalls that can turn your seeds into a science experiment gone wrong.
- Seed Selection Matters: In Step 1, when selecting seeds, focus on those that sink immediately in water—these are your best candidates.
- Temperature Consistency: Maintaining that 80°F lukewarm water temperature in Step 2 is crucial for consistent results.
Frequently asked questions
Got questions about soaking tomato seeds? You’re not alone! Here are answers to the most common concerns—plus a few pro tips to ensure your seeds sprout like champions.
How long should I soak tomato seeds before planting?
Soak your seeds for 8–24 hours in warm water (ideally 70–80°F). Most gardeners find 12–16 hours sweet spot—long enough to kickstart germination without over-softening the seed coat. Pro tip: Use a breathable cloth or paper towel to prevent mold.
Can I reuse the water after soaking seeds?
Nope! Discard the soaking water—it can harbor bacteria that may harm your seeds or seedlings. After soaking, rinse seeds gently with clean water and plant them in moist, sterile soil. Think of it like a fresh start for your tiny tomatoes!
What if my seeds don’t germinate after soaking?
Don’t panic! Seeds need warmth (70–85°F), moisture, and darkness to germinate. Try these fixes:
- Check seed viability (float test: sink = good, float = bad).
- Use a seedling heat mat if your home is chilly.
- Plant deeper (¼ inch) for larger seeds or shallower (⅛ inch) for tiny ones.
Do I need to soak tomato seeds if I’m direct-sowing outdoors?
Soaking helps speed up germination, but it’s not mandatory for outdoor planting. If your soil is warm and moist, seeds may sprout on their own in 7–14 days. However, soaking gives you a 3–5 day head start—perfect for cooler climates or impatient gardeners!
What happens if I soak seeds too long?
Over-soaking (beyond 24 hours) can cause seeds to rot or develop fungal issues. Signs of trouble: slimy texture, foul odor, or mold. If this happens, rinse seeds immediately and plant them in dry soil to prevent further damage. When in doubt, less is more—better safe than sorry!
**Bonus Tip: Speed Up Germination Like a Pro!
For extra oomph, try scarification (lightly sanding the seed coat) or a warm water soak with a dash of hydrogen peroxide (3%) to boost oxygen flow. Just rinse thoroughly before planting!
Wrapping up and next steps
Soaking tomato seeds before planting is a simple yet powerful trick to give your garden a head start! By boosting hydration and speeding up germination, you’ll enjoy healthier seedlings and a more productive harvest.
Whether you’re a seasoned gardener or just starting out, this 3-day moisture boost is an easy way to maximize your success.
Now that you’re ready to dive in, grab your seeds and get soaking—your future tomato plants will thank you! 🌱 For even more tips, explore best practices for transplanting seedlings next.