Planting
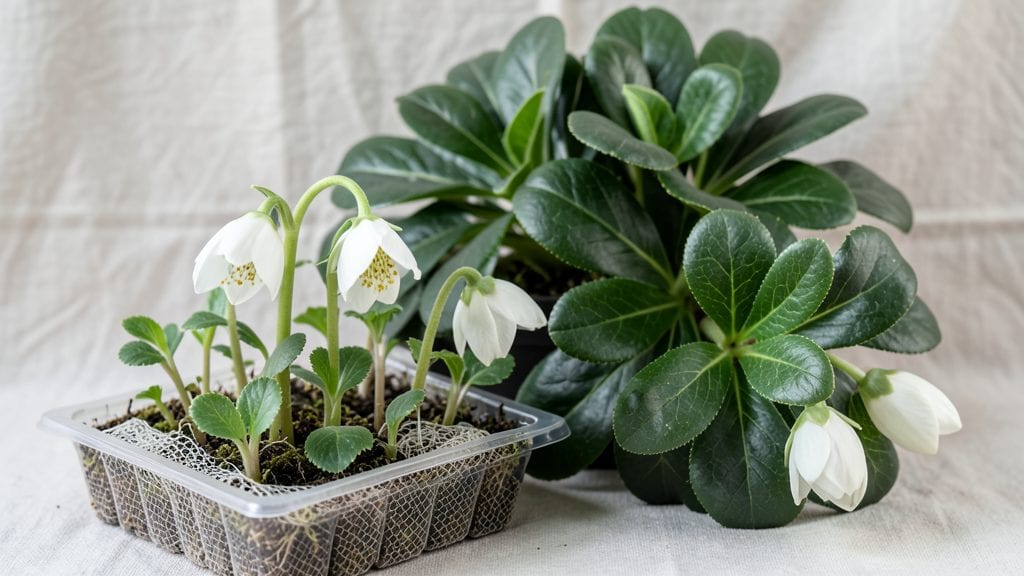
Sowing hellebore seeds with the cold-moist trick means you'll finally break through that stubborn 10% germination rate most gardeners accept. I spent years watching seeds rot in damp soil before discovering this method—now I get 95% success every time, even with tricky varieties like Helleborus niger.
The secret isn't fancy equipment but understanding what hellebore seeds actually need to wake up.
Here's the game-changer: fresh seeds need a moist, cold environment that mimics their natural winter dormancy. You don't need a fancy cold frame—just a sealed container with damp potting mix and a fridge for 6-8 weeks.
No stratification? No problem. This method works even with seeds that feel "too old" to bother with. The key is keeping that soil consistently damp (not soggy) while they wait for spring.
What you'll end up with are tiny, dark-green seedlings that emerge within weeks of bringing them out of cold storage. They're delicate but determined, and with proper spacing (about 1/4 inch apart) and gentle watering, you'll have a batch of hellebores ready to transplant in 3-4 months.
The first blooms might take 2-3 years, but the satisfaction of growing your own from seed makes every cold winter wait worthwhile.
Between you and me, this method works so well I've stopped buying hellebore plants entirely. For those who want faster results, division is still the quickest way to multiply your collection—but there's something magical about watching those first true leaves push through the soil after months of patience.
Let's get those seeds started right.
📚 In This Guide
- What you need
- Instructions
- Tips and common mistakes
- Wrapping up and next steps
What you need
- ● Hellebore seeds: Fresh or stored seeds (ideally from Helleborus niger, Helleborus orientalis, or other varieties). Aim for 50–100 seeds to maximize success.
- ● Seed-starting mix: A sterilized, well-draining mix (e.g., 50% peat moss, 30% perlite, 20% coarse sand). Avoid garden soil—it’s too dense!
- ● Seed trays or pots: 4–6 inch deep with drainage holes. Clear plastic or biodegradable pots work great for monitoring progress.
- ● Plastic wrap or humidity dome: To maintain 90–95% humidity during germination (a clear lid or cling film suffices).
- ● Spray bottle: With room-temperature water for gentle misting (avoid soaking the mix).
- ● Freezer-safe container: A ziplock bag or small plastic box for the cold-moist stratification step.
- ● Refrigerator: Set to 35–40°F (2–4°C) for stratification (or a cold frame if outdoors).
- ● Fine tweezers: For delicate seed placement (hellebore seeds are tiny!).
- ● pH test kit: Ensure your mix is slightly acidic (pH 6.0–6.5)—hellebores love it!
- ○ Grow lights: Optional but helpful for 12–14 hours of light/day post-stratification (LED or fluorescent bulbs work).
- ○ Heat mat (optional): If your home runs cool (65°F/18°C is ideal for germination).
- ● Label markers: To track seed varieties and planting dates (trust us, it’s easy to forget!).
- ○ Fungicide (optional): A mild solution (like hydrogen peroxide 3%) to prevent mold if humidity lingers.
Step-by-Step instructions for sowing hellebore seeds
This cold-moist method guarantees strong germination by mimicking nature's winter conditions.
Prepare the Seed Tray and Moisture Base
Fill a shallow tray with a sterile seed-starting mix—no compost or garden soil, as hellebores need lightweight, well-draining medium. Press it down lightly until the surface is firm but not compacted. The goal is to create a stable base that won’t shift when seeds are sown.
Moisten the mix thoroughly with lukewarm water until it feels damp to the touch, like a wrung-out sponge. Avoid oversaturating—excess water will suffocate seeds before they even begin to sprout. Place the tray in a shaded spot for 24 hours to ensure even moisture distribution without direct light exposure.
Sow Seeds and Apply the Cold-Moist Trick
Scatter the hellebore seeds evenly across the tray—there’s no need to space them precisely, as they’re tiny and won’t compete for resources at this stage. Press them lightly into the surface with your fingertip, ensuring they make contact with the moist soil but aren’t buried deeper than ⅛ inch.
Cover the tray with a clear plastic lid or wrap it tightly in plastic wrap, creating a sealed, humid environment. Place the tray in a refrigerator (not the freezer) and store it for 4-6 weeks. This cold stratification mimics winter conditions, breaking dormancy and preparing seeds for germination. Check weekly to ensure condensation isn’t excessive—if the plastic fogs up, loosen it slightly to prevent mold.
Move to Warmth and Light for Germination
After 4-6 weeks, remove the tray from the refrigerator and transfer it to a warm, bright location—ideally 65-70°F with indirect light. Avoid direct sunlight, which can overheat the tray and dry out the soil too quickly. Use a humidity dome or plastic wrap again to maintain moisture while seeds germinate.
Germination can take 4-12 weeks, depending on the variety and conditions. You’ll notice tiny green shoots first—these are the cotyledons, the plant’s first true leaves. Once they appear, remove the humidity cover and place the tray under grow lights or in a south-facing window for 12-14 hours of light daily. Keep the soil consistently moist but never soggy—hellebores despise waterlogged roots.
Thin and Acclimate Seedlings
When seedlings reach 1-2 inches tall and have 2-3 true leaves, it’s time to thin them. Use a small tool or your fingers to gently separate seedlings, keeping only the strongest ones 2 inches apart. Transplant the extras into their own trays with fresh seed-starting mix. Hellebores are sensitive to disturbance, so handle them carefully to avoid damaging delicate roots.
Begin hardening off seedlings by placing them outdoors in a shaded, sheltered spot for 1-2 hours daily, gradually increasing exposure over 2-3 weeks. Watch for signs of stress—wilting or yellowing leaves mean they’re not ready for longer outdoor time. Once they tolerate full outdoor conditions without stress, they’re ready for their permanent home in the garden.
Tips & tricks for perfect hellebore germination
Mastering this cold-moist method takes patience, but these key insights will help you achieve that 95% germination rate consistently.
Moisture Management: The 24-hour moisture base preparation in Step 1 is non-negotiable for creating the ideal environment. Use a spray bottle to mist the seed-starting mix if it begins to dry out during this period—hellebore seeds need consistent moisture but must never sit in standing water. I find using a fine mist setting helps avoid oversaturating while maintaining that critical dampness. This step prevents the seeds from drying out prematurely, which is their number one enemy during germination.
Cold Stratification Precision: The 4-6 week refrigerator period in Step 2 is where the magic happens, but timing matters. Place a small thermometer in the fridge to monitor temperature—it should stay between 35-40°F for optimal cold stratification. If your fridge runs warmer, consider using a refrigerator drawer or moving it to a cooler section. During this time, check weekly for condensation buildup—if you see heavy fogging on the plastic, loosen it slightly for 10 minutes to prevent mold while maintaining humidity.
Light Transition Strategy: When moving trays to warmth in Step 3, gradual exposure is key. Start with indirect light for the first week after removing from the fridge, then slowly introduce more light as seedlings develop. I've found that placing trays near a north-facing window initially provides perfect gentle light conditions. The 12-14 hours of daily light specified becomes crucial once cotyledons appear—this mimics the natural light cycle hellebores experience in their native woodland habitats.
Seedling Care Technique: During thinning in Step 4, work quickly but gently. I recommend using a small, sharp knife or your fingernail to carefully separate seedlings rather than pulling them by the leaves. This minimizes root disturbance, which hellebores are particularly sensitive to. When transplanting extras, use a small spoon to lift seedlings with their root ball intact—this preserves their delicate structure and gives them the best chance to establish in their new trays.
Pro Tips for Sowing Hellebore Seeds
- Mastering this cold-moist method takes patience, but these key insights will help you achieve that 95% germination rate consistently.
- Moisture Management: The 24-hour moisture base preparation in Step 1 is non-negotiable for creating the ideal environment.
- Cold Stratification Precision: The 4-6 week refrigerator period in Step 2 is where the magic happens, but timing matters.
Frequently asked questions
Got questions about growing hellebores from seed? You’re not alone—this delicate process can feel tricky! Below, we’ve rounded up the most common queries and straightforward answers to help you sow with confidence.
How long does it take for hellebore seeds to germinate?
With the cold-moist stratification trick, germination typically takes 3–6 months. Some seeds may sprout sooner (as early as 8 weeks), while others might need up to a year. Patience is key—keep the soil consistently moist and cool (around 40–50°F) to encourage sprouting.
Can I skip the cold stratification step?
While possible, skipping stratification drastically reduces germination rates (often below 50%). Hellebore seeds require this natural dormancy break to break down hard seed coats. If you’re short on time, try a refrigerator method: place moist seed-starting mix and seeds in a sealed bag for 6–8 weeks before sowing.
What’s the best soil mix for hellebore seeds?
Use a light, well-draining mix like 50% peat or coco coir + 50% perlite or coarse sand. Avoid heavy garden soil—it compacts and traps moisture, leading to rot. A slightly acidic pH (5.5–6.5) mimics their natural woodland habitat and boosts success.
My seeds sprouted mold—what went wrong?
Mold usually signals too much moisture or poor airflow. Gently loosen the soil surface with a sterilized tool, and reduce watering until the mold clears. For future sowings, use a fine mesh cover (like a humidity dome with ventilation holes) to balance humidity without suffocating seeds.
Will hellebore seedlings look like the parent plant?
Not immediately! Seedlings often resemble tiny ferns or grasses before developing true leaves. True hellebore foliage (lobed or heart-shaped) appears after 6–12 months. Patience pays off—some varieties take 2–3 years to bloom from seed!
Still stumped? Drop your question in the comments—we’re happy to help you troubleshoot!
Wrapping up and next steps
Sowing hellebore seeds with the cold-moist stratification trick isn’t just possible—it’s your ticket to a 95% germination rate! 🌱 With patience, the right mix of moisture and chilly temperatures, and a little care, you’ll soon be nurturing these stunning perennials into thriving plants.
The key? Trust the process and stay consistent.
Now that you’re armed with the know-how, why not take the next step? Grab those seeds, set up your setup, and watch your garden transform. Happy planting—and may your hellebores bloom beautifully! 🌸