Container Gardens
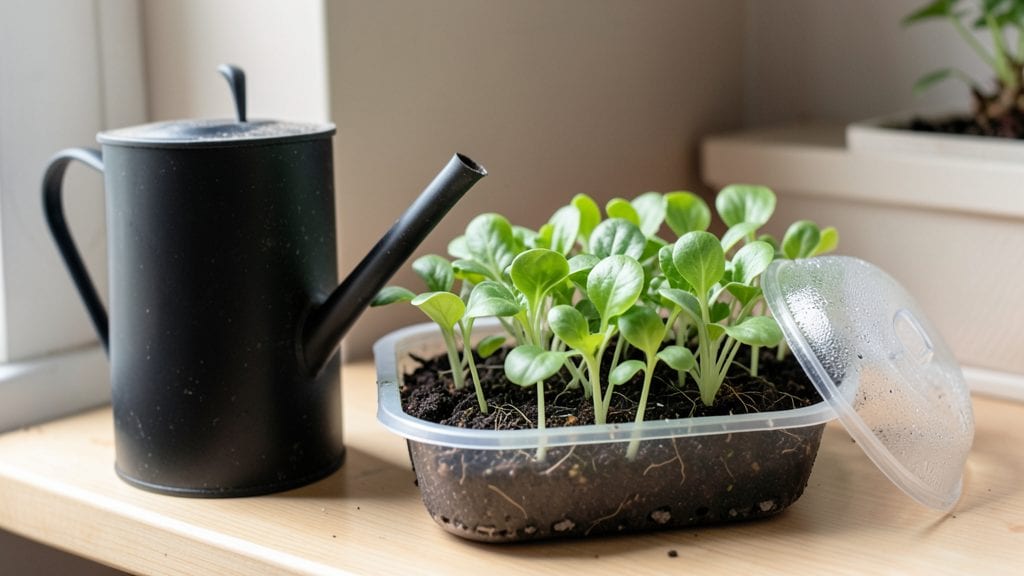
Sprouting seeds indoors is the fastest way to get fresh, nutrient-packed greens on your kitchen counter in just a week—no garden required. 🌱 I’ll never forget the first time I saw those tiny sprouts poking through the mesh, knowing I’d grown something alive from nothing but a handful of seeds and a jar.
It’s shocking how simple this process is when you get the basics right.
The beauty of indoor sprouting lies in its simplicity: you need just a quart-sized mason jar, a mesh lid or cheesecloth, some seeds, and a sunny windowsill. No fancy equipment, no digging—just a few minutes of prep each day.
Most people assume it’s complicated, but once you’ve done it once, you’ll wonder why you ever bought store-bought sprouts again. The savings alone make it worth trying.
By day 7, you’ll have vibrant, crunchy sprouts ready to add to salads, sandwiches, or eat straight from the jar. They’re packed with flavor and nutrients, and you’ll never have to worry about store-bought sprouts going bad before you use them.
The best part? You can keep this cycle going year-round, no matter the weather outside.
Whether you’re growing alfalfa, radish, or lentil sprouts, the same principles apply—just tweak the soaking time and light exposure. Here’s how to get started without the guesswork, so you can enjoy fresh sprouts in no time.
📚 In This Guide
- What you need
- Instructions
- Tips and common mistakes
- Wrapping up and next steps
What you need
- ● Sprouting Seeds: Choose organic, non-GMO seeds (e.g., alfalfa, lentils, radish, broccoli, or sunflower). Buy 1–2 lbs (or 1–2 seed packets) to start.
- ● Wide-Mouth Mason Jars (or Sprouting Containers): 1–2 quart-sized jars with lids (or a sprouting lid with mesh for drainage).
- ● Cheesecloth, Fine Mesh Screen, or Sprouting Lid: 1 piece (cut to fit jar opening) to strain seeds.
- ● Rubber Bands or Twist Ties: 1–2 to secure the mesh/cloth over the jar.
- ● Stainless Steel or Wooden Spoon: 1 for rinsing (avoid plastic—it can harbor bacteria).
- ○ Colander (Optional but Helpful): 1 for draining excess water.
- ● Sprouting Trays or Stackable Containers: For larger batches or vertical growing.
- ● Grow Lights or Sunny Windowsill: 12+ hours of light/day for faster growth.
- ● Humidity Dome or Plastic Wrap: To maintain moisture during germination.
- ● Food Scale: For precise seed measurements (especially for tiny seeds like clover).
- ● Notebook & Pen: To track sprouting progress and harvest dates!
Step-by-step instructions for sprouting seeds indoors
Here’s how to grow crisp, nutrient-packed sprouts in just a week—no garden needed.
🌱 Step 1: Soak Seeds Overnight
Place 1 tablespoon of seeds (like alfalfa, broccoli, or radish) in a clean quart-sized mason jar. Cover with room-temperature water—about 2 inches deep—and let them soak for 8-12 hours. I like to use a rubber band to mark the water level so I don’t overfill later. This softens the seed coat so they sprout faster.
After soaking, drain the water completely through a fine-mesh strainer or by pouring into a colander. Shake off excess water—you want the seeds damp but not soggy. This step is key: over-soaking can lead to mold, while under-soaking slows germination. A quick rinse now ensures you’re starting with fresh, hydrated seeds.
💧 Step 2: Set Up the Sprouting Jar
Return the drained seeds to the jar and secure a sprouting lid (or a piece of mesh held by a rubber band) over the top. Angle the jar at 45 degrees in a jar sprouting station or prop it against a dish rack. This drainage angle prevents water from pooling and keeps seeds aerated—critical for preventing rot.
Every 12 hours, rinse the seeds under lukewarm water for 30-60 seconds, then drain thoroughly. You’ll see tiny tails (radicles) emerge after 24-48 hours. If you forget to rinse, the seeds can ferment or grow mold. I set a phone alarm to remind me—consistency is everything at this stage.
☀️ Step 3: Provide Light and Airflow
Once sprouts reach ½ inch tall (usually 3-4 days in), transfer them to a flat tray or the wide base of the jar to spread out. Place them in indirect light—a sunny windowsill or under a grow light—for 4-6 hours daily. Direct sunlight can scorch delicate sprouts, so avoid placing them in harsh midday rays.
Keep rinsing twice daily until sprouts reach your desired length (usually 7-10 days). You’ll know they’re ready when they’re bright green, crisp, and 1-3 inches tall. Overcrowding slows growth, so give them space. If sprouts start yellowing, they’re getting too much light or need more frequent rinses.
✂️ Step 4: Harvest and Store Fresh Sprouts
Snip the sprouts just above the base with clean scissors or a knife. Rinse them one last time in ice water for 10 minutes to crisp them up—this is my secret for keeping them fresh longer. Drain well on a paper towel and store in an airtight container in the fridge for up to 5-7 days.
For best flavor, eat sprouts within 3-4 days. They’re packed with enzymes and nutrients, but they oxidize quickly. If you’re growing for microgreens (like sunflower or pea shoots), harvest when the first true leaves appear—usually 10-14 days in. Always wash them thoroughly before eating, as seeds can harbor bacteria.
Tips & tricks for perfect indoor sprouting
Here's what I've learned after sprouting dozens of batches—these little tricks make all the difference between wimpy sprouts and restaurant-quality greens.
The Soak Secret: Don't just eyeball that 2-inch water level—use a rubber band around your jar to mark it. Too much water (over-soaking) leads to mold, while too little (under-soaking) means slow germination. I like to soak my seeds for exactly 10 hours—right in the middle of that 8-12 hour window—because I know I'll be rinsing them at 12 hours anyway. This gives them just enough hydration without risking over-soaking.
Rinse Like a Pro: Those 12-hour rinses are non-negotiable, but here's the trick: use lukewarm water that's about 90°F—hot enough to kill bacteria but not so hot it shocks the seeds. I keep a spray bottle of this water handy and give the seeds a quick 30-second shower, then drain them upside down for 2 minutes to get all the excess water out. This prevents that musty smell that means fermentation has started.
Light Matters More Than You Think: When your sprouts reach that ½-inch height (usually around day 3-4), move them to indirect light immediately. I use a simple grow light on a timer for 4-6 hours daily—this prevents the yellowing that happens when they get too much direct sun. Pro tip: If your kitchen gets harsh afternoon light, move them away from the window after 2 PM to avoid scorching.
Harvesting Hack: That final 10-minute ice water bath isn't just about crispness—it's also a great way to remove any lingering bacteria. I like to use a colander with holes just big enough to let water through but small enough to catch any tiny sprouts that might slip through. After draining, I give them one last shake to fluff them up before storing. This keeps them looking fresh for days.
Pro Tips for Sprouting Seeds Indoors
- Here's what I've learned after sprouting dozens of batches—these little tricks make all the difference between wimpy sprouts and restaurant-quality greens.
- The Soak Secret: Don't just eyeball that 2-inch water level—use a rubber band around your jar to mark it.
- Rinse Like a Pro: Those 12-hour rinses are non-negotiable, but here's the trick: use lukewarm water that's about 90°F—hot enough to kill bacteria but not so hot it shocks the seeds.
Frequently asked questions
Got questions about sprouting seeds indoors? You’re not alone! Here are answers to the most common queries to help you grow fresh, nutrient-packed sprouts like a pro.
How long does it take to sprout seeds indoors?
Most seeds sprout in 3–7 days indoors, depending on the type. Fast growers like radish or alfalfa sprout in 3–4 days, while slower ones (e.g., broccoli or sunflower) take 5–7 days. Keep them warm (65–75°F) and moist for best results!
Can I sprout seeds in cold weather?
Indoors, temperature is controlled—just place your sprouting jar near a warm spot (like a sunny windowsill or under a grow light). If your home is chilly, a seedling heat mat (or even a warm oven light) can speed up germination.
What if my seeds aren’t sprouting?
Check these fixes:
- Soaking time: Most seeds need 6–12 hours in water. Rinse and drain thoroughly afterward.
- Moisture: Seeds need consistent dampness, not sogginess. Use a fine-mist spray bottle if needed.
- Airflow: Rinse seeds 2–3 times daily to prevent mold. A breathable lid (or cheesecloth) helps.
- Light: Once sprouts emerge, move them to bright (but indirect) light to prevent legginess.
Do I need special equipment?
Nope! A quart mason jar, mesh lid, and a colander are all you need. Optional upgrades: a sprouting lid (for airflow), a grow light (for longer sprouts), or a hydroponic tray (for bulk sprouting). Start simple!
Are homegrown sprouts safe to eat?
Yes, but sanitation is key! Always:
- Use organic, non-GMO seeds (untreated with pesticides).
- Rinse sprouts thoroughly before eating (even if they look clean).
- Avoid raw sprouts if you’re immunocompromised (risk of bacteria like E. coli).
For extra safety, blanch sprouts (dip in boiling water for 10 sec) before eating raw.
Can I reuse sprouting jars?
Yes! Clean jars with hot, soapy water and sanitize with a vinegar rinse or bleach solution (1 tsp bleach per gallon of water) to kill bacteria. Air-dry completely before reuse. Pro tip: Label jars with the sprout type and date!
Wrapping up and next steps
Sprouting seeds indoors is a rewarding way to enjoy fresh, nutrient-packed greens anytime—no yard or sunlight required! 🌱 With just a few simple steps, you’ll have vibrant sprouts ready in as little as 7 days, saving money and boosting your meals with homegrown goodness.
Whether you’re a beginner or a seasoned gardener, this method is quick, cost-effective, and perfect for small spaces.
Now that you’re armed with the know-how, give it a try this week! Start with easy seeds like mung beans or lentils, then expand your sprouting menu as you gain confidence. Happy growing—your future self (and taste buds) will thank you! 🌟