Vegetables
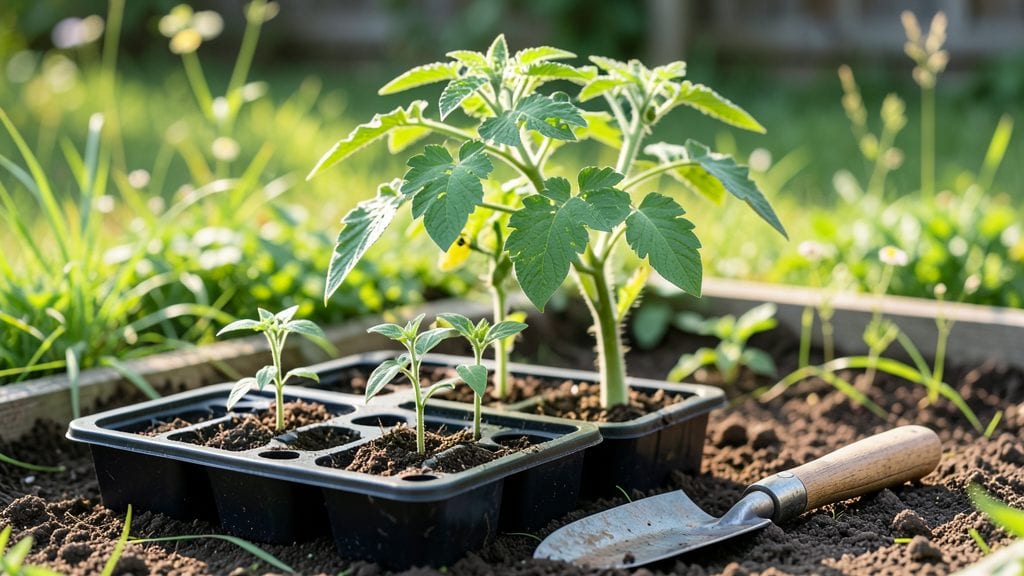
Starting tomato seeds outdoors means skipping the seedling stage entirely—and I’ve done it so successfully that I now grow more tomatoes than my neighbors with twice the space. The key is timing: wait until soil temperatures hit 60°F consistently, and avoid planting before your last frost date.
My first attempt failed when a late freeze hit my seedlings, but now I use row covers and watch the forecast like a hawk.
You’ll need a sunny spot, well-draining soil, and a way to protect young plants from temperature swings. Direct sowing works best in warm climates (zones 8-10), while cooler zones (3-7) benefit from transplanting hardened-off seedlings.
I swear by a simple hardening-off routine: move seedlings outside for 2-3 hours the first day, gradually increasing to full sun over 7-10 days.
The payoff? Plants that start strong, resist transplant shock, and produce heavier yields than store-bought seedlings. You’ll taste the difference in flavor too—homegrown tomatoes hit their peak sweetness when grown in their own soil from day one. Plus, no more worrying about root-bound plants or nursery diseases.
Works for both beginners and seasoned gardeners, though cooler climates need extra prep. Here’s how to time it right for your zone—and avoid my first-year mistakes.
📚 In This Guide
- What you need
- Instructions
- Tips and common mistakes
- Wrapping up and next steps
What you need
- ● Tomato seeds: Choose heirloom or hybrid varieties (e.g., Beefsteak, Cherry, Roma). Buy 5–10 seeds per plant (you’ll lose some to thinning or pests).
- ● Seed-starting mix: 1–2 cubic feet of sterile, well-draining potting soil (avoid garden soil—it’s too dense!). Look for mixes labeled "seed-starting" or "organic."
- ● Containers: Biodegradable pots (5–6 inches deep) or cell trays (72–200 cells)—1 per seedling (or share a tray if starting early indoors).
- ● Plastic nursery flats (for grouping seedlings before transplanting).
- ● Watering can or spray bottle: With a fine mist nozzle to avoid disturbing seeds.
- ○ Grow lights or sunny outdoor spot: Grow lights (optional but helpful): LED or fluorescent bulbs (12–16 hours/day) if starting indoors early.
- ● Outdoor location: A south-facing window, greenhouse, or cold frame (if hardy in your zone).
- ● Fertilizer: Balanced, water-soluble fertilizer (e.g., 5-5-5 or 10-10-10) for seedlings. Dilute to ½ strength to avoid burning.
- ● Twine or plant ties: (For later—1–2 feet per seedling to stake young plants as they grow.)
- ● Last frost date: Know your USDA Hardiness Zone—seedlings need warm soil (50–60°F) and no frost risk before transplanting.
- ● Sunlight: 6+ hours of direct sun daily (use a sun calculator for your location).
- ● Water source: Easy access to soft, room-temperature water (avoid chlorinated water—let it sit out for 24 hours).
- ● Heat mat: ($20–$40) to speed germination if nights are chilly (70–80°F ideal).
- ● Seedling heaters: ($10–$25) for early starts in cold climates.
- ● Row covers or frost cloth: To protect seedlings from unexpected cold snaps.
- ● pH test kit: To check soil pH (6.0–6.8 is perfect for tomatoes).
- ● Compost or worm castings: For a nutrient boost when transplanting.
Step-by-step instructions for starting tomato seeds outdoors
Here's how to transition delicate seedlings into robust outdoor plants without shock or setback.
Time the Planting for Optimal Conditions
Start seeds indoors 6-8 weeks before your last frost date—this gives them a strong head start. I check my local frost calendar and mark the date on my seedling heat mat. For most climates, this means beginning in late winter or early spring. The goal is to have seedlings with 4-6 true leaves ready to harden off when nighttime temperatures consistently stay above 50°F.
If you're in a cooler region, extend the indoor growing time by 2-3 weeks—tomatoes need warmth to thrive. I've learned the hard way that rushing this step leads to weak plants that struggle in the garden. Watch for strong stems and deep green leaves before moving outside; these are your indicators of readiness.
Choose the Right Outdoor Location
Select a site with full sun exposure—tomatoes need 6-8 hours of direct sunlight daily. I avoid low-lying areas where cold air settles, as even hardened-off plants can suffer damage from late frosts. The soil should drain well; tomatoes hate soggy roots, so amend heavy clay with 2-3 inches of compost mixed into the top 12 inches of soil.
If your garden bed lacks nutrients, work in 1 cup of 10-10-10 fertilizer per 4-foot row at planting time. I also test soil pH—tomatoes prefer a range of 6.0-6.8. If your soil is too acidic, add dolomitic lime a month before planting to adjust the pH gradually.
Begin the Hardening-Off Process
Start hardening off 10-14 days before transplanting by moving seedlings outdoors for 1-2 hours the first day. Place them in a shaded, sheltered spot—direct sun can scorch tender leaves. I use a small frame covered with shade cloth to protect them while they adjust. Watch for wilting or yellowing leaves, which signal stress; if this happens, extend the outdoor time by only 30 minutes the next day.
Gradually increase outdoor exposure by 1 hour daily, moving them to slightly sunnier spots each time. After 5-7 days, let them stay out all day but bring them in at night if temperatures drop below 55°F. This slow acclimation builds resilience—plants hardened off this way transplant with minimal shock and continue growing strongly.
Transplant Seedlings into the Garden
Transplant on an overcast day or late afternoon to reduce stress from intense sunlight. Dig holes twice as wide as the root ball but no deeper—burying the stem too far encourages rot. Space seedlings 18-24 inches apart in rows 3-4 feet apart for adequate airflow. I firm the soil gently around the base to eliminate air pockets, then water deeply to settle everything in place.
Remove any lower leaves that will touch the soil—this prevents disease and keeps the plant's energy focused on upward growth. Mulch with 2-3 inches of straw to retain moisture and suppress weeds. Water at the base once daily for the first week, then taper to every other day once the plants establish roots.
Monitor and Support New Growth
Keep an eye out for pests like hornworms or diseases such as early blight, which thrive in damp conditions. I inspect plants every 2-3 days and remove affected leaves immediately. If you notice yellowing between veins, it’s likely a nutrient deficiency—apply a balanced liquid fertilizer at half strength to avoid burning tender roots.
As plants grow, install cages or stakes to support them. Tomatoes need strong structural support to prevent sprawling and disease. Prune suckers—those little shoots in the leaf axils—weekly to direct energy into fruit production. With consistent care, your hardened-off seedlings will reward you with vigorous vines and abundant harvests all season long.
Tips & tricks for perfectly hardened-off tomato seedlings
Mastering the hardening-off process transforms fragile seedlings into resilient outdoor plants—these key strategies ensure your tomatoes thrive from day one in the garden.
Timing Your Transplant: The 6-8 week indoor growing period is non-negotiable for most climates, but I've found that seedlings with 4-6 true leaves consistently perform best. If your last frost date is uncertain, check your local agricultural extension service—they provide precise frost prediction maps. For cooler regions, that extra 2-3 weeks indoors makes all the difference in stem strength. I mark my calendar with highlighters to track both the 6-8 week start point AND the nighttime 50°F threshold—this visual reminder prevents rushing the process.
Sunlight Acclimation Strategy: When beginning the 10-14 day hardening-off process, I use a gradual approach that mirrors the sun's arc across the sky. Start with just 1-2 hours of morning shade, then progress to afternoon shade by day 3. By day 7, you can move to full sun—but only if temperatures stay above 55°F. The key is watching leaf response: slight wilting is normal, but yellowing means you're moving too fast. I keep a small notebook by my seedlings to track daily sun exposure and leaf condition, which helps me adjust the schedule precisely.
Soil Preparation Insight: The 2-3 inches of compost mixed into the top 12 inches of soil isn't just about nutrients—it's about creating the perfect moisture retention without waterlogging. I test my soil's drainage by digging a 12-inch hole and filling it with water; if it drains completely within an hour, it's ready. For heavy clay soils, I add perlite to improve aeration. The 1 cup of 10-10-10 fertilizer per 4-foot row should be worked in gently to avoid disturbing roots during transplanting, and I always water it in thoroughly afterward to activate the nutrients.
Post-Transplant Care: After transplanting, I've found that the once-daily watering for the first week is critical, but the technique matters just as much as the schedule. Water deeply at the base using a soaker hose or drip irrigation to encourage deep root growth. The 2-3 inches of straw mulch doesn't just retain moisture—it also creates a microclimate that protects young roots from temperature fluctuations. I check soil moisture by feeling the top inch; if it's dry, it's time to water. This method prevents both underwatering and the root rot that can occur with soggy conditions.
Pro Tips for Starting Tomato Seeds Outdoors
- Mastering the hardening-off process transforms fragile seedlings into resilient outdoor plants—these key strategies ensure your tomatoes thrive from day one in the garden.
- Timing Your Transplant: The 6-8 week indoor growing period is non-negotiable for most climates, but I've found that seedlings with 4-6 true leaves consistently perform best.
- Sunlight Acclimation Strategy: When beginning the 10-14 day hardening-off process, I use a gradual approach that mirrors the sun's arc across the sky.
Frequently asked questions
Got questions about starting tomato seeds outdoors?
You’re not alone! Here are some of the most common concerns—and their simple solutions—to help you grow confident, resilient tomato plants.
When is the best time to start tomato seeds outdoors?
Timing depends on your climate! For most regions, sow seeds 6–8 weeks before the last frost when soil temps hit 50–55°F (10–13°C). In warmer zones (zones 8+), you can start as early as February. Check your local frost dates and aim for seedlings to be 4–6 inches tall before transplanting.
How do I protect seedlings from late frosts?
Use frost cloths or row covers to shield young plants. If frost is forecasted, drape the cover loosely (like a tent) to avoid trapping heat. For extra protection, mulch around the base with straw or grass clippings to insulate roots. Avoid plastic, which can overheat seedlings during the day.
Can I start tomato seeds directly in the ground instead of pots?
Yes! Direct sowing works in warm climates (zones 7–10) where frost isn’t a risk. Plant seeds ½ inch deep in loose, well-draining soil, spacing them 2–3 feet apart. Thin seedlings to the strongest one per spot. For cooler areas, pots are safer—they give you control over moisture and temperature.
Why are my outdoor seedlings wilting or turning yellow?
Wilting often signals underwatering or overwatering. Check soil moisture—it should feel like a damp sponge, not soggy or dry. Yellow leaves (especially lower ones) may mean overwatering or poor drainage. Move pots to a shadier spot temporarily and reduce watering. Pests like aphids can also stress plants—spray with soapy water if you spot them.
How long does it take for tomato seedlings to harden off?
Harden off seedlings over 7–14 days, gradually increasing their outdoor time from 1–2 hours/day to full sun. Start with morning shade and avoid hot afternoon sun at first. By day 7, they should handle 6+ hours of direct sunlight. Watch for color changes (deep green = ready!) before transplanting.
What’s the fastest way to revive leggy seedlings?
Leggy seedlings (tall and weak) need more light. Move them to a sunnier spot or use a grow light 12–16 hours/day. Bury ⅔ of the stem when transplanting—roots will form along the buried part! Reduce watering slightly to encourage thicker stems. No fertilizer yet! Focus on light first.
Wrapping up and next steps
Starting tomato seeds outdoors is a rewarding journey that connects you to the roots of your harvest—literally! 🌱 With the right preparation, patience, and a little know-how, you’ll soon be watching tiny seedlings transform into robust plants ready to thrive in your garden.
The key is taking it step by step, from selecting the perfect varieties to mastering the hardening-off process, which ensures your seedlings are tough enough to face the elements.
Now that you’re armed with tips and tricks, it’s time to roll up your sleeves and get growing! Start small—even a few healthy seedlings can yield a bountiful harvest—and don’t forget to document your progress.
Before you know it, you’ll be enjoying homegrown tomatoes straight from your garden. Happy planting! 🍅✨