Vegetables
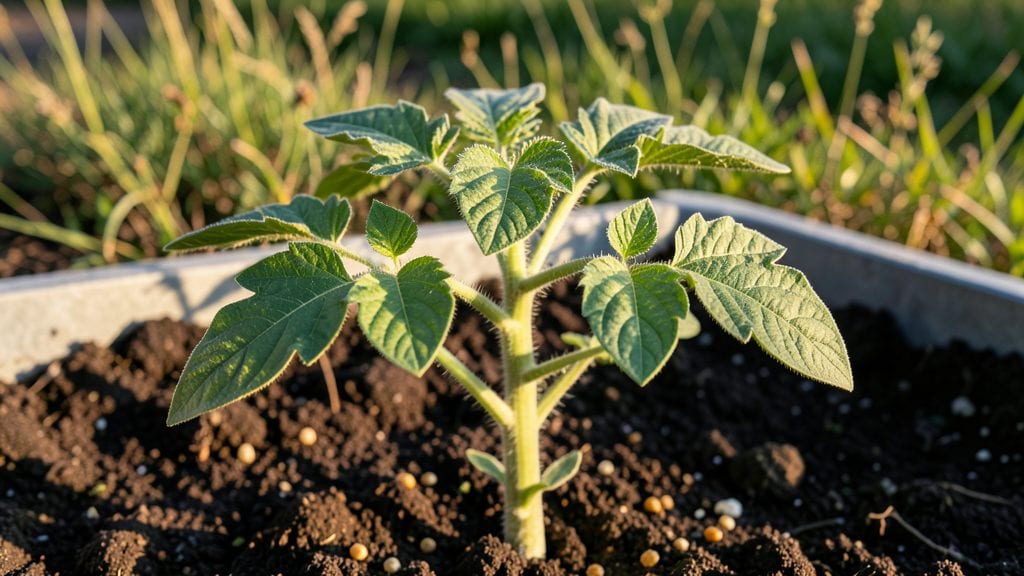
Nothing beats the thrill of spotting those first sprouts—here are the tomato seedling images I’ve collected over the years to help you spot healthy growth from day one. shoot to the sturdy transplants ready for the garden.
The difference between thriving plants and sad, leggy failures comes down to a few key visual cues, and I’m sharing them so you can spot them early.
These images show exactly what to watch for: when the first leaves unfurl, how to tell if seedlings are getting enough light, and what strong stems should look like before transplanting.
Most beginners overwater or let seedlings stretch too tall—both problems become obvious once you know what healthy growth really looks like. With these visuals, you’ll catch issues before they become irreversible, and your plants will reward you with a stronger harvest.
You’ll learn to recognize the perfect moment to move seedlings outside, how to fix common problems like damping-off, and what color leaves mean about your care routine.
By the time you’re pinching off suckers later in the season, you’ll already have a head start on growing tomatoes that outperform anything from the nursery. The best part? These stages apply whether you’re growing in trays, egg cartons, or even recycled containers.
This guide works for any climate and skill level—just follow the visual cues and care tips, and you’ll end up with tomato plants that look like they’ve been grown by experts. Let’s get those seedlings thriving from day one.
📚 In This Guide
- What you need
- Instructions
- Tips and common mistakes
- Wrapping up and next steps
What you need
- ● Seed-starting trays or pots: 2-4 inch deep cells or small pots (biodegradable or plastic). Quantity: 12-24 cells or 6-12 pots.
- ● Seed-starting mix: Lightweight, sterile potting soil (avoid garden soil). Quantity: 1-2 cubic feet.
- ● Tomato seeds: Choose heirloom or hybrid varieties (e.g., Cherry, Beefsteak, Roma). Quantity: 10-20 seeds.
- ● Watering can or spray bottle: With a fine mist nozzle to avoid disturbing seeds.
- ○ Grow lights or sunny windowsill: 12-16 hours of light daily. Optional: LED grow lights (12-24W).
- ● Humidity dome or plastic wrap: To retain moisture until germination.
- ● Plant labels and markers: To track varieties and planting dates.
- ● Heating mat: Keeps soil warm (70-85°F) for faster germination.
- ● Fertilizer (balanced or seed-starting formula): Diluted to half-strength after true leaves appear.
- ● Pruning shears or scissors: For transplanting or trimming.
- ● Camera or smartphone with macro mode: For capturing tomato seedling images up close!
- ● Grow tent or greenhouse: For controlled environments (ideal for urban gardeners).
Instructions for identifying healthy tomato seedling stages
Here's how to recognize each growth phase and keep seedlings thriving.
Spot Germination and First True Leaves
The first sign of life appears when tiny white roots break through the seed coat, followed by a small loop of stem pushing upward. This usually happens within 5-10 days at 75-85°F soil temperatures. You'll see the seedling "hook" as it stretches toward light—this is normal and temporary.
Wait until first true leaves (not the initial seed leaves) appear, which look like small, rounded, dark green leaves. These mark the 2-3 week stage and signal it's time to remove any weak seedlings if you over-sowed. Healthy seedlings at this point have sturdy stems and no yellowing—a sign of overwatering or poor light.
Assess Stem Strength and Leaf Development
By 3-4 weeks, strong seedlings should have 3-4 sets of true leaves and stems about 6 inches tall. The leaves should be deep green, not pale or yellow, and spaced evenly along the stem. If stems look thin or leggy (stretched and weak), move them closer to a grow light or brighter window immediately.
Check for no signs of disease like black spots, wilting, or mold on the soil surface. These are red flags for damping-off or fungal issues. If you spot any, reduce watering and improve airflow by spacing seedlings slightly wider.
Evaluate Root and Overall Plant Health
Gently grasp the base of a seedling and lift to inspect roots. Healthy roots are white or pale, branched, and not mushy. If roots look dark or smell foul, the plant has root rot from overwatering. At this 4-5 week stage, roots should fill about half the root ball in their container.
Look for strong, upright growth with no signs of wilting, even in the afternoon. Seedlings should bounce back quickly if gently pinched—this elasticity shows resilience. If leaves droop and stay that way, the plant is underwatered or root-bound. Adjust watering to keep soil evenly moist but not soggy.
Prepare for Transplanting with Hardening Checks
Two weeks before your last frost date, start hardening off seedlings by placing them outside in partial shade for 1-2 hours daily. Watch for leaf color changes—healthy seedlings will darken slightly but not yellow. If leaves curl or wilt, they're not ready and need more time indoors.
By the 6-8 week stage, seedlings should be 12-18 inches tall with 5-7 sets of true leaves. Their stems should be thick enough to support themselves without leaning. If they still look weak, delay transplanting and provide supplemental light or fertilizer to boost growth before moving outdoors.
Tips & tricks for identifying healthy tomato seedling stages
Here's what I've learned from years of growing tomatoes—these tricks will help you spot healthy seedlings at every stage and avoid common pitfalls.
Timing is Everything: Those 5-10 days for germination can feel like forever, but don't rush it! Keep soil consistently warm at 75-85°F using a seedling heat mat if needed. I've seen germination happen in just 3 days with perfect conditions, but 10 days is normal—patience pays off. If nothing appears after 14 days, your seeds may need to be replanted.
The Leaf Test: Those first true leaves are your golden ticket to healthy plants. They should be dark green, rounded, and appear after the initial seed leaves (cotyledons) fall off. I always compare them to a quarter—they should be about that size at the 2-3 week mark. Any yellowing or browning means overwatering or poor light.
Root Check Secret: When you're ready to transplant at the 4-5 week stage, gently remove one seedling to inspect roots. Healthy roots should be white, branched, and fill about half the container. If they're dark or smell bad, you've got root rot from overwatering. I keep a small notebook to track each seedling's progress—it's amazing how much you learn by observing!
Hardening Off Strategy: The 1-2 hours of daily hardening off two weeks before your last frost is crucial. Start with just 30 minutes in partial shade, then gradually increase time and sun exposure. I've seen seedlings wilt dramatically when rushed—always watch for leaf color changes. A slow transition prevents shock and sets your plants up for success in the garden.
Pro Tips for Tomato Seedling Images
- Here's what I've learned from years of growing tomatoes—these tricks will help you spot healthy seedlings at every stage and avoid common pitfalls.
- Timing is Everything: Those 5-10 days for germination can feel like forever, but don't rush it!
- The Leaf Test: Those first true leaves are your golden ticket to healthy plants.
Frequently asked questions
Got questions about tomato seedlings? You’re not alone! Here are answers to the most common queries to help you grow strong, healthy plants from the start.
How do I know if my tomato seedling is healthy?
A healthy tomato seedling has vibrant green leaves (not yellow or wilted), a sturdy stem (not leggy or weak), and no signs of pests like holes or webbing. Check the roots too—if they’re white and firm when gently pulled, you’re on the right track!
When should I transplant my tomato seedlings outdoors?
Wait until after the last frost and when nighttime temps stay above 50°F (10°C). Seedlings should be 4-6 inches tall with at least 2-3 sets of true leaves. Harden them off first by gradually exposing them to outdoor conditions for 1-2 weeks. →
What can I do if my tomato seedlings are leggy?
Leggy seedlings happen from too little light. Move them to a sunny spot (6+ hours of light/day) or use a grow light 12-16 hours daily. Bury the stem deeper when transplanting to encourage root growth. Avoid overcrowding—space seedlings 2-3 inches apart for better airflow.
Why are my tomato seedlings turning yellow?
Yellow leaves often signal overwatering (check soil moisture), nutrient deficiency (use balanced fertilizer), or pests (inspect for aphids). If lower leaves yellow first, it’s usually normal aging. But if new leaves yellow, act fast—adjust watering or test soil pH (ideal: 6.0-6.8).
Can I use regular potting soil for tomato seedlings?
Yes, but amend it for better results! Mix in compost or worm castings (20-30%) for nutrients and perlite or vermiculite (10%) to improve drainage. Avoid garden soil—it can compact and harbor diseases. Seedling mixes are lightweight and ideal for early growth.
Wrapping up and next steps
Growing healthy tomato seedlings is all about observation, care, and patience—and now you’ve got the visual guide to spot each thriving stage! 🌱 From tiny sprouts to sturdy transplants, recognizing the right cues ensures your plants will reward you with bountiful harvests later.
Whether you’re a beginner or a seasoned gardener, these tomato seedling images are your secret weapon for success.
Ready to take the next step? Plant those seedlings in your garden or containers and watch them flourish—your future salads, sauces, and sandwiches are waiting! 🍅✨