Container Gardens
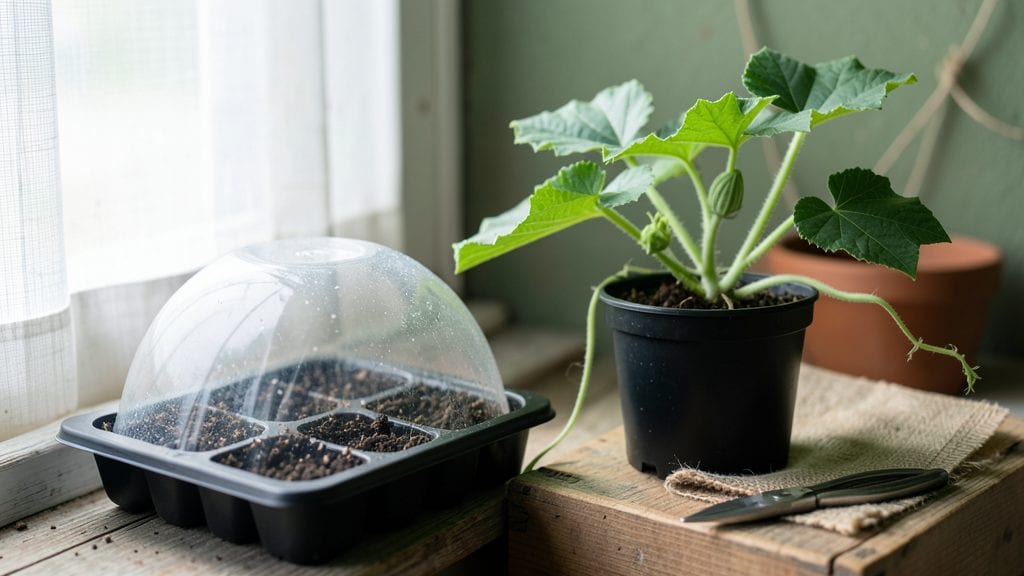
Starting summer squash seeds indoors 2–4 weeks before your last frost date is the golden ticket to a garden overflowing with zucchini and yellow squash by July. I learned the hard way—planting too early means leggy, weak seedlings, while starting too late leaves you scrambling for transplants at the nursery.
The key is matching your schedule to your zone’s frost timeline, not just guessing.
Most summer squash varieties germinate in 5–10 days when soil stays above 60°F, but they hate cold snaps. Use a heat mat if your home runs chilly, and keep seedlings in bright light (grow lights work best) to prevent them from stretching toward the window like starving kittens.
Transplant them outdoors when nighttime temps stay above 55°F—any colder, and they’ll sulk for weeks.
By following these dates, you’ll harvest plump, tender squash starting in 6–8 weeks after planting. Imagine the first crisp slice of homegrown zucchini in early summer—nothing beats it. The secret? Start early enough to beat the heat of peak season, so your plants focus on producing instead of wilting.
This method works for all summer squash—zucchini, yellow squash, pattypan—no matter your zone. Just adjust the start date based on your last frost, and you’ll be snipping harvests before your neighbors even think about planting. Ready to get growing?
📚 In This Guide
- What you need
- Instructions
- Tips and common mistakes
- Wrapping up and next steps
What you need
- ● Summer squash seeds: Choose heirloom or hybrid varieties (e.g., Zucchini, Yellow Crookneck, or Patio Star). Buy 2–3 seeds per pot (you can thin later).
- ● Seed-starting containers: Biodegradable pots (3–4 inches deep) or trays with individual cells. 1–2 containers per seed.
- ● High-quality seed-starting mix: Lightweight, sterile, and well-draining (avoid garden soil). 1 bag (1–2 cubic feet).
- ● Grow lights or sunny windowsill: 12–16 hours of light daily. A LED grow light (2–4 feet long) works best.
- ○ Heat mat (optional but helpful): Keeps soil warm (70–90°F) for faster germination. 1 mat (12–24 inches wide).
- ● Misting bottle or spray nozzle: For gentle watering without disturbing seeds.
- ● Fertilizer: Balanced, water-soluble fertilizer (e.g., 5-5-5 or 10-10-10). 1 small bottle.
- ● Humidity dome or plastic wrap to retain moisture.
- ● pH test kit (ideal soil pH: 6.0–6.8).
- ● Label markers to track seed varieties and planting dates.
- ● Fungicide (like neem oil) to prevent damping-off disease.
Instructions for starting summer squash seeds indoors by planting Zone
Timing is everything with summer squash—get it right, and you’ll enjoy fresh harvests all season long.
Calculate Your Last Frost Date and Work Backward
Summer squash thrives in warm soil and air, so you’ll need to time your indoor start so seedlings are ready 4-6 weeks before your last spring frost date. Look up your USDA Plant Hardiness Zone—most gardeners in Zones 3-5 should start seeds indoors by mid-March, while those in Zones 6-8 can wait until late March to early April. Zones 9-10 rarely need indoor starts at all, as the growing season is long enough to direct-sow after soil warms.
Use a frost date calculator or check your local cooperative extension service for precision. Mark your calendar 4 weeks before your target transplant date—this is when you’ll move seedlings outdoors. If you’re in a cooler microclimate, extend the indoor period to 6 weeks to ensure hardy plants before the first heat wave hits.
Start Seeds in a Warm, Controlled Environment
Summer squash seeds germinate best in soil temperatures between 70-90°F. Place your seed-starting tray on a seedling heat mat set to 80°F to speed up germination, which typically takes 5-10 days. If you don’t have a heat mat, set the tray on top of your refrigerator or in a warm corner of your kitchen—just ensure the soil stays consistently warm.
Sow seeds ½ inch deep in biodegradable pots (they’ll transplant easily without root disturbance). Cover the tray with plastic wrap to retain humidity, but remove it as soon as sprouts appear to prevent fungal issues. Keep the soil evenly moist but not soggy—overwatering at this stage leads to damping-off, a deadly fungal disease that collapses seedlings overnight.
Provide Adequate Light and Prevent Leggy Growth
Once seedlings emerge, move them to a south-facing window or under grow lights for 14-16 hours of light daily. Summer squash seedlings grow fast but become leggy and weak if stretched toward light. If you notice stems elongating with small, pale leaves, your light source is too far away—adjust it to 2-3 inches above the plants. Strong seedlings should have sturdy stems and dark green, compact leaves within 2 weeks.
Rotate the tray quarter-turn daily to encourage even growth. Avoid cold drafts, which stunt development. If your home stays below 60°F at night, consider using a plant grow light on a timer to maintain consistent warmth and light exposure.
Harden Off Seedlings Before Transplanting
Begin hardening off 10-14 days before your target transplant date. Start by placing seedlings outside in a shaded, sheltered spot for 1-2 hours the first day, gradually increasing exposure by 1 hour daily. By the final week, they should tolerate full sun and wind for 6-8 hours. This process toughens stems and prevents transplant shock.
Watch for wilting or yellowing leaves—a sign they’re not ready. If this happens, return them indoors for another day and extend the process. Transplant on a cool, overcast afternoon to reduce stress. Bury seedlings 1 inch deeper than their original soil line, as squash roots develop along the stem.
Time Transplanting for Warm Soil Conditions
Summer squash won’t thrive in cold soil—wait until soil temperatures reach 60°F before transplanting, usually 2-3 weeks after your last frost date. Use a soil thermometer to confirm. Plant seedlings 18-24 inches apart in rows 3-4 feet apart to allow for sprawling vines. If frost threatens after transplanting, cover plants with frost cloth for protection.
Mulch around the base with 2-3 inches of straw to retain moisture and suppress weeds. Water deeply at the base every 2-3 days, ensuring the soil stays consistently moist but well-drained. Avoid overhead watering, which spreads fungal diseases. With proper timing, your squash will bolt into growth and produce abundant harvests within 50-60 days of transplanting.
Tips & tricks for perfect summer squash seed starting
Mastering the timing and conditions for summer squash seeds indoors ensures robust seedlings ready for transplant. Here's how to optimize each critical phase.
Zone-Specific Timing Precision: The 4-6 week window before your last frost date is non-negotiable for summer squash. In Zones 3-5, starting by mid-March gives seedlings exactly the 6-week indoor development they need before warm soil arrives. For Zones 6-8, late March to early April timing aligns with your 4-week transplant window. I've found that gardeners in transitional zones (like Zone 5b) often need to adjust by 1 week earlier if their springs are particularly cold—always check your local frost dates rather than relying on zone averages alone.
Heat Mat Hack for Germination: Maintaining that 70-90°F soil temperature range during germination is crucial, but not everyone has a seedling heat mat. I've successfully used a repurposed aquarium heater wrapped in a towel to create a warm microclimate under seed trays. The key is consistency—fluctuations below 70°F can delay germination by days, while temperatures above 90°F risk overheating seeds. If your kitchen stays around 80°F at night, place trays on top of your refrigerator (not inside) to maintain that optimal 80°F range without equipment.
Light Management for Compact Growth: Those critical 14-16 hours of daily light prevent leggy seedlings, but natural light varies dramatically. I recommend supplementing with a simple LED grow light on a timer if your south-facing window provides less than 6 hours of direct sunlight. Position the light 2-3 inches above seedlings and adjust height as they grow—too high causes stretching, too low creates heat stress. The quarter-turn rotation isn't just about even growth; it helps you spot early signs of nutrient deficiencies or pest activity on all sides of the plants.
Harden Off Strategically: The gradual 10-14 day hardening process is where most beginners fail. Start with just 1-2 hours of shade on day one, then increase by 1 hour daily. I've seen many gardeners rush this step by jumping to full sun too soon, which causes transplant shock. Pay special attention to nighttime temperatures—if nights drop below 60°F during hardening, bring seedlings back indoors overnight. The goal is to acclimate them to outdoor conditions without overwhelming their systems before transplant day.
Pro Tips for When To Start Summer Squash Seeds Indoors
- Mastering the timing and conditions for summer squash seeds indoors ensures robust seedlings ready for transplant.
- Zone-Specific Timing Precision: The 4-6 week window before your last frost date is non-negotiable for summer squash.
- Heat Mat Hack for Germination: Maintaining that 70-90°F soil temperature range during germination is crucial, but not everyone has a seedling heat mat.
Frequently asked questions
about starting summer squash seeds indoors—because every gardener deserves a stress-free (and squash-filled!) growing season.When is the absolute latest I can start summer squash seeds indoors?
In most zones, aim to start seeds 4–6 weeks before your last frost date. For example, in Zone 5, that’s mid-April, while Zone 10 gardeners can wait until February. If you miss the window, opt for transplants or direct-sow after soil warms to 60°F+.
What if my indoor space is too cold for summer squash seeds?
Summer squash thrives at 70–90°F, but seeds need warmth (75–85°F) to germinate. Use a seedling heat mat ($15–$25) or place pots on a sunny windowsill with a grow light 12–14 hours/day. Skip the heat mat if you’re sowing in Zone 9+—just keep them cozy!
Can I start summer squash seeds too early indoors?
Yes! Overcrowded, leggy seedlings are a red flag. Start seeds no earlier than 6–8 weeks before transplanting (or they’ll outgrow their containers). For Zones 3–4, late March is ideal; Zones 7–8 can wait until mid-March. Pro tip: Use 4-inch pots to avoid root-bound stress.
What’s the best alternative if I don’t want to start seeds indoors?
Direct-sowing is easy! Wait until soil reaches 60°F+ (test with a finger—should feel warm like bathwater ). Plant seeds 1 inch deep, 2–3 feet apart, and thin to the strongest sprout. For containers, use 12+ inch pots with well-draining soil. Bonus: Zucchini and yellow squash germinate faster than pattypan varieties.
My squash seedlings look weak—what’s wrong?
Common culprits: damping off (fungus from overwatering), poor light (etiolation = stretchy stems), or nutrient burn (too much fertilizer). Fix it by:
- Thinning air circulation (remove crowded seedlings).
- Watering at soil level (not overhead).
- Adding grow lights if seedlings lean toward the sun.
- Using half-strength fertilizer after true leaves appear.
How do I harden off summer squash seedlings?
Acclimate seedlings 7–10 days before transplanting by:
- Day 1–3: Move outdoors for 1–2 hours in shade.
- Day 4–6: Gradually increase time to 4–6 hours, adding morning sun.
- Day 7–10: Leave out all day (evening frost risk?).
Wrapping up and next steps
Starting summer squash seeds indoors at the right time ensures a thriving harvest—whether you're in Zone 3 or Zone 10. By following your zone’s last frost date and using the 6-8 week indoor head start, you’ll give your plants the best chance to flourish.
Now that you’re armed with timing tips, grab those seeds and get growing! 🌱
Your next step? Transplant with confidence—harden off seedlings, monitor soil warmth, and watch your squash vines take over your garden (or containers!) like a pro. Happy planting!