Planting
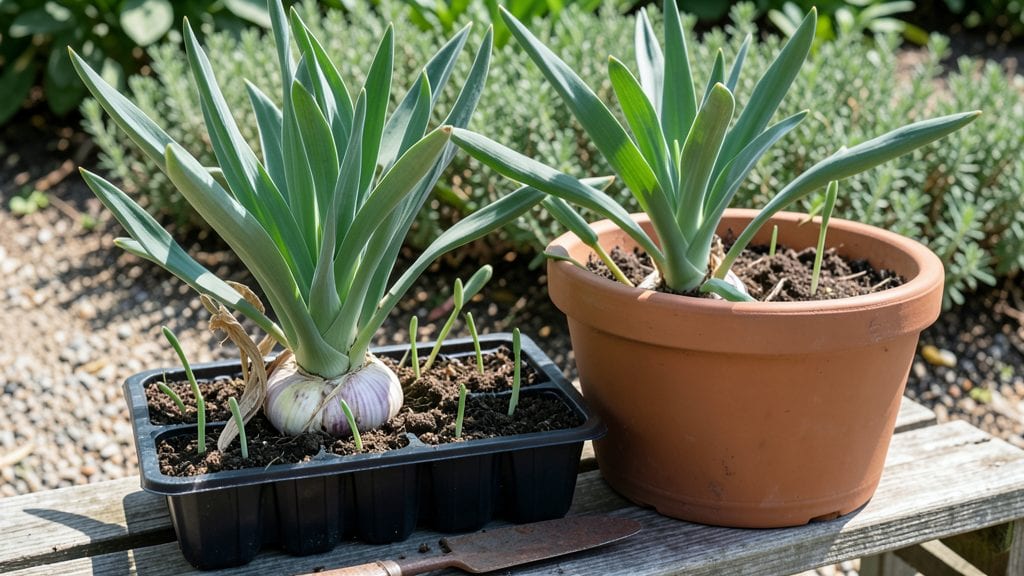
Growing allium plant seeds through a layered chill method guarantees the dramatic blooms you’ve been dreaming of next spring. ✨ I’ve spent years perfecting this technique—especially for varieties like Allium giganteum—because store-bought seedlings often disappoint, while seeds give you bigger, hardier plants for less.
The key lies in mimicking nature’s winter cycle, which tricks seeds into breaking dormancy at precisely the right time.
You’ll need a few simple supplies: a plastic bag, damp paper towels, and a refrigerator with steady temps around 35-40°F. No fancy equipment required—just patience and a clear timeline.
Most allium seeds take 8-12 weeks of cold stratification before they’re ready to plant, and the process is foolproof once you know the steps. Even beginners see better germination rates than with unchilled seeds.
By the time spring arrives, you’ll have sturdy seedlings with bold purple, white, or pink blooms that tower over the garden. The layered chill method eliminates the guesswork of timing, so you won’t end up with patchy or stunted growth.
Plus, you’ll save money by growing from seed instead of buying expensive transplants.
This approach works for both ornamental alliums and edible varieties like chives, adapting easily to different climates. Whether you’re planting in containers or garden beds, the same principles apply. Let’s get those seeds stratified for a show-stopping spring display.
📚 In This Guide
- What you need
- Instructions
- Tips and common mistakes
- Wrapping up and next steps
What you need
- ● Allium plant seeds: Choose Allium cepa (onion), Allium sativum (garlic), or ornamental varieties like Allium giganteum or Allium schubertii. Buy 20–50 seeds (depending on desired quantity). Opt for organic, untreated seeds for best results.
- ● Growing medium: A well-draining mix of 50% potting soil and 50% perlite or coarse sand (1–2 gallons total). Avoid heavy clay soil.
- ● Containers: 4–6-inch deep pots with drainage holes (1–2 pots per seed type). Plastic or terracotta works—just ensure they’re clean!
- ● Watering can or spray bottle: With a fine mist nozzle to avoid disturbing seeds.
- ○ Plastic wrap or humidity dome: To maintain moisture during germination (optional but helpful).
- ● Small hand trowel or spoon: For gently pressing seeds into soil.
- ● Labeling tags & marker: To track seed varieties and planting dates.
- ● Refrigerator or cold frame: A consistent 35–45°F (2–7°C) space for the 8–12 week chill period. A seed fridge or even a garage with temperature control works.
- ● Grow lights or sunny windowsill: For 12–14 hours of light/day after germination (if indoors).
- ● Patience & a calendar! Track your chill timeline and planting dates to ensure blooms by spring.
- ● Seed heating mat: Speeds up germination if your space is chilly ($15–$25).
- ● pH testing kit: Ensure soil pH is 6.0–7.0 (alliums prefer slightly acidic to neutral).
- ● Compost or worm castings: Boosts nutrient-rich soil for faster growth.
- ● Journal or app: Log moisture levels, chill progress, and sprouting dates.
Step-by-step instructions for growing allium from seeds using layered chill
This method guarantees strong, vibrant allium blooms next spring by mimicking natural winter stratification.
🌱 Step 1: Prepare Seeds for Stratification
Start by placing your allium seeds in a small container filled with the moistened seed-starting mix from your materials list. Gently press each seed about ¼ inch deep—too shallow and they’ll dry out; too deep and they’ll struggle to emerge. I like to use a toothpick to create tiny holes for precise placement.
Cover the container loosely with plastic wrap to retain moisture but allow airflow. Place it in the refrigerator, where temperatures hover around 35-40°F. This cold period, lasting 6-8 weeks, tricks the seeds into thinking winter has passed and they’re ready to grow. Check weekly to ensure the mix stays damp—never soggy.
💧 Step 2: Transition to Warmth for Germination
After 6-8 weeks in the fridge, remove the container and move it to a warm spot, ideally 65-75°F. You’ll notice nothing yet—that’s normal. Allium seeds often take 4-6 weeks to germinate once they’ve experienced this cold treatment. Keep the soil consistently moist but not waterlogged; a spray bottle works best to avoid disturbing seeds.
Place the container in bright, indirect light at first. Direct sun can scorch tiny seedlings, so I start with a north-facing windowsill or under a grow light. Once sprouts appear, you’ll see tiny green shoots breaking through the soil—this is your cue to move them to a slightly sunnier spot, but still avoiding harsh afternoon rays.
☀️ Step 3: Harden Off and Transplant Seedlings
When seedlings reach 2-3 inches tall and have developed 2-3 true leaves, they’re ready for their first taste of outdoor conditions. Begin by placing them in a sheltered spot outside for 1-2 hours the first day. Gradually increase exposure over 10-14 days, ending with full sun. This process, called hardening off, prepares them for the garden’s real-world stresses.
Transplant outdoors after the last frost date, spacing them 12-18 inches apart as your materials list specifies. Dig holes slightly deeper than the root ball to ensure stability, and water deeply right after planting. Alliums thrive in well-draining soil, so if your garden soil is heavy, mix in a bit of sand or perlite to improve drainage.
⏰ Step 4: Maintain Through First Season
Water your alliums once a week during dry spells, ensuring the soil stays evenly moist but not waterlogged. You’ll know it’s time to water when the top inch of soil feels dry to the touch. Fertilize lightly with a balanced, slow-release fertilizer every 4-6 weeks to encourage strong root and foliage growth.
As summer progresses, you’ll notice the plants developing spherical flower buds—this is where the magic happens. Alliums are low-maintenance once established, but remove any dead or yellowing leaves to redirect energy to the blooms. By late summer, you’ll be rewarded with striking, globe-shaped flowers that add dramatic height and texture to your garden.
Tips & tricks for perfect allium blooms using layered chill
Mastering the layered chill method transforms allium seeds from stubborn starters to reliable bloomers—here's how to optimize every step.
Cold Treatment Precision: The 6-8 week refrigeration at 35-40°F is non-negotiable for breaking allium seed dormancy. I place my containers in the crisper drawer where temps stay most consistent. If your fridge fluctuates, consider using a dedicated seed refrigerator or even a basement storage area. Pro tip: Label your container with the start date so you don't accidentally extend the cold period beyond 8 weeks—this can actually reduce germination rates rather than improve them.
Germination Patience: Don't be discouraged if nothing appears after moving to warmth—those 4-6 weeks of waiting are crucial. I've seen allium seeds take up to 8 weeks to germinate after the cold treatment, especially in cooler indoor environments. The key is maintaining that 65-75°F warmth consistently. If your home runs cooler, consider using a seedling heat mat underneath the container to compensate. Once you spot those first tiny green shoots, move them to slightly brighter light immediately—they'll grow surprisingly fast once they get started.
Harden Off Gradually: That 10-14 day hardening process is where most beginners rush and end up with stressed seedlings. I start with just 1-2 hours on the first day in a sheltered spot (like under a patio cover) and gradually increase exposure. Watch for signs of stress—wilting or yellowing means you're moving too fast. A simple trick: place a small fan nearby during hardening to simulate wind conditions they'll encounter outdoors. This toughens their stems and helps prevent flopping when planted.
Soil Preparation Secret: While the instructions mention sand or perlite for heavy soils, I go a step further by mixing in a handful of worm castings when transplanting. This gives your alliums a nutrient boost right from the start without overwhelming them. The worm castings also improve soil structure, helping prevent waterlogging which can be deadly for these bulbs. Just be sure to space them that full 12-18 inches apart—they'll need room to develop those dramatic spherical blooms.
Pro Tips for Allium Plant Seeds
- Mastering the layered chill method transforms allium seeds from stubborn starters to reliable bloomers—here's how to optimize every step.
- Cold Treatment Precision: The 6-8 week refrigeration at 35-40°F is non-negotiable for breaking allium seed dormancy.
- Germination Patience: Don't be discouraged if nothing appears after moving to warmth—those 4-6 weeks of waiting are crucial.
Frequently asked questions
Got questions about growing allium plants from seeds?
You’re not alone! Here are answers to the most common queries to help you master the layered chill method and get those stunning blooms next spring.
How long does it take for allium seeds to germinate?
Most allium seeds take 30–60 days to germinate after the cold stratification period. Patience is key—keep the soil consistently moist (but not soggy) and place the pot in a bright, cool spot (around 60–65°F) until sprouts appear. If nothing happens after 2 months, gently check for mold or rot and adjust moisture levels.
Can I skip the layered chill method? What’s the alternative?
While the layered chill method mimics natural winter conditions, you can use a refrigerator stratification instead: Mix seeds with damp sand or peat moss in a sealed bag, then store them in the fridge (35–40°F) for 6–8 weeks. Avoid freezing—just keep them chilled! Some gardeners also try direct sowing in fall, but success varies by climate.
Why aren’t my allium seeds sprouting after stratification?
If seeds refuse to sprout post-chill, check these fixes:
- Moisture issues: Too dry? Soak the soil. Too wet? Let it dry slightly.
- Temperature shock: Sudden warmth after cold can stall growth—gradually warm the soil.
- Old seeds: Allium seeds lose viability after 1–2 years. Test a few in warm water—if they float, they’re likely dead.
- Light needs: Some varieties need bright indirect light; others tolerate shade.
Still stuck? Try a bottom heat mat (70°F) to encourage germination.
When should I transplant seedlings outdoors?
Wait until after the last frost and soil temperatures rise to at least 50°F (spring). Harden off seedlings by placing them outdoors for 1–2 hours daily over 1–2 weeks, gradually increasing exposure. Plant in well-draining soil with full sun (6+ hours/day) for best blooms. Space them 12–24 inches apart, depending on the variety.
What’s the best companion plant for alliums?
Alliums thrive with:
- Herbs: Thyme, rosemary, or sage (repel pests naturally).
- Vegetables: Carrots, lettuce, or onions (share similar growing conditions).
- Avoid: Beans or peas—they compete for nutrients.
Bonus: Alliums deter aphids and Japanese beetles, making them a perfect garden ally!
Wrapping up and next steps
Growing allium seeds with the layered chill method is your ticket to vibrant, reliable blooms next spring—no fancy equipment or guesswork required! 🌱 By mimicking nature’s cycles, you’ll give your seeds the perfect head start, ensuring stronger seedlings and healthier plants.
Whether you’re a seasoned gardener or just starting out, this technique is a game-changer for easy, rewarding results.
Ready to transform your garden? Start by gathering your seeds and supplies, then follow the steps to stratify them. Once your alliums are sprouting, plant them outdoors (or under grow lights) and watch your patience pay off with stunning, long-stemmed flowers. Happy growing! 🌸