
Lawn
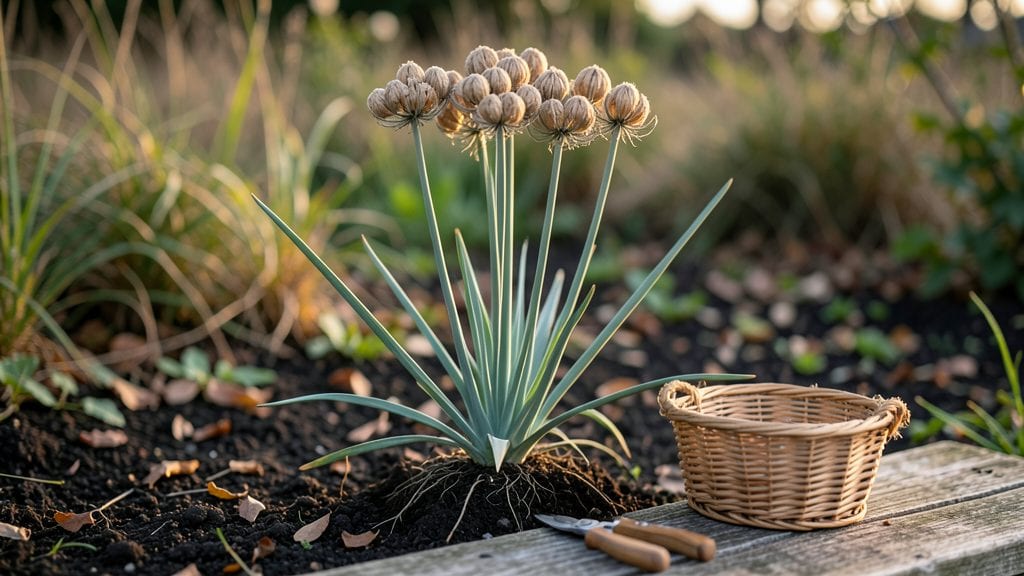
Harvesting allium seed pods turns last year’s blooms into next season’s star performers—if you do it right. 🌱 I’ve learned the hard way that skipping cold stratification means waiting months for germination (or giving up entirely). The secret lies in timing, drying, and a little winter magic to break dormancy.
You’ll need mature seed pods, a paper bag for drying, and a freezer for stratification—no fancy equipment. Start by harvesting pods when they turn brown and papery, then let them dry completely before storing.
For varieties like ornamental alliums or garlic chives, this process ensures strong, uniform seedlings that outperform store-bought starts.
By spring, you’ll have lush, healthy plants ready to bloom again—often bigger and more vibrant than their parents. The key is patience: proper drying prevents mold, and cold stratification mimics nature’s way of waking seeds up. No more weak, slow starters.
Works for onions, garlic, and ornamental alliums alike. Once you master this, you’ll never buy seedlings again—just save, store, and grow your own reliable stock. Let’s get those pods ready for next season’s garden.
📚 In This Guide
- What you need
- Instructions
- Tips and common mistakes
- Wrapping up and next steps
What you need
- ● Allium seed pods: Fresh, fully matured pods (harvested in late summer or early fall). Aim for at least 50 pods for a reliable batch—more if you’re experimenting with multiple varieties.
- ● Moistened potting mix: A well-draining blend (e.g., 50% peat moss or coco coir + 50% perlite or coarse sand). Use about 2-3 cups per 10 pods.
- ● Seed-starting tray or small containers: With drainage holes (e.g., 6-pack cell trays or 4-inch pots). One container per 10-15 pods works well.
- ● Plastic wrap or clear lid: To create a mini greenhouse effect (e.g., 1 sheet per container).
- ● Refrigerator or cold frame: A space that maintains 35–45°F (2–7°C) for 6–12 weeks.
- ● Spray bottle with water: For gentle moisture checks.
- ● Permanent marker or labels: To track varieties and stratification dates.
- ● Humidity dome: For faster germination if your climate is dry.
- ● Grow lights or sunny windowsill: Post-stratification, for seedlings that need light (12–16 hours/day).
- ● Thermometer: To monitor cold temps accurately (especially if using an unregulated fridge).
- ● Fungicide (e.g., neem oil or hydrogen peroxide): A 1:10 dilution spray to prevent mold if pods stay overly damp.
- ● Journal or app: To log stratification progress (e.g., dates, temp shifts, sprouting).
Step-by-step guide for cold stratifying allium seed pods
Here's how I guarantee reliable blooms next season with this simple process.
🌱 Step 1: Harvest and Clean the Seed Pods
Collect mature allium seed pods when they've turned completely brown and dried on the plant. I like to harvest them in late summer or early fall when they're fully mature but still attached. Use clean scissors to snip the pods from the stems, leaving about ½ inch of stem attached—this helps prevent moisture loss during storage.
Spread the pods on a clean, dry surface and let them air-dry for 3-5 days in a well-ventilated area. This prevents mold and ensures the pods are completely dry before stratification. You'll know they're ready when the pods feel light and crispy to the touch.
🪴 Step 2: Prepare the Stratification Container
Choose a container with drainage holes, like a plastic mesh bag or a shallow tray lined with paper towels. I use a small plastic container with holes drilled in the bottom—it's breathable and easy to monitor. Place a 1-inch layer of slightly damp vermiculite or perlite at the bottom to maintain moisture without sogginess.
Arrange the seed pods in a single layer, ensuring they don't overlap. This allows air to circulate and prevents rot. If you're working with a large quantity, you can layer them in a single container, but avoid stacking more than 2 inches deep—this ensures even moisture and temperature exposure.
💧 Step 3: Moisten and Seal the Container
Lightly mist the vermiculite or perlite until it feels damp but not wet—think of a wrung-out sponge. The goal is to keep the environment humid without creating a soggy mess. Place the container in a sealed plastic bag with a few small holes poked in the top to allow airflow. This creates a mini cold frame effect.
I like to label the bag with the allium variety and the date—this helps track how long the seeds have been stratifying. Place the sealed container in a refrigerator set to 35-40°F. This temperature mimics winter conditions and triggers germination hormones in the seeds.
⏰ Step 4: Monitor and Test for Germination
Check the container every 2-4 weeks to ensure the vermiculite remains slightly damp. If it feels dry, mist it lightly again. Avoid opening the bag too often—temperature fluctuations can disrupt the stratification process. After 8-12 weeks, remove a few pods to test for germination.
Plant the tested pods in a small pot with well-draining soil and place it in a warm, sunny spot. You'll see sprouts within 2-4 weeks if stratification was successful. If no germination occurs, return the pods to the refrigerator for another 4-6 weeks before testing again.
☀️ Step 5: Transplant and Care for New Growth
Once seedlings emerge, transplant them into individual pots filled with a mix of potting soil and perlite to ensure good drainage. Place the pots in a sunny window or under grow lights for 12-14 hours of light daily. You'll notice the seedlings develop strong, sturdy stems and deep green leaves within a few weeks.
Keep the soil consistently moist but not waterlogged. After the last frost date in your area, acclimate the seedlings to outdoor conditions by gradually increasing their exposure to sunlight and wind. Plant them in the garden after 2-3 weeks of hardening off, and you'll have healthy alliums ready to bloom next season.
Tips & tricks for perfect allium seed pod stratification
These little tricks will help you avoid common pitfalls and maximize your chances of stunning blooms next season.
Harvesting Timing: Don't rush the harvest! Wait until the seed pods are completely brown and crispy to the touch—this ensures maximum viability. I've learned the hard way that harvesting too early means lower germination rates. Look for pods that easily crumble when gently squeezed between your fingers. Also, that ½-inch stem attachment is crucial—it helps prevent moisture loss during the drying process.
Container Selection: The right container makes all the difference. While plastic mesh bags work well, I prefer using a shallow tray lined with paper towels because it's easier to monitor moisture levels. Whatever you choose, make sure it has proper drainage—soggy pods won't germinate. And remember, that 2-inch depth limit is non-negotiable for even moisture distribution throughout the container.
Temperature Consistency: Maintaining that 35-40°F range is critical for successful stratification. I recommend using a refrigerator thermometer to monitor the temperature—some fridges have hot or cold spots. If you notice temperature fluctuations, move your container to a more stable location. The goal is to mimic natural winter conditions that trigger germination hormones in the seeds.
Germination Testing: When testing for germination after 8-12 weeks, don't be discouraged if not all pods sprout immediately. Some allium varieties are slower to germinate than others. If you don't see results, return the pods to the refrigerator for another 4-6 weeks before testing again. Patience is key—this process mimics nature's timing, which can vary by species.
Pro Tips for Allium Seed Pods
- These little tricks will help you avoid common pitfalls and maximize your chances of stunning blooms next season.
- Harvesting Timing: Don't rush the harvest!
- Container Selection: The right container makes all the difference.
Frequently asked questions
Got questions about allium seed pods and cold stratification?
Here are the answers to the most common queries to help you grow stunning blooms next season!
What is cold stratification, and why do allium seed pods need it?
Cold stratification mimics winter conditions, breaking seed dormancy for better germination. Allium seed pods (like garlic chives or ornamental alliums) often require this step to ensure strong, reliable blooms. Without it, seeds may sprout unevenly or not at all—think of it as a "wake-up call" for your seeds!
How long should I cold stratify allium seed pods?
Most allium seeds need 6–12 weeks in the fridge (33–41°F). Check your seed packet for specifics—some varieties (like Allium giganteum) may need longer. Place them in a sealed bag with damp paper towels, then store in the crisper drawer. Patience pays off with healthier plants!
Can I skip cold stratification if I plant seeds outdoors in fall?
Yes! Planting in late fall or early winter (when temps drop naturally) often works—Mother Nature does the stratification for you. However, inconsistent winter chill might lead to poor germination. For guaranteed results, especially in mild climates, use the fridge method.
What if my allium seeds don’t sprout after stratification?
Don’t panic! Try these fixes:
- Check moisture: Seeds need consistent dampness (not soggy). Re-moisten paper towels if dry.
- Test viability: Soak seeds in warm water for 24 hours—if they sink, they’re likely good.
- Adjust timing: Some seeds need longer stratification (up to 6 months). Extend the fridge time.
- Freshness matters: Older seeds (2+ years) may lose viability. Buy new!
Are there allium varieties that don’t need cold stratification?
Most ornamental alliums (like Allium schubertii or Allium cristophii) benefit from stratification, but some annual alliums (e.g., Allium cepa—common onion) may germinate without it. Always check the seed packet! For perennials, stratification is your best bet for vibrant blooms.
Pro Tip: Label your seed packets!
Allium seed pods can look similar—label each variety with the date and stratification start/end times. This saves headaches when it’s time to plant! Use masking tape and a marker for a quick, garden-friendly solution.
Wrapping up and next steps
Cold stratifying allium seed pods is your secret weapon for vibrant blooms next season! By mimicking winter’s chill, you’ll break dormancy and boost germination rates—no guesswork, just reliable results. Whether you’re a seasoned gardener or just starting, this method is simple and rewarding.
Ready to transform your garden? Grab those seed pods, follow the steps, and plant with confidence! 🌱✨ Happy gardening—your future alliums will thank you!