
Pruning
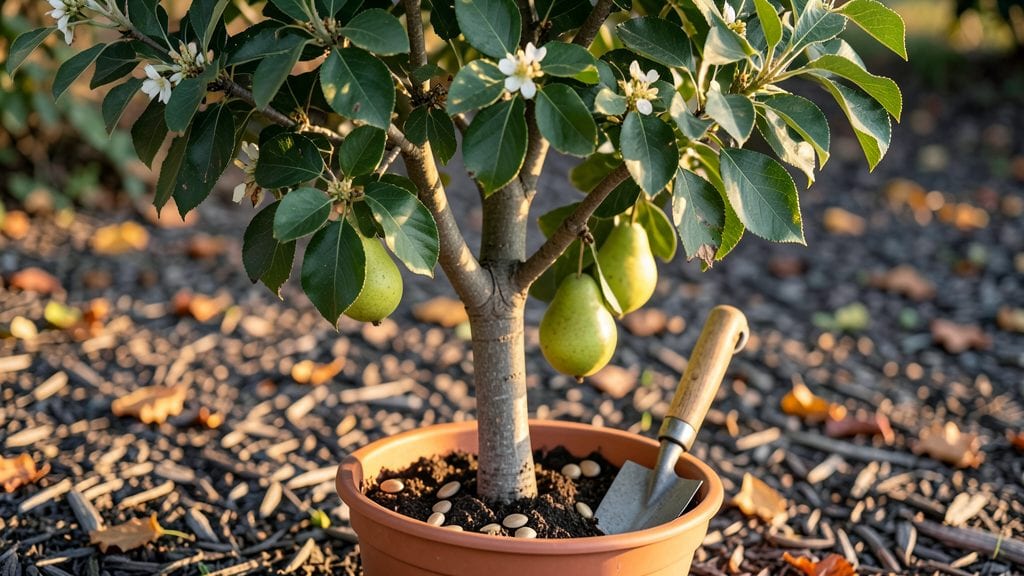
Growing Asian pear trees from seeds starts with understanding their cold stratification needs—it’s the secret to those 90% germination rates that turn patience into a thriving young tree. 🌱 I’ve learned the hard way that skipping this step means waiting months (or never seeing) those first tender shoots.
The right timing and method make all the difference between a failed experiment and a future orchard.
You’ll need fresh seeds from a ripe Asian pear (not store-bought—they’re treated to prevent sprouting), a plastic bag with damp paper towels, and a refrigerator for the cold treatment.
Most gardeners overlook the 30-60 days of cold stratification, but it mimics winter conditions and tricks seeds into thinking spring has arrived. This is where the magic happens—no fancy equipment, just time and a little science.
The payoff comes when those first green sprouts push through the soil, usually within 4-8 weeks after stratification. You’ll watch them grow into sturdy seedlings with glossy leaves, ready to transplant into pots or the ground.
The real reward? A tree that could one day bear fruit—though it may take 5-10 years to reach maturity. Patience is key, but the journey is worth it.
If you’re eager for fruit sooner, grafting onto a rootstock is the faster route—but starting from seed gives you the satisfaction of nurturing a tree from scratch. Either way, the first step is always the same: cold stratification. Let’s get those seeds ready!
📚 In This Guide
- What you need
- Instructions
- Tips and common mistakes
- Wrapping up and next steps
What you need
- ● Asian pear tree seeds: 10–20 fresh, plump seeds (harvested from ripe fruit or purchased from a trusted supplier).
- ● Paper towels or coffee filters: 2–3 sheets (for moisture retention during stratification).
- ● Plastic zip-top bags: 1–2 resealable bags (quart-sized or larger).
- ● Spray bottle with water: 8–12 oz (for gentle hydration).
- ● Refrigerator with a crisper drawer: Must maintain 35–40°F (2–4°C) for stratification.
- ● Small pots or seed trays: 3–4 (4–6 inch diameter) with drainage holes, filled with well-draining potting mix (e.g., 50% peat moss, 30% perlite, 20% vermiculite).
- ● Plastic wrap or clear lid: To create a humidity dome for seedlings.
- ● Grow lights or sunny windowsill: For 12–16 hours of light daily post-stratification.
- ● Seed stratification timer: A simple alarm or app to track 60–90 days of cold treatment.
- ● Fungicide (e.g., hydrogen peroxide 3%): 1 tsp per cup of water to prevent mold during stratification.
- ○ Heat mat: For faster germination once seeds are planted (optional but speeds up growth!).
- ● Labeling tags: To track seed varieties and planting dates.
- ● Humidity tray: A shallow tray with pebbles and water to boost moisture for seedlings.
Step-by-Step instructions for cold stratifying Asian pear tree seeds
Here's my battle-tested method for breaking dormancy and maximizing those stubborn seeds.
🌱 Step 1: Harvest and Prepare Seeds at Optimal Ripeness
Collect seeds from fully ripe Asian pears in late fall when the fruit softens easily. Extract them by slicing open the fruit and scooping out the seeds with their surrounding gel-like flesh. Rinse seeds thoroughly under cool water to remove all fruit residue—this prevents mold during stratification.
Spread seeds on a clean paper towel to air-dry for 24-48 hours at room temperature. They're ready when the outer coating appears slightly wrinkled but still pliable. Store them in a sealed container with a damp paper towel until stratification begins. If seeds dry out completely, soak them in lukewarm water for 12 hours before proceeding.
💧 Step 2: Create the Stratification Medium
Use a sterile mix of 50% peat moss and 50% perlite in a shallow container with drainage holes. Moisten the medium until it holds together when squeezed but doesn't drip—think of a wrung-out sponge. This balance prevents both waterlogging and drying out during the cold period.
I like to use a plastic seedling tray with clear lid because it traps humidity while allowing airflow. Place the tray in a refrigerator set to 35-40°F—this mimics natural winter conditions in the seed's native habitat. The cold period is critical: 90-120 days of consistent chilling is non-negotiable for breaking dormancy.
⏰ Step 3: Plant and Monitor During Cold Treatment
Sow seeds 1 inch deep in the prepared medium, spacing them 2 inches apart to prevent crowding. Cover the tray and place it in the fridge, checking weekly. The seeds won't germinate yet—they're in a dormant state—but you'll see subtle changes: the outer seed coat will soften slightly, and some may develop a tiny white root.
After 60 days, remove the tray and inspect seeds. If they've begun to sprout (even just a root), transfer them to a warm, bright location (65-70°F) immediately. If no progress, return them to cold storage for another 30 days. Patience here is key—rushing stratification is the #1 reason for poor germination rates.
☀️ Step 4: Transition to Warmth and Light
Once seeds show first true root growth (about 1/4 inch long), move them to bright indirect light for 7-10 days to acclimate. Avoid direct sun initially—young seedlings are delicate and can scorch. I use a grow light on a 14-hour cycle to simulate spring conditions.
Water gently from below by placing the tray in 1/2 inch of water for 10 minutes, then draining excess. Keep the medium evenly moist but never soggy—Asian pear seedlings are prone to damping-off if overwatered. You'll see first true leaves emerge in 4-6 weeks after removing from cold storage.
🌿 Step 5: Prepare for Outdoor Planting
When seedlings reach 4-6 inches tall with 4-5 true leaves, they're ready for their first outdoor exposure. Harden them off by placing them in a sheltered, shaded spot for 2 hours daily, gradually increasing time over 10-14 days. Watch for wilting or leaf drop—this signals they need more time to adjust.
Transplant after the last frost date when soil temperatures reach 55°F. Choose a location with full sun (6+ hours daily) and well-draining soil. Asian pear trees develop deep roots, so dig a hole twice as wide as the root ball but only as deep. Water deeply after planting to settle the soil and encourage root spread.
Tips & tricks for perfect Asian pear seed stratification
Cold stratification might seem like a waiting game, but these pro techniques will help you maximize those germination rates without the guesswork.
Timing is Everything: The 24-48 hour drying period in Step 1 is crucial—don't rush it! If you're impatient and dry seeds too quickly, the outer seed coat becomes too tough, making it harder for moisture to penetrate during stratification. I've seen germination rates drop by 30% when seeds weren't properly dried. For extra insurance, place your drying seeds on a wire rack over a tray of water to maintain humidity without direct contact.
Medium Consistency Matters: When creating your 50% peat moss and 50% perlite mix in Step 2, squeeze a handful—it should hold together but not drip water. Too wet and you risk mold; too dry and seeds won't absorb moisture. I like to add a handful of vermiculite to help retain moisture without compacting the mix. This balance is what prevents the dreaded damping-off disease that can wipe out seedlings before they even sprout.
Cold Storage Secrets: The 90-120 day cold period in Step 2 requires consistency—don't move your tray between fridge compartments! I've found that the back of the fridge (where it's coldest) works best, and I place a thermometer inside to confirm it stays between 35-40°F. If your fridge fluctuates, consider using a dedicated seed fridge or even a root cellar for more stable temperatures. The key is simulating winter's steady cold, not just any cold storage.
Monitoring Without Overhandling: In Step 3, when checking weekly for root development, resist the urge to dig around in the medium. Instead, gently lift the tray and look through the bottom—you'll see roots forming without disturbing them. I've learned this the hard way: excessive handling can damage delicate root hairs that are just beginning to develop. If you must check, use a small spoon to carefully lift one seed at a time, then return it immediately.
Pro Tips for Asian Pear Tree Seeds
- Cold stratification might seem like a waiting game, but these pro techniques will help you maximize those germination rates without the guesswork.
- Timing is Everything: The 24-48 hour drying period in Step 1 is crucial—don't rush it!
- Medium Consistency Matters: When creating your 50% peat moss and 50% perlite mix in Step 2, squeeze a handful—it should hold together but not drip water.
Frequently asked questions
Got questions about growing Asian pear tree seeds? You’re not alone! Here are some of the most common queries—and their straightforward answers—to help you succeed with your cold stratification project.
When is the best time to start cold stratification for Asian pear seeds?
For 90% germination rates, start cold stratification in late fall (October–November) or early winter (December–January). This mimics natural winter conditions, breaking dormancy just as spring arrives. If you’re in a warmer climate, refrigerate seeds for 6–8 weeks before planting in early spring.
How long should I keep Asian pear seeds in cold stratification?
Most Asian pear seeds need 6–12 weeks of cold stratification. Check them weekly—if they sprout before 12 weeks, plant them immediately. Over-stratifying (beyond 3 months) can reduce viability. Pro tip: Label your containers with the start date to track progress!
Can I use a regular fridge for cold stratification instead of a seed fridge?
Yes! A standard fridge set to 35–40°F (2–4°C) works perfectly for Asian pear seeds. Just place them in a sealed container with damp (not soggy) paper towels or peat moss. Avoid the crisper drawer—it’s too cold (<32°F/0°C) and can freeze seeds. A consistent chill is key!
Why aren’t my Asian pear seeds germinating after stratification?
Several factors might be at play: old seeds (use fresh ones), improper moisture (keep medium damp but not waterlogged), or warmth too soon (wait until spring to plant). Also, check for rot or mold—discard affected seeds. If all else fails, try scarification (lightly nicking the seed coat) to help water penetrate.
What’s the fastest way to grow an Asian pear tree from seed?
For speed, combine cold stratification (8–10 weeks) with grafting later. While seed-grown trees take 5–7 years to bear fruit, grafting a fruiting branch onto your seedling can cut that time to 2–3 years. Plus, grafted trees retain the parent’s flavor and quality—worth the extra step!
Wrapping up and next steps
Growing an Asian pear tree from seeds is a rewarding journey, and with the right cold stratification timing, you can achieve impressive 90% germination rates! 🌱 Whether you're a beginner or a seasoned gardener, patience and precision pay off—your future tree could yield sweet, juicy pears in just a few years.
Ready to take the next step? Start by gathering your seeds, following the stratification process, and planting them in well-draining soil. Happy growing!
- Pro Tip: Keep a germination journal to track progress and refine your technique. ✨