
Watering
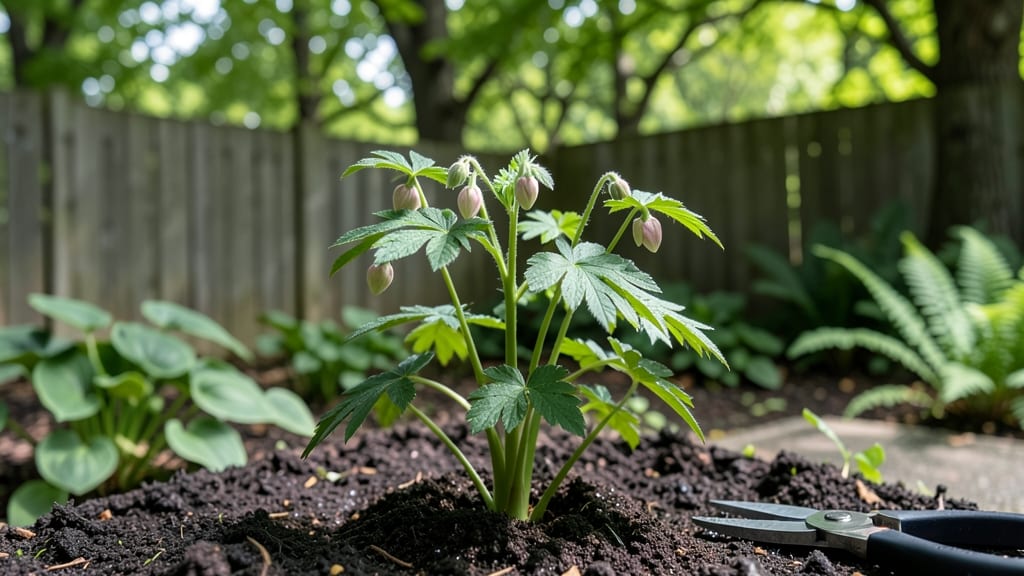
Bleeding heart seedlings thrive when you mimic their natural cold-moist forest floor. 🌿 I’ve learned the hard way that dry starts lead to weak stems and stunted blooms—these plants need damp soil from day one. The secret isn’t fancy equipment but keeping that seedling zone consistently moist without drowning it.
Start with a 50/50 mix of peat moss and perlite to prevent compaction, then plant seeds just ¼ inch deep in small pots. A humidity dome or plastic wrap keeps moisture steady while preventing rot.
Most seedlings show first leaves in 2-3 weeks, but patience is key—rushing watering or light leads to leggy, floppy stems that never recover.
By the time spring arrives, you’ll have vibrant green seedlings ready for transplanting, their delicate foliage already forming. The blooms come later, but this early care ensures they burst into heart-shaped clusters come May. Skip the guesswork with these foolproof moisture tips.
Works for both indoor starts and outdoor planting—just adjust watering as temperatures rise. Let’s get those seedlings off to the right start before the first true leaves appear.
📚 In This Guide
- What you need
- Instructions
- Tips and common mistakes
- Wrapping up and next steps
What you need
- ● Bleeding heart seedlings – 3-5 young plants (choose healthy, sturdy ones with vibrant green leaves).
- ● Well-draining potting mix – 5-10 gallons (look for a blend labeled for woodland perennials or shade-loving plants).
- ● Containers or garden beds – 12-inch diameter pots (for seedlings) or a partially shaded garden spot with loose, moist soil.
- ● Watering can or hose with a gentle spray nozzle – For precise, even moisture delivery.
- ○ Mulch (optional but recommended) – 1-2 inches of shredded bark or compost to retain moisture and regulate temperature.
- ● Gloves – To protect your hands while handling soil or delicate seedlings.
- ● Trowel or small shovel – For transplanting or loosening soil if needed.
- ● Spray bottle – For misting seedlings on particularly dry days.
- ○ pH testing kit (optional) – To ensure your soil is slightly acidic (pH 6.0-7.0), ideal for bleeding hearts.
- ● Shade cloth (if planting outdoors) – 30-50% coverage to protect seedlings from harsh afternoon sun.
How to prepare bleeding heart seedlings for cold-moist success
Here’s my proven method for nurturing delicate bleeding heart seedlings through winter’s chill—where most gardeners fail.
🌱 Step 1: Select and Prepare Containers for Moisture Retention
Bleeding heart seedlings demand consistent moisture, so choose 4-inch deep containers with drainage holes—unglazed terra cotta works best. I line the bottom with 1 inch of coarse sand to improve drainage while preventing root rot. This layer acts as a moisture buffer, keeping roots hydrated without suffocating them.
Fill the remaining space with a lightweight seed-starting mix (never garden soil—it compacts and blocks airflow). Tap the container gently to settle the mix, then moisten it thoroughly with lukewarm water until it feels like a damp sponge. The goal is to mimic the cool, moist conditions bleeding hearts thrive in during dormancy.
💧 Step 2: Sow Seeds at the Right Depth and Moisture Level
Press 1-2 seeds per container just below the soil surface—no deeper than ¼ inch. Bleeding hearts have tiny seeds that need light to germinate, so avoid burying them. Cover lightly with a fine layer of the same mix, then mist the surface with a spray bottle until evenly damp.
Here’s the trick: do not water from above after sowing. Instead, place the container in a tray filled with ½ inch of water. The mix will draw up moisture from below, ensuring even hydration without disturbing the seeds. Keep the tray in a cool (60-65°F) spot—a basement or unheated garage works perfectly.
⏰ Step 3: Maintain Consistent Moisture Through Germination
Bleeding heart seeds germinate slowly—expect 4-8 weeks in ideal conditions. Check moisture daily by pressing a finger into the soil: it should feel cool and damp, like a wrung-out sponge. If the top layer dries slightly, add water to the tray below; never let the mix bone-dry.
Once seedlings emerge, reduce tray watering to every 3-4 days, letting the top ½ inch dry slightly between waterings. This prevents damping-off, a fungal disease that turns young stems to mush. You’ll know moisture is right when the soil surface looks matte but not crusty—bleeding hearts hate soggy roots.
☀️ Step 4: Gradually Acclimate to Light and Temperature Shifts
After true leaves appear (not the initial seed leaves), move seedlings to bright, indirect light—a north-facing window or under 50% shade cloth. Direct sun at this stage scorches tender foliage. I place a small fan on low near the seedlings to strengthen stems; this mimics natural wind and prevents leggy growth.
When nighttime temperatures drop below 50°F, harden off seedlings by placing them outdoors in partial shade for 1-2 hours daily, increasing time gradually. Watch for wilting or yellowing leaves—these are signs they’re not ready. Bleeding hearts are woodland plants; they’ll thank you for mimicking their native cool, moist understory conditions.
🌿 Step 5: Transplant at the Right Time for Spring Success
Wait until soil temperatures reach 55°F and all frost risk has passed before transplanting. Dig holes twice as wide as the root ball and amend the soil with compost for moisture retention. Space seedlings 12-18 inches apart—they’ll spread over time, but crowding invites disease.
Water deeply after planting, then mulch with 2 inches of shredded leaves or bark to retain moisture and suppress weeds. The key to vibrant blooms? Never let the soil dry out completely—bleeding hearts reward consistent moisture with lush, heart-shaped foliage and dramatic spring flowers. I promise, your patience will pay off in spades.
Tips & tricks for perfect bleeding heart seedling prep
Mastering the delicate balance of moisture and temperature is where most gardeners stumble with bleeding heart seedlings. Here's how to avoid common pitfalls and ensure your seedlings thrive through winter's chill.
Container Selection: Unglazed terra cotta pots aren't just my top recommendation—they're essential. Their porous nature wicks away excess moisture while maintaining that critical damp sponge consistency we need. If you don't have terra cotta, plastic containers with drainage holes work too, but check moisture daily since they dry faster. Place a small pebble in the drainage hole to prevent clogging while allowing water to escape.
Moisture Management: The 4-8 week germination period is where patience pays off, but consistency is key. After sowing, maintain that ½ inch water tray method religiously—it's the only way to ensure even moisture without disturbing seeds. For the first 2 weeks, I weigh my containers daily; if they've lost more than 5% of their weight, it's time to add water to the tray. This prevents the top layer from drying while keeping roots properly hydrated.
Light and Temperature Balance: When true leaves appear, that's your cue to move seedlings to bright indirect light. I've found north-facing windows work best, but supplement with a grow light if natural light is insufficient. The 50-65°F temperature range is non-negotiable—any warmer and you risk leggy growth, any cooler and germination slows dramatically. Use a small fan on low to create gentle airflow, which strengthens stems and prevents that classic "etoliation" look from too little light.
Transplanting Timing: Waiting for 55°F soil temperatures is crucial, but don't rely solely on the calendar. I always test soil temperature with a thermometer for 3 consecutive days before transplanting. The 12-18 inch spacing might seem generous, but bleeding hearts spread aggressively—crowding leads to fungal issues. Amend planting holes with compost to maintain that moisture-retentive environment they crave.
Pro Tips for Bleeding Heart Seedling
- Mastering the delicate balance of moisture and temperature is where most gardeners stumble with bleeding heart seedlings.
- Container Selection: Unglazed terra cotta pots aren't just my top recommendation—they're essential.
- Moisture Management: The 4-8 week germination period is where patience pays off, but consistency is key.
Frequently asked questions
Got questions about nurturing your bleeding heart seedlings?
You’re not alone! Here are answers to the most common concerns—from timing to troubleshooting—so you can set your plants up for stunning spring blooms.
Why does my bleeding heart seedling have a "bleeding" appearance?
The reddish sap (called latex) is completely normal! It’s a natural response to damage (like cutting or transplanting) and won’t harm your plant. Just let it dry for a few hours before handling, and avoid overwatering the area afterward to prevent rot.
How long should I keep bleeding heart seedlings in cold-moist conditions?
For best results, mimic their native woodland habitat by keeping them chilled (35–45°F) and consistently moist for 4–6 weeks. This "stratification" period tricks seeds into thinking winter’s over, boosting germination rates. Pro tip: Use a seedling heat mat on low if your space is too warm!
What’s the best way to water bleeding heart seedlings without drowning them?
These plants hate soggy roots—water only when the top 1 inch of soil feels dry. Use a spray bottle or gentle stream to avoid disturbing tender seedlings. For cold-moist prep, bottom-watering (placing trays in shallow water) keeps moisture steady without excess.
Can I use regular potting mix, or do I need something special?
A light, well-draining mix (like 50% peat moss + 50% perlite or vermiculite) works best. Avoid heavy garden soil—it compacts and suffocates roots. For cold-moist prep, add a thin layer of damp sphagnum moss over seeds to retain humidity.
My seedlings look leggy or weak—what went wrong?
Leggy seedlings usually mean too much light or warmth during stratification. Move them to a shadier, cooler spot (like a north-facing window) and reduce light exposure. If they’re already sprouted, thin them to 2–3 inches apart to prevent competition.
What’s a good alternative if I can’t stratify seeds in the fridge?
No fridge? Try the "outdoor winter prep" method: Plant seeds in pots in a shady, protected outdoor spot (like under a tree) in fall. Let nature handle the cold-moist cycle—just keep soil damp. Move indoors in early spring when temps rise!
Wrapping up and next steps
Growing bleeding heart seedlings with cold-moist prep is your secret to stunning spring blooms—no guesswork, just confidence!
By mastering the right watering techniques and chilling method, you’re setting your plants up for lush, healthy growth. Your patience now will reward you with breathtaking pink and white blooms that’ll steal the show in your garden. 🌸
Ready to take the next step? Plant your prepped seedlings outdoors in early spring (after the last frost) and keep them consistently moist. Watch them thrive—and soon, you’ll be the envy of every gardener in the neighborhood! 🌱✨