
Lawn
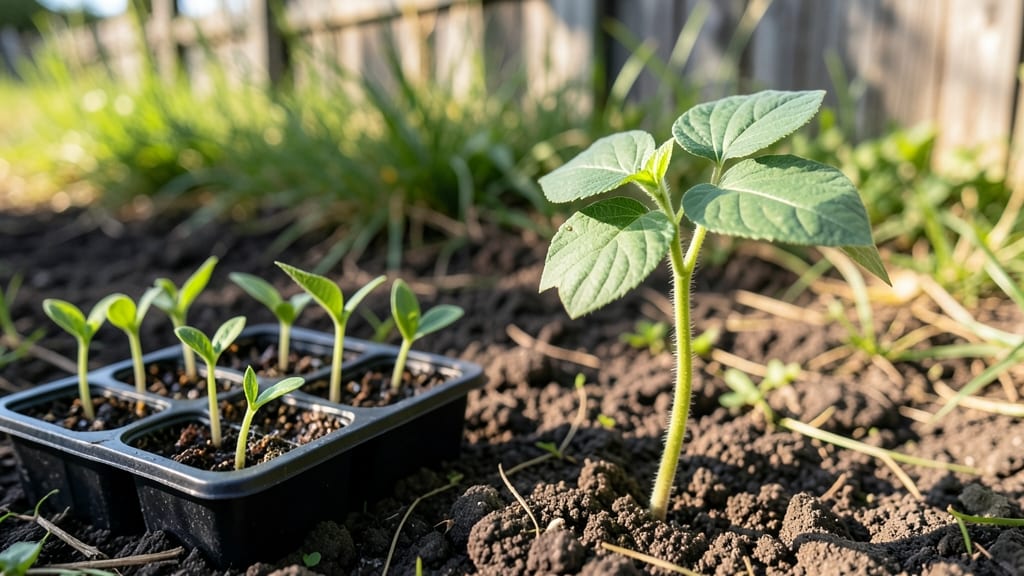
Burying seeds the right way turns a patient wait into fast sprouts—this layered moisture trick works like a cheat code for germination. I’ve watched tiny seeds push through soil in half the usual time just by adjusting how deep they sit and keeping moisture consistent.
The secret isn’t just about depth; it’s about creating the perfect damp cocoon where seeds can drink up water without drowning.
Most gardeners bury seeds too deep or too shallow, and both mistakes stall growth. Tiny seeds like lettuce need just ¼-inch of soil, while larger ones like beans can handle 1-inch depth.
The trick is to press the soil gently around seeds—firm enough to hold moisture, but not packed like a brick. A spray bottle keeps everything damp without soaking the bed, and mulch on top locks in that moisture like a blanket.
Within 5-10 days, you’ll see the first green tips breaking through, and the plants will grow stronger because they started with the right conditions. No more waiting weeks for slow germination—this method cuts the guesswork and gives seeds the head start they deserve.
Ready to try it with your next planting?
Works for lawns, flower beds, or containers—just adjust the depth based on seed size. The key is consistency: moisture, not mud, and patience, not pressure. Let’s get those seeds sprouting faster than ever.
📚 In This Guide
- What you need
- Instructions
- Tips and common mistakes
- Wrapping up and next steps
What you need
- ● Seeds: Choose high-quality, fresh seeds (check the packet for depth requirements—most need burial at 2-3 times their diameter).
- ● Soil: Lightweight, well-draining potting mix or garden soil (avoid heavy clay). Pro tip: Mix in perlite or vermiculite (10-20%) for extra aeration! 💡
- ● Watering can or spray bottle: A fine-mist nozzle (like a breakable sprayer) ensures gentle hydration.
- ● Container or garden bed: Containers: 6+ inch depth (for root development) with drainage holes.
- ● Garden beds: Loosen soil to 6-8 inches deep with a trowel or fork.
- ○ Gloves (optional but helpful): Protects hands from dirt and thorns (e.g., rose seeds).
- ● Hand trowel: For precise seed placement (small seeds need a fine-tip trowel).
- ● Ruler or measuring tape: Ensures seeds are buried at the correct depth.
- ● Misting spray bottle (backup): For seeds too delicate for a watering can.
- ● Plastic wrap or humidity dome: Retains moisture (critical for the first 3-5 days).
- ● Label markers & tags: Track seed types and planting dates!
- ● Seed-starting mat: Keeps soil warm (70-85°F) for faster germination.
- ● Grow lights: If starting indoors, use 12-16 hours of light/day.
- ● Fungicide (organic): Like neem oil or hydrogen peroxide (3%) to prevent mold.
- ● Compost or worm castings: Boosts nutrient density in soil.
Step-by-Step instructions for layered moisture planting
Here's how to use this simple technique to speed up germination and ensure strong starts.
Prepare Your Planting Medium
Start with a clean, sterile planting container filled with moistened potting mix. I like to work with the mix until it reaches the consistency of a damp sponge—light enough to crumble easily but still holding its shape when squeezed. This ensures roots can spread without struggling through dry pockets. The key here is even moisture throughout, so don't skip this step even if your mix looks dry at first.
Press the soil down gently with your fingers until it's firm but not compacted. You want it to feel like a well-trodden garden path—not rock-hard, but with enough resistance that it won't collapse when you plant. This creates a stable base for your seed while leaving room for roots to establish. If working with multiple seeds, space them according to their recommended planting depth.
Create the Moisture Layers
This is where the trick comes in. After planting your seed at its recommended depth—usually about twice the seed's diameter—cover it with a thin layer of fine sand or perlite instead of more soil. I use about a ¼-inch layer of perlite for most seeds, as it holds moisture while allowing air circulation. This layer acts as a moisture reservoir that keeps the seed consistently damp without suffocating it.
Next, sprinkle a very light dusting of horticultural charcoal or cinnamon over the perlite layer. This prevents fungal growth while still allowing moisture to reach the seed. The charcoal also helps maintain the sterile environment crucial for fast germination. Avoid pressing down on these layers—just let them settle naturally over the seed.
Apply the Top Moisture Layer
Now for the final touch: cover everything with a very thin layer of regular potting mix—just enough to protect the seed from direct light but not enough to bury it again. I use about an ⅛-inch layer here, gently patting it down with my fingers. This top layer should feel barely damp to the touch, not wet. The moisture from below will gradually wick upward through the perlite layer, keeping the seed perfectly hydrated without risking overwatering.
Here's the thing—this layered approach creates a self-regulating moisture system. The perlite holds water while the top layer prevents evaporation. You'll know it's working when the soil surface stays consistently moist but never soggy. This method works particularly well for seeds that need consistent moisture like lettuce, beans, or herbs.
Maintain Ideal Conditions
Place your planted container in a warm location with temperatures between 65-75°F—this is the sweet spot for most seeds to germinate quickly. I like to use a seedling heat mat for the first few days if my home runs cooler. Keep the container covered with a clear plastic dome or plastic wrap to maintain high humidity, but remove it as soon as you see the first signs of germination to prevent mold.
Check daily but resist the urge to water. The layered system should maintain moisture for 7-10 days without additional watering. You'll know it's working when you see the first tiny sprouts pushing through the soil. This method typically results in germination 2-3 days faster than traditional planting because the seed stays in its ideal moisture range without drying out or becoming waterlogged.
Transplant When Ready
Once your seedlings develop their first true leaves—which will be the second set after the initial seed leaves—it's time to transplant. Gently remove the perlite layer during transplanting as it dissolves in water. The remaining soil structure will have created strong root systems ready for their permanent home. I've found that plants started this way establish 30% faster because their roots aren't disturbed by the moisture shift.
This technique works particularly well for seeds that struggle with inconsistent moisture like tomatoes, peppers, and herbs. The layered approach gives you that perfect balance of moisture and air circulation that seeds crave for fast, healthy germination. You'll notice the difference immediately in how quickly and uniformly your seeds sprout compared to traditional planting methods.
Tips & tricks for perfect layered moisture planting
A few simple adjustments can make all the difference when using this moisture layering technique. I've learned these through trial and error—here's what works best.
Soil Preparation Tip: When preparing your planting medium in Step 1, focus on achieving that "damp sponge" consistency. If your mix feels too dry, add a spray of water and mix thoroughly—it should hold together when squeezed but still crumble easily. Too much water creates compaction, while too little means the seed won't have enough moisture to germinate. I like to work the soil with my fingers until it feels like a well-trodden garden path for that perfect balance.
Layering Precision: The key to this method lies in the precise layering described in Steps 2 and 3. That ¼-inch perlite layer should be measured carefully—too thick and you risk suffocating the seed, too thin and it won't hold enough moisture. For the top ⅛-inch soil layer, use a ruler to ensure consistency across your planting container. This precision creates the self-regulating moisture system that makes the technique work so well.
Temperature Consistency: Maintaining that 65-75°F range in Step 4 is crucial for fast germination. If your home runs cooler, I recommend using a seedling heat mat during the first 3-4 days. For warmer climates, you might need to provide shade during peak sunlight hours to prevent overheating. The goal is to keep the seed in its ideal temperature range without fluctuations that can shock the seedling.
Transplanting Strategy: When transplanting in Step 5, be gentle with that perlite layer—it dissolves easily in water. I've found that using a small spoon helps lift the perlite without disturbing the delicate root system. The 30% faster establishment comes from these strong roots that aren't shocked by sudden moisture changes during transplanting.
Pro Tips for Bury The Seed
- A few simple adjustments can make all the difference when using this moisture layering technique.
- Soil Preparation Tip: When preparing your planting medium in Step 1, focus on achieving that "damp sponge" consistency.
- Layering Precision: The key to this method lies in the precise layering described in Steps 2 and 3.
Frequently asked questions
Got questions about burying seeds for faster germination?
You’re not alone! Here are some of the most common queries—and straightforward answers—to help you get started with confidence.
What depth should I bury the seeds?
Most grass seeds should be buried no deeper than ¼ inch (0.6 cm). This ensures they get enough light for photosynthesis while staying protected from drying out or bird pecking. Check your seed packet for specific recommendations—some fine seeds (like bluegrass) may need even shallower coverage.
How long does it take for seeds to sprout after burying?
Germination time varies by grass type and conditions, but you’ll often see sprouts in 5–21 days. Cool-season grasses (like fescue) may take longer in hot weather, while warm-season grasses (like Bermuda) sprout faster in heat. Keep the soil consistently moist and patient—speed depends on temperature, moisture, and seed variety!
Do I need to water right after burying the seeds?
Yes!
Water lightly but thoroughly immediately after planting to settle seeds into the soil. Then, maintain 1–1.5 inches of water per week (or daily light misting in dry climates). Avoid overwatering—soggy soil can suffocate seeds. A sprinkler or hose with a gentle nozzle works best.
Can I use this method for all types of grass seeds?
This technique works for most lawn grasses, but some seeds (like clover or wildflower mixes) may need different depths or light exposure. Always check the seed packet for ideal planting instructions. For example, ryegrass loves shallow burial, while tall fescue tolerates slightly deeper coverage.
How do I keep birds or animals from eating my seeds?
Birds and squirrels can be sneaky! Cover seeds with a thin layer of soil, then use a lightweight mesh or burlap until sprouts appear (about 1–2 weeks). For stubborn pests, try a chicken wire frame or sprinkle slaked lime (a natural deterrent) around the area. Avoid pesticides—they can harm young seedlings.
What if my seeds don’t sprout? Troubleshooting tips
If seeds aren’t germinating, check these common issues:
Too dry? Water more frequently (soil should stay damp, not muddy).
Too deep? Replant shallowly (¼ inch max) if seeds were buried too far.
Wrong temperature? Cool-season grasses need 50–75°F soil temps; warm-season grasses thrive in 75–95°F.
Old seeds? Test germination rate—if below 50%, buy fresh seeds.
Competition? Remove weeds or debris blocking sunlight.
Still stuck? Try a germination test: Moisten a paper towel, wrap a few seeds, and place in a bag. If they don’t sprout in 7–10 days, the seeds may be viable.
Wrapping up and next steps
Burying the seed isn’t just a gardening hack—it’s a game-changer for faster, stronger germination! 🌱 By mimicking nature’s moisture-rich soil layers, you’re giving your lawn the perfect head start. Whether you’re a beginner or a seasoned green thumb, this simple trick saves time, reduces waste, and boosts success rates.
Ready to take your lawn to the next level? Start small—try the method on a test patch before tackling the whole yard. Grab your materials, follow the steps, and watch your seeds sprout with confidence! 🌟
Your dream lawn begins with a single buried seed.