Propagation
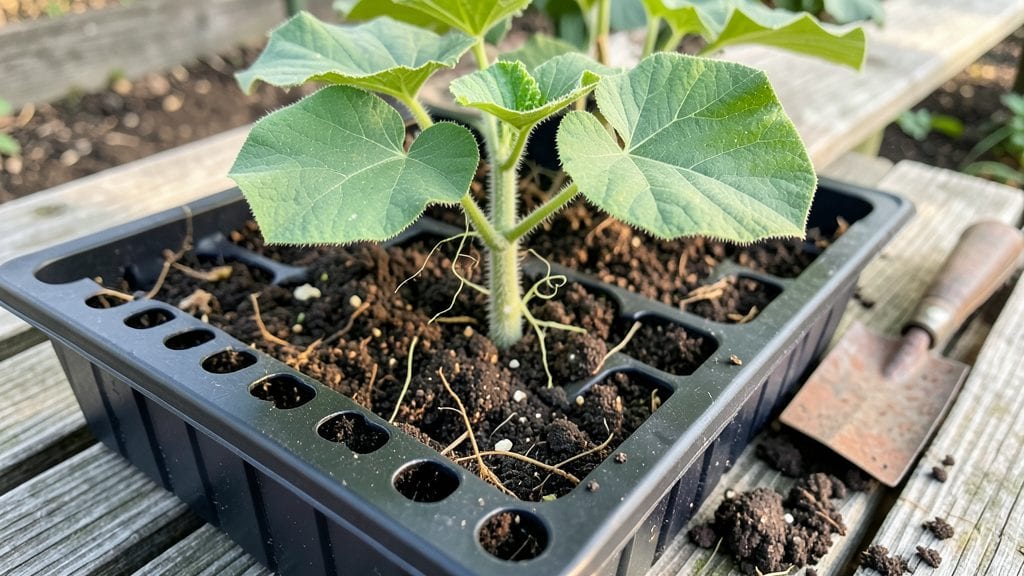
When cantaloupe seeds sprout, you're just days away from sweet, vine-ripened fruit—even if you're growing from kitchen scraps. 🌱 I've turned melon rinds into thriving plants by saving seeds and giving them the right start, and the process is simpler than you'd think.
The key lies in warmth, moisture, and patience as those first tiny leaves push through the soil.
You only need a few supplies: biodegradable pots, a mix of potting soil and perlite, and a heat mat or sunny windowsill. Plant seeds about half an inch deep and keep the soil consistently moist but never soggy.
Most seeds sprout within 5-10 days when conditions are right—though some stubborn ones might take up to two weeks.
Once sprouted, cantaloupe seedlings crave warmth and light. Move them to a south-facing window or under grow lights immediately, and expect those first true leaves to appear within 7-14 days.
The vines will start climbing fast, and with proper care, you'll be harvesting fruit in just 70-90 days—even from scraps.
This method works year-round with artificial lighting, making it perfect for apartment balconies or greenhouses. The real magic? Watching those first sprouts turn into lush vines heavy with fruit. Let's get those seeds growing!
📚 In This Guide
- What you need
- Instructions
- Tips and common mistakes
- Wrapping up and next steps
What you need
- ● Cantaloupe seeds: 5–10 fresh, viable seeds (save them from store-bought cantaloupes or use organic seeds for best results).
- ● Seed-starting container: A small pot (4–6 inches deep), seedling tray, or even a repurposed egg carton with drainage holes.
- ● Potting mix: 1–2 cups of lightweight, well-draining seed-starting soil (avoid garden soil—it’s too dense!).
- ● Water spray bottle: For gentle hydration (a fine-mist setting keeps seeds from washing away).
- ○ Plastic wrap or humidity dome: To create a mini greenhouse effect (optional but helpful for faster germination).
- ● Grow light or sunny windowsill: A south-facing window or a 12–16 hour LED grow light for seedlings (natural light works too!).
- ● Tweezers or pencil: For carefully placing seeds into the soil.
- ● Small hand shovel or spoon: To gently cover seeds with soil (¼ inch deep is ideal).
- ○ Fertilizer (optional): A balanced, water-soluble fertilizer (5-10-5 ratio) for seedlings once they sprout.
- ● Transplanting pot (later stage): A 1-gallon container or larger when seedlings are 2–3 inches tall.
- ○ Stake or trellis (optional): For vining cantaloupe varieties (if growing indoors or in small spaces).
- ● A warm, bright spot (65–85°F is perfect for germination).
- ● Patience! Cantaloupe seeds typically sprout in 5–10 days (some may take longer).
- ● Consistency: Keep soil moist but not soggy—overwatering is a common pitfall!
How to germinate cantaloupe seeds for year-round growth
Here’s how I turn kitchen scraps into thriving melon plants—no greenhouse needed.
🌱 Step 1: Select and Prep Seeds for Faster Germination
Save cantaloupe seeds from ripe fruit by scooping out the pulp and rinsing it under cool water. The seeds inside are your starting point. I like to soak them in lukewarm water for 12-24 hours—this softens the outer coating and speeds up germination. Place them in a small bowl of water and let them sit until they begin to swell slightly.
After soaking, drain the water and spread the seeds on a damp paper towel. Fold the towel to cover them lightly, then place it in a sealed plastic bag. Keep the bag in a warm spot, like on top of the fridge (75-85°F). Check daily for sprouts—you’ll see tiny white roots and a small green shoot within 3-5 days. This pre-sprouting method gives you a head start, especially in cooler climates.
💧 Step 2: Plant Sprouted Seeds in Warm, Moist Soil
Fill your 4-inch seedling pots with the 2 gallons of seed-starting mix (not garden soil—it’s too dense). Moisten the mix until it’s damp but not soggy, then press it down lightly to remove air pockets. Make a small hole about ½ inch deep—just enough to cradle the sprout without burying it too deeply.
Gently place each sprout into its hole, root-side down, and cover it with a thin layer of soil. Press the soil around the sprout to secure it, but don’t compact it too tightly. Water lightly with a spray bottle to settle the soil without disturbing the sprout. Place the pots in a warm, sunny spot (65-75°F) where they’ll receive 6-8 hours of indirect light daily. Avoid direct sunlight at this stage—it can dry out the delicate sprouts too quickly.
☀️ Step 3: Provide Consistent Warmth and Light for Strong Starts
Cantaloupe seedlings thrive in warmth, so keep them in a spot where the soil stays consistently 70-75°F. If your home runs cooler, a seedling heat mat set to low will help maintain the ideal temperature. Once the first true leaves (not the initial seed leaves) appear—usually within 7-10 days—you can gradually introduce more light.
Move the pots to a south-facing window or under a grow light for 12-14 hours daily. If you notice the seedlings stretching toward the light (a sign of legginess), raise the grow light or rotate the pots daily so they grow evenly. You’ll know they’re happy when the leaves are dark green and firm, not pale or wilted. This stage is critical—weak starts struggle to produce fruit later.
🌿 Step 4: Transplant Seedlings When They’re Ready
After 4-6 weeks, when seedlings have 4-6 true leaves and are at least 4 inches tall, it’s time to transplant. Choose a large container (at least 12 inches deep) or a garden bed with well-draining soil. Cantaloupes need space—plant each seedling 24 inches apart in rows 36 inches apart to allow for vines to spread.
Dig a hole slightly larger than the seedling’s root ball, place the plant in, and backfill with soil, pressing gently to remove air pockets. Water deeply right after transplanting to help the roots settle. Mulch around the base with 1 bag of straw mulch to retain moisture and regulate soil temperature. Avoid fertilizing at this stage—young plants need time to establish roots before they can handle nutrients.
⏰ Step 5: Monitor Growth and Support Vines
As the vines grow, they’ll need support. Install 4 trellis stakes around each plant, spacing them evenly, and gently weave the vines through the trellis as they grow. Cantaloupes are heavy feeders, so after 2-3 weeks, apply a balanced fertilizer (like the 1 lb of 10-10-10 fertilizer) according to package instructions. You’ll see new leaves and stems emerge within 1-2 weeks—this is your signal that the plant is thriving.
Water consistently, keeping the soil evenly moist but not waterlogged. Cantaloupes need 1-2 inches of water per week, but adjust based on rainfall. Watch for yellowing leaves—this could mean overwatering or nutrient deficiency. If you see white flowers appear after 6-8 weeks, that’s your cue that fruit will follow soon. With patience, you’ll have ripe cantaloupes ready to harvest in 80-100 days from transplanting.
Tips & tricks for perfect cantaloupe seed germination
A few strategic moves can transform your kitchen scraps into thriving melon plants with minimal fuss.
Soaking Secret: The 12-24 hour soak isn't just about hydration—it's about breaking dormancy. I've found that adding a drop of hydrogen peroxide (3%) to the soaking water prevents mold while speeding up germination. Simply mix 1 teaspoon per quart of water. This extra step cuts the waiting time by nearly 24 hours in cooler conditions.
Temperature Control: Maintaining that 75-85°F range during germination is non-negotiable. If your kitchen runs cooler, place your sealed bag of seeds on top of the fridge or near a sunny window during the day. I've had seeds sprout in just 3 days when kept at 80°F, but they took 7 days when left at 68°F. Use an inexpensive thermometer to monitor the spot—consistency is key.
Light Strategy: When moving seedlings to 6-8 hours of indirect light in Step 2, position them about 6-8 inches away from the light source. This prevents leggy growth while still providing enough energy for root development. I keep my seedlings under fluorescent shop lights on a timer—this gives me predictable results without the guesswork of natural light variations.
Transplant Timing: The 4-6 week window for transplanting feels long, but don't rush it. Look for seedlings with 4-6 true leaves that are at least 4 inches tall—these plants have developed strong enough root systems to handle the transplant shock. I've learned the hard way that transplanting too early leads to stunted growth, while waiting too long can make the roots circle in the pot.
Pro Tips for Cantaloupe Seeds Sprout
- A few strategic moves can transform your kitchen scraps into thriving melon plants with minimal fuss.
- Soaking Secret: The 12-24 hour soak isn't just about hydration—it's about breaking dormancy.
- Temperature Control: Maintaining that 75-85°F range during germination is non-negotiable.
Frequently asked questions
Got questions about sprouting cantaloupe seeds? You’re not alone! Here are answers to the most common queries to help you grow your own melons with confidence.
Can I sprout cantaloupe seeds from store-bought melons?
Just save the seeds from a ripe, organic cantaloupe—avoid conventionally grown ones if you want to preserve variety traits. Rinse the seeds gently, dry them, and they’re ready for sprouting. Pro tip: Store-bought seeds may take slightly longer to germinate than fresh ones, but patience pays off!
How long does it take for cantaloupe seeds to sprout?
With the right conditions (warmth, moisture, and indirect light), cantaloupe seeds typically sprout within 5–10 days. If your seeds haven’t sprouted in 2 weeks, they might need a boost—try soaking them overnight in warm water or adjusting your growing environment.
What do I do if my cantaloupe seedlings look weak or leggy?
Leggy seedlings mean they’re stretching for light! Move them closer to a bright, indirect light source (like a south-facing window or grow light) and ensure they’re not overcrowded. If they’re still struggling, consider thinning them or providing support with small stakes.
Can I grow cantaloupe indoors year-round?
Yes, but it requires extra care. Cantaloupes thrive in warm climates, so use a grow light, maintain temperatures above 70°F (21°C), and ensure high humidity. If space is tight, opt for smaller varieties like ‘Minnesota Midget’ or grow them in containers with excellent drainage.
What if my cantaloupe seeds don’t sprout at all?
Don’t give up! Try these troubleshooting steps:
- Check seed viability: Soak seeds in water—if they sink, they’re likely still good.
- Adjust moisture: Keep the growing medium damp (not soggy) and cover with a damp paper towel to retain humidity.
- Warmth matters: Place seeds near a heat source (like a heating mat) if your home runs cool.
Wrapping up and next steps
Growing cantaloupe from seeds is a rewarding way to enjoy fresh, homegrown fruit while reducing waste—no green thumb required! Whether you’re sprouting seeds from store-bought melon or saving them from your garden, this method is simple, cost-effective, and perfect for year-round propagation.
Start small, stay patient, and soon you’ll be harvesting sweet, juicy cantaloupes straight from your own backyard.
Ready to take the next step? Try sprouting a few seeds today! Experiment with different containers, lighting, or even indoor growing setups to find what works best for you. Happy gardening—your future melon patch awaits! 🌱