Planting
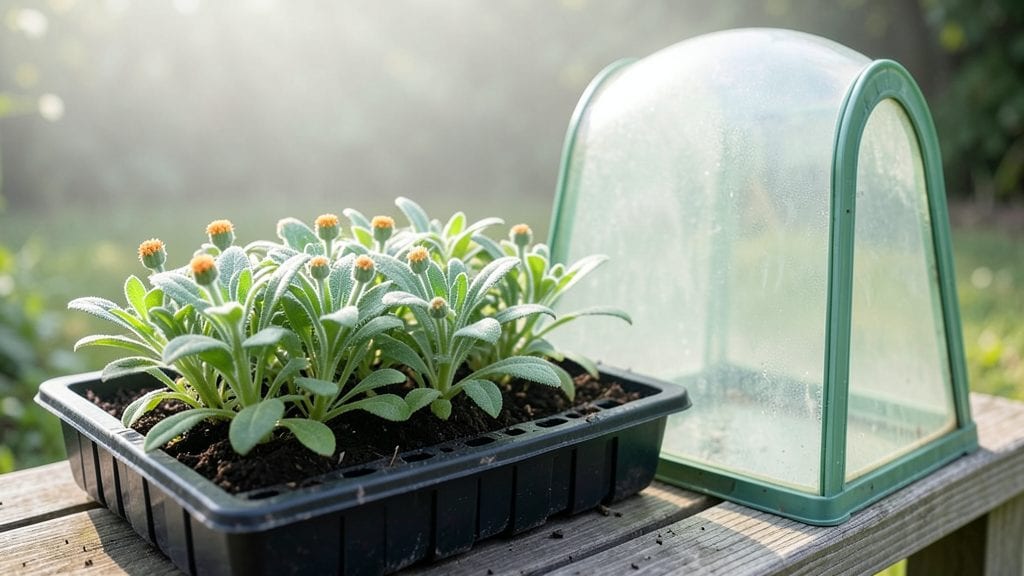
Cold sowing seeds in winter means your spring garden starts months ahead—no greenhouse or heat mat required. ✨ I learned this trick after watching hardy lettuce and spinach push through snow in my zone 5 garden, and it’s changed how I plan every season.
The method works by letting nature do the hardening for you. You’ll need cold-tolerant seeds like kale, Swiss chard, or hardy peas, plus a patch of soil that drains well.
No fancy equipment—just a shovel, seeds, and a little patience. Most gardeners skip this step, but it’s the secret to jump-starting your growing season.
What you’ll get is a head start on growth, plants that hit the ground running in spring, and fewer transplant shocks. The first true leaves appear weeks before traditional planting, and the flavor often improves from that extra cold exposure.
Just don’t expect miracles with tender crops like tomatoes or peppers.
Perfect for zones 3-7 where winters are cold but not extreme. Here’s how to do it right—no guesswork, just reliable results. The key is timing, soil prep, and knowing which plants can handle the chill.
📚 In This Guide
- What you need
- Instructions
- Tips and common mistakes
- Wrapping up and next steps
What you need
- ● Seeds: Choose cold-hardy varieties like lettuce, spinach, peas, kale, or arugula. Aim for 1–2 tbsp per tray (adjust based on seed size).
- ● Seed trays or containers: 1–2 shallow trays (4–6 inches deep) with drainage holes. Plastic or biodegradable options work great!
- ● Potting soil: A well-draining, seed-starting mix (avoid garden soil—it’s too dense!). Use about 2–3 cups per tray.
- ● Watering can or spray bottle: A gentle misting tool to avoid disturbing seeds. 1–2 sprays per day is ideal.
- ● Clear plastic dome or plastic wrap: To create a mini greenhouse effect. Cut to fit your tray snugly.
- ● Outdoor space: A protected, shady spot (e.g., under a porch, deck, or tree) where temps stay between 32–50°F (0–10°C).
- ● Grow lights or LED bulbs: If your winter is too cold (low-watt bulb (e.g., 40W) can add warmth.
- ● Labeling tags: To track seed varieties—toothpicks + masking tape work in a pinch!
- ● Garden gloves: For messy soil hands (because let’s be real, no one likes dirty fingers).
- ● Heat mat (for indoor backup): If you’re in a freeze-prone zone, a low-heat mat (50°F/10°C) can save your seeds.
Step-by-Step instructions for cold sowing seeds
Here's my foolproof method to get a head start on spring blooms using winter's chill.
🌱 Step 1: Select the Right Seeds and Prepare the Soil
Cold sowing works best with biennials and perennials that need a cold period to germinate, like foxgloves, hollyhocks, and sweet Williams. Choose a spot in your garden that gets full sun to partial shade—this is where you'll scatter your seeds in late fall or early winter.
Rake the area gently to remove debris and loosen the top 2-3 inches of soil. You want it crumbly but not powdery. I like to add a thin layer of compost to the surface before scattering seeds—this gives emerging seedlings a nutrient boost without burying them too deep.
💧 Step 2: Scatter Seeds and Lightly Cover
Sprinkle seeds evenly over the prepared soil, spacing them about 1-2 inches apart for small seeds or 3-4 inches apart for larger ones. Don’t press them into the soil—just let them settle naturally. A light dusting of soil or a sprinkle of compost over the seeds is enough to protect them from birds and wind.
Water gently but thoroughly right after sowing. The soil should feel damp 1 inch down, but not soggy. I use a fine-mist spray nozzle on my hose to avoid disturbing the seeds. This step is critical—too much water washes seeds away, while too little leaves them parched and vulnerable to freezing.
☀️ Step 3: Protect and Wait for Spring
Cover the area with a thin layer of straw or leaves to insulate the seeds during cold snaps. This isn’t just for warmth—it also prevents soil from heaving during freeze-thaw cycles, which can push seeds too deep. I like to use fallen leaves from my yard, but straw works too if you have it.
Leave the seeds undisturbed until late winter or early spring, when you start seeing signs of life. You’ll know it’s working when you spot tiny green shoots peeking through the mulch. This could take 6-12 weeks, depending on your climate and how cold your winter was.
✂️ Step 4: Thin and Care for Young Seedlings
Once seedlings reach about 2 inches tall, it’s time to thin them. Use a small trowel or your fingers to carefully remove weaker seedlings, leaving the strongest ones spaced according to the plant’s mature size. This prevents overcrowding and gives each plant room to grow.
Water seedlings deeply once a week, aiming for 1 inch of water per week. You’ll notice they’ll start to look more robust as they establish roots. Mulch lightly around the base to retain moisture and keep weeds at bay. By the time spring arrives, you’ll have a thriving garden with plants that are already several weeks ahead of those sown in spring.
Tips & tricks for perfect cold sowing success
Cold sowing seeds is all about patience and preparation—here's how to avoid the most common mistakes and get the best results.
Seed Selection Wisdom: Not all seeds respond well to cold sowing. Stick to biennials and perennials like foxgloves, hollyhocks, and sweet Williams that actually need cold stratification to germinate. Annuals like marigolds or sunflowers won't work—they need warm soil to sprout. I learned this the hard way after planting impatiens seeds in winter and waiting for nothing!
Soil Prep Secret: When loosening that top 2-3 inches of soil in Step 1, think "crumbly, not powdery." Use a garden fork to break up compaction without disturbing deeper layers. Adding a thin layer of compost before sowing gives seedlings a nutrient head start without burying them too deep—this is especially important in poor soil where young roots need all the help they can get.
Watering Technique: That gentle but thorough watering in Step 2 is crucial. Use a fine-mist spray nozzle to avoid creating channels that wash seeds away. The soil should be damp 1 inch down but not soggy—think of a wrung-out sponge. Too much water can cause seeds to rot before they even get a chance to germinate, while too little leaves them vulnerable to freezing.
Mulch Layer Strategy: The straw or leaves you use in Step 3 serve two purposes: insulation AND protection. I like to use fallen leaves from my yard because they're free and work perfectly, but straw is better for areas with heavy rain. The key is keeping the layer thin—about 1-2 inches—so it doesn't suffocate emerging seedlings when spring arrives.
Pro Tips for Cold Sowing Seeds
- Cold sowing seeds is all about patience and preparation—here's how to avoid the most common mistakes and get the best results.
- Seed Selection Wisdom: Not all seeds respond well to cold sowing.
- Soil Prep Secret: When loosening that top 2-3 inches of soil in Step 1, think "crumbly, not powdery."
Frequently asked questions
Got questions about cold sowing? You’re not alone—this method can feel a little mysterious at first! Here are some of the most common queries (and answers) to help you get started with confidence.
What seeds can I cold sow?
Cold sowing works best for hardy annuals and biennials that thrive in cool conditions. Popular picks include lettuce, spinach, kale, parsley, snapdragons, and sweet alyssum. Avoid tropical plants or seeds that need warmth to germinate, like tomatoes or peppers.
How long should I cold sow seeds for?
Most seeds need 4–8 weeks in the fridge to stratify (simulate winter). Check your seed packet for specifics—some, like snapdragons, may need up to 10 weeks. Plant them outdoors when soil is workable (usually 4–6 weeks before your last frost date).
What if my seeds rot in the fridge?
Rotting happens when seeds get too wet or too cold (below 35°F). Use moist but not soggy paper towels or peat pots, and store containers in the crispier drawer (not the freezer section!). If mold appears, toss the batch and try again with fresh seeds.
Can I cold sow in containers or directly in the garden?
Both work! For containers, use seed-starting trays with drainage. For direct garden sowing, plant seeds in a protected spot (like under a cold frame) when soil temps drop below 60°F. Just mark their location—you’ll forget where they are!
What if winter never comes? Can I still cold sow?
Cold sowing mimics winter conditions, so you can do it anytime seeds aren’t already germinating. Just adjust timing: If you skip the fridge, plant seeds outdoors in fall (when temps dip) or use a DIY cold frame with ice packs to chill them.
Pro Tip:
Label your containers with the seed type and planting date—trust us, you’ll thank yourself when you’re ready to transplant! For extra insurance, take a photo of your setup before refrigerating.
Wrapping up and next steps
Cold sowing seeds is your secret weapon for a head start on spring blooms—no waiting, no fuss! By mimicking nature’s timing, you’ll enjoy faster germination, stronger seedlings, and a garden that thrives ahead of the curve.
Whether you’re a seasoned gardener or just starting, this method proves that patience (and a little chill) pays off in vibrant, healthy plants.
Ready to put your new skills to the test? Grab those seeds, prep your containers, and dive in! Start small with a few cold-hardy varieties, then expand as you gain confidence. Your future spring garden will thank you—literally! 🌱✨