Lawn
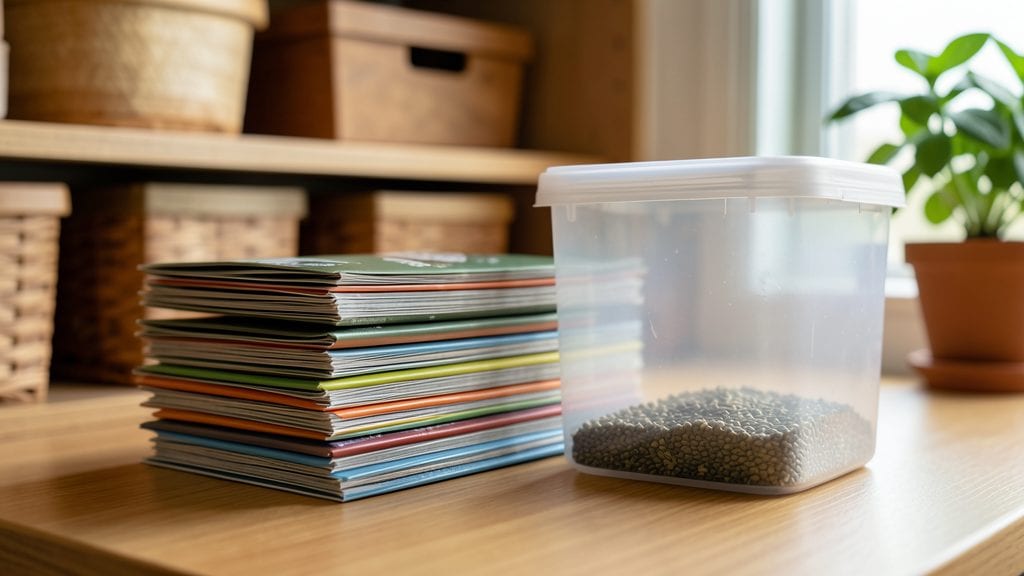
Proper seed packet storage is the secret to preserving heirloom treasures for years—not just months—as I discovered when my prized tomato seeds vanished too soon. The key isn’t just a cool, dark spot; it’s controlling humidity, sealing properly, and organizing by planting season so you don’t forget what’s still good.
You’ll need airtight containers (mason jars or vacuum-sealed bags work best), silica gel packets to absorb any lingering dampness, and a permanent marker to label varieties and planting dates.
I also keep a small notebook to track when I opened each packet—some seeds last 5 years, others just 2, and you don’t want to waste them.
By spring, you’ll pull out packets that look and feel fresh, ready to plant with confidence. The difference between storing seeds correctly and letting them sit in a damp drawer is like night and day—one gives you a garden, the other gives you disappointment.
Here’s exactly how to do it right.
This method works for any climate, whether you’re dealing with humid summers or dry winters. The same principles apply whether you’re storing a few packets or a full seed collection. Let’s get those seeds ready for next year’s harvest.
📚 In This Guide
- What you need
- Instructions
- Tips and common mistakes
- Wrapping up and next steps
What you need
- ● Air-tight containers: 2–4 glass jars with tight-sealing lids (e.g., mason jars, 8–16 oz capacity)
- ● OR 1–2 vacuum-sealed bags (for bulk storage)
- ● Desiccant packets: 2–4 silica gel packets (1–2 oz each) to absorb moisture
- ● Permanent markers or labels: 1–2 fine-tip markers (for labeling seed types)
- ○ Optional but helpful: 1 humidity indicator card (to track moisture levels)
- ● 1 small notebook (to log seed varieties and storage dates)
- ● 1 cool, dark storage space (e.g., basement, closet, or fridge)
Step-by-step instructions for storing seed packets to preserve viability
Here’s how to keep your seeds dry, organized, and ready for next season’s planting.
Empty Packets and Label Seeds Immediately
Open each seed packet and pour the seeds into small, airtight containers—glass jars with silicone seals work perfectly. I use 1-ounce glass jars because they’re just the right size for most seed quantities and keep moisture out effectively. Label each container with the seed variety and the year you stored them.
Don’t skip labeling—seeds from different years or varieties can look identical. Write the name clearly on masking tape or a small label attached to the jar lid. This ensures you won’t accidentally plant last year’s heirloom tomatoes when you meant to grow cherry varieties. Store the empty seed packets in a separate envelope inside the jar to reference later.
Choose the Right Containers and Keep Them Bone-Dry
Select containers that are completely moisture-proof—plastic isn’t ideal because it can trap humidity over time. Glass jars with tight-sealing lids are my top choice, but small metal tins also work well. Place a small silica gel packet inside each container to absorb any residual moisture that might linger.
Before sealing, let the seeds sit in the container for 24 hours in a warm, dry place. This helps ensure any lingering moisture evaporates before you close the lid. If you’re storing seeds in a humid climate, consider adding an extra silica packet or two to prevent condensation from forming inside the container.
Store in a Cool, Dark, and Stable Environment
Place the sealed containers in a cool, dark spot where the temperature stays between 35-45°F. A refrigerator’s crisper drawer is perfect because it’s consistently cool and dark, but avoid the freezer—freezing temperatures can damage seed viability over time. If you don’t have fridge space, a basement or root cellar works just as well.
Keep the containers away from any sources of heat or light, like windowsills or near appliances that generate warmth. Fluctuations in temperature and exposure to light can speed up seed deterioration. Check the containers once a year to make sure the seals are still intact and the silica packets are still dry—replace them if they’ve absorbed too much moisture.
Organize by Viability and Planting Priority
Group seeds by their expected lifespan—most seeds last 1-5 years, but some, like onions or leeks, only stay viable for 1 year. Place shorter-lived seeds in the front of your storage area so you’ll use them first. I keep a small notebook nearby to jot down the year I stored each seed and any notes about germination success from previous years.
When it’s time to plant, test a few seeds from each variety by sowing them in a small pot with moist potting mix. Place the pot in a warm spot and check for sprouts within 7-10 days. If germination is slow or uneven, those seeds may need to be replaced. This simple test saves you from planting entire gardens with seeds that might not perform well.
Refresh Seeds Every Few Years for Best Results
Even with perfect storage, seeds gradually lose viability over time. After 3-5 years, refresh your seed stock by purchasing new packets or growing out your best performers. I always save seeds from my healthiest plants—those with the strongest growth, best flavor, or most vibrant blooms—to ensure the next year’s crop is just as robust.
If you’re storing heirloom or open-pollinated seeds, label them clearly with the parent plant’s traits so you can repeat your favorite varieties. For hybrid seeds, note that the second generation may not produce true-to-type plants. This way, you’ll always know what to expect when planting season rolls around again.
Tips & tricks for perfect seed packet storage
These simple strategies will help you keep your seeds dry, organized, and ready for planting next season.
Container Selection Matters: While glass jars with silicone seals are ideal, don't overlook small metal tins as an alternative. The key is ensuring containers are completely moisture-proof—plastic can trap humidity over time, which is the enemy of seed longevity. I've found that 1-ounce jars work perfectly for most seed quantities, but you can use larger containers if you're storing bulk seeds like beans or corn.
The 24-Hour Drying Secret: Before sealing your containers, let the seeds sit uncovered for the full 24 hours in a warm, dry place. This critical step ensures any lingering moisture evaporates completely. In humid climates, I recommend adding an extra silica gel packet to prevent condensation from forming inside the container after sealing. Trust me, this small extra step makes all the difference in maintaining seed viability.
Temperature Control is Critical: Maintaining that 35-45°F range is more important than you might think. I've seen seeds stored in basements that were actually warmer than 50°F, which significantly reduces their lifespan. If you don't have fridge space, consider using a dedicated seed storage box with temperature control or even a small electric cooler designed for seed storage. The goal is consistent coolness without freezing.
Labeling System Upgrade: Beyond just writing the seed variety, I've found it helpful to include additional details like germination rate and planting depth on my labels. This turns your storage system into a mini seed database. You can also use color-coded labels to quickly identify seed types at a glance—red for tomatoes, blue for herbs, and so on. This visual system saves time when you're ready to plant.
Pro Tips for Seed Packet Storage
- These simple strategies will help you keep your seeds dry, organized, and ready for planting next season.
- Container Selection Matters: While glass jars with silicone seals are ideal, don't overlook small metal tins as an alternative.
- The 24-Hour Drying Secret: Before sealing your containers, let the seeds sit uncovered for the full 24 hours in a warm, dry place.
Frequently asked questions
Got questions about keeping your seed packets fresh for planting season?
Here are answers to the most common concerns—so you can save seeds like a pro!
How long can seed packets last if stored properly?
Most seeds stay viable for 1–5 years when stored in cool, dry conditions. Check the packet for a germination rate (e.g., 90% for 3 years) to track freshness. Vegetable seeds often degrade faster (1–2 years), while flower or herb seeds can last 5+ years!
What’s the best temperature and humidity for seed storage?
Aim for 32–41°F (0–5°C) and 30–50% humidity—think refrigerator or root cellar, not a damp basement. Avoid freezer storage (moisture + frost = seed death ). Use silica gel or airtight containers to block moisture.
Can I store seed packets in the original packaging?
Original packets are fine short-term (1–2 years), but for long-term storage, upgrade to:
- Mylar bags + oxygen absorbers (best for 10+ years)
- Glass jars with tight lids (add uncooked rice as a natural humectant)
- Vacuum-sealed bags (removes air = less mold risk)
How do I know if my stored seeds are still good?
Test viability with the paper towel method:
- Moisten a paper towel, place 10 seeds in the center, and fold.
- Seal in a baggie and store in a warm spot (70°F/21°C).
- Check in 3–10 days: 50%+ sprouted = plantable! Fewer than 50%? Try fresh seeds.
What’s the best way to organize seed packets for easy access?
Keep it simple with these space-saving hacks:
- Binders or accordion folders: Sort by plant family (e.g., tomatoes, peppers) or season (spring vs. fall).
- Magnetic whiteboard: Stick packets to a fridge board with custom labels for quick ID.
- Shoe box + dividers: Use egg cartons or craft foam to separate types.
Wrapping up and next steps
Proper seed packet storage is your secret weapon for unlocking next year’s garden dreams—without the stress! 🌱 By keeping seeds dry, cool, and protected from light, you’ll preserve their viability for years to come.
Whether you’re a seasoned gardener or just starting out, these simple steps ensure your hard-earned seeds stay ready for planting.
Now that you’re armed with the best practices, take action! Audit your seed stash today, label those packets, and store them with confidence. Your future garden—and your wallet—will thank you. Happy growing! 🌿