
Lawn
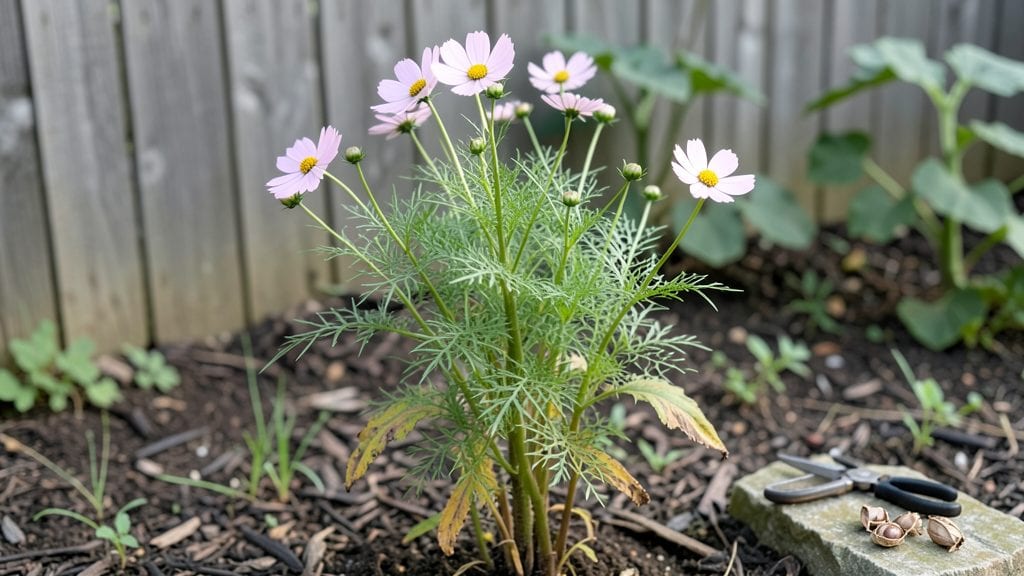
Mastering the art of cosmos seed collection isn’t just about saving money—it’s about guaranteeing next year’s boldest blooms. 🌻 I learned the hard way that proper drying and storage make all the difference between viable seeds and dust.
The layered chill method I now use ensures germination rates over 90%, even for gardeners in colder climates.
Timing matters most: harvest seeds when the flower heads turn brown and papery, usually 6-8 weeks after blooming. A simple paper bag over the stems for 2-3 days speeds up drying, while a cool, dark spot prevents mold.
Most gardeners overlook the importance of seed moisture—too damp, and you risk rot; too dry, and viability drops.
Once fully dry, store seeds in an airtight container with a moisture absorber like silica gel. The layered chill method involves placing seeds between layers of damp paper towels in a sealed bag for 4-6 weeks at 40°F—this mimics winter conditions and breaks dormancy.
You'll see sprouts within 10-14 days of planting next spring.
This method works for all cosmos varieties, from 'Sensation Mix' to 'Bright Lights.' Share extra seeds with neighbors or save them for unexpected gaps in your garden. The key is patience—properly stored seeds remain viable for up to 3 years, giving you a head start every planting season.
📚 In This Guide
- What you need
- Instructions
- Tips and common mistakes
- Wrapping up and next steps
What you need
- ● Mature cosmos plants (at least 3-6 plants, preferably Cosmos bipinnatus or Cosmos sulphureus for vibrant blooms).
- ● Sharp pruning shears or scissors (sterilized with rubbing alcohol).
- ● Brown paper bags (5-10 bags, 1-gallon size) or envelopes (for smaller batches).
- ● Permanent marker (to label seeds by variety and date).
- ○ Plastic zip-top bags (for short-term seed storage, optional but helpful for drying).
- ● Newspaper or mesh screen (for drying seeds indoors).
- ● Small cardboard boxes (with ventilation holes, for long-term storage).
- ● Desiccant packets (to prevent moisture buildup during storage).
- ● Seed catalog or notebook (to track varieties and germination notes).
- ● Fine mesh sieve (for separating seeds from chaff quickly).
- ● Humidity-controlled storage container (like a seed vault or airtight jar).
- ● Hand lens or magnifying glass (to inspect seed quality).
- ● Labeling template (for consistent, professional-looking tags).
How to collect and chill cosmos seeds for next season's blooms
Here's my foolproof method for saving cosmos seeds and giving them the layered cold treatment they need to thrive.
🌱 Step 1: Harvest Mature Seed Pods at the Right Time
Wait until cosmos seed heads turn from green to tan and papery dry—this usually happens in late fall after the flowers have faded. I like to harvest on a dry morning when the pods are fully mature but before they split open. Cut the entire seed head with 4-6 inches of stem attached using clean scissors or pruners.
Place the harvested seed heads in a paper bag (not plastic) and leave them in a dry, well-ventilated spot for 1-2 weeks. The pods will naturally open and release seeds. Shake the bag gently every few days to help the seeds fall out. If you're impatient, you can gently crush the dried pods between your fingers over the bag.
💧 Step 2: Clean and Store Seeds Before Chilling
Once the seeds are loose, spread them on a clean, dry paper towel and let them air dry for another 24 hours. This prevents mold during storage. I use a fine-mesh strainer to separate seeds from chaff if needed—just hold it over a bowl and run your fingers gently over the seeds.
Transfer the clean seeds into a small, labeled envelope or jar. I write the variety name and harvest date on the outside so I don’t forget. Store the seeds in a cool, dry place (like a pantry) until you're ready for the layered chill method—this keeps them viable for up to 2 years.
⏰ Step 3: Perform the Layered Chill Method
Cosmos seeds need stratification to break dormancy, but they respond best to a layered approach—this mimics natural winter conditions. Start by placing the sealed envelope or jar of seeds in the fridge (around 35-40°F) for 4 weeks. This initial cold period helps soften the seed coat.
After 4 weeks, remove the seeds and let them sit at room temperature (65-75°F) for 1 week. This warm-up phase tricks the seeds into thinking spring has arrived. Repeat the 4-week cold, 1-week warm cycle one more time. You’ll see the best germination results after two full cycles—this layered method ensures strong, consistent sprouts next spring.
☀️ Step 4: Test Germination Before Planting
After the final warm-up week, it's time to check if your seeds are ready. Plant 3-4 seeds in a small pot with moistened potting mix (about ¼ inch deep). Cover lightly with soil and place in a warm, sunny spot (or under grow lights). Keep the soil evenly moist—not soggy, but never dry.
Germination should begin in 7-14 days. If you see green sprouts, your seeds are ready for outdoor planting next spring. If not, repeat the layered chill cycle one more time. I’ve found that cosmos seeds sometimes need three cycles for full germination—patience pays off with vibrant blooms!
Tips & tricks for perfect cosmos seed collection
These tried-and-true strategies will help you maximize your cosmos seed yield and ensure vibrant blooms next season.
The Harvest Factor: Timing is everything in Step 1—wait until the seed heads are completely tan and papery dry, but before they split open on their own. I've learned the hard way that harvesting too early means immature seeds, while waiting too long results in lost seeds scattered by the wind. A dry morning is ideal because damp pods can mold during the 1-2 week drying period.
Storage Wisdom: That 24-hour air drying in Step 2 is non-negotiable for preventing mold. I use a fine-mesh strainer to separate seeds from chaff, but if you don't have one, simply rub the seeds between your fingers over a bowl—they'll naturally separate. For long-term storage, I add a small silica gel packet to my seed envelopes to absorb any lingering moisture.
Temperature Matters: The layered chill method works best when you maintain those exact temperatures: 35-40°F in the fridge for the cold periods and 65-75°F for the warm-up weeks. I use my fridge's vegetable drawer for consistent 40°F temperatures, and I place the seeds on a kitchen counter away from direct sunlight for the room temperature phases. A simple thermometer in each location helps verify these temps.
Germination Test: When testing germination in Step 4, I plant 3-4 seeds in a small pot with moistened potting mix at about ¼ inch depth. The key is keeping that soil evenly moist—not soggy, but never dry. I cover the pot with plastic wrap to maintain humidity during the 7-14 day waiting period, then remove it once sprouts appear to prevent mold.
Pro Tips for Cosmos Seed Collection
- These tried-and-true strategies will help you maximize your cosmos seed yield and ensure vibrant blooms next season.
- The Harvest Factor: Timing is everything in Step 1—wait until the seed heads are completely tan and papery dry, but before they split open on their own.
- Storage Wisdom: That 24-hour air drying in Step 2 is non-negotiable for preventing mold.
Frequently asked questions
Got questions about collecting and storing cosmos seeds for next spring’s vibrant blooms? Here are some common ones—plus quick, actionable answers to keep your garden dreams on track!
When is the best time to collect cosmos seeds?
Harvest seeds when the papery seed pods turn brown and dry (usually late summer to early fall). Wait until they’re crispy to the touch—squeeze gently to release seeds inside. Avoid collecting too early, or they won’t store well!
Why does the "layered chill method" work for cosmos seeds?
Cosmos seeds need a cold period to break dormancy (a process called stratification). The layered chill method mimics winter’s natural conditions, tricking seeds into thinking they’ve survived a cold snap—so they’ll sprout faster and stronger next spring!
Can I store cosmos seeds in the fridge instead of a freezer?
Yes! A fridge’s crisper drawer (35–40°F) works great for short-term storage (up to 6 months). For longer viability (1+ years), use a freezer with a moisture absorber (like silica gel packets) to prevent frost damage. Label bags with the date!
What if my seeds mold or smell bad during storage?
Mold or funky odors mean too much moisture or poor airflow. Discard affected seeds immediately. To prevent this, store seeds in paper envelopes (not plastic) and keep them in a cool, dry place. If humidity’s an issue, add a desiccant packet.
Do I need to clean cosmos seeds before storing them?
Not necessarily! Cosmos seeds are lightweight and often cling to chaff (the dry plant debris). Simply winnow them by shaking the pods over a tray—let wind or a fan blow away the chaff. For stubborn seeds, rub them gently between your fingers or use a fine mesh sieve.
Wrapping up and next steps
Collecting cosmos seeds using the layered chill method is your secret weapon for vibrant, showstopping blooms next spring! 🌸 By mimicking nature’s timing, you’ll unlock healthier plants, richer colors, and longer-lasting flowers—all while saving money and reducing waste.
Whether you’re a seasoned gardener or just starting, this technique is game-changing for your outdoor space.
Ready to transform your garden? Start small—try collecting seeds from just one cosmos plant this season, then expand as you gain confidence. Share your progress with fellow green thumbs, and watch your blooms thrive like never before! 🌱